
LAST HURRAH?
I haven’t been in the Three Sisters Garden for two or more weeks. In fact, I’ve been completely ignoring it.
The corn was done. The squash had powdery mildew. Bugs had destroyed the sunflowers. It was so overgrown, I had to shove my way through the plants to get to the other end of the rows and I couldn’t get to the plants to treat them for the issues that had developed. I had only picked ten green beans so figured they were a bust too.
Furthermore, when I went in the last time, I came out with welts and blisters all over my arms from pushing through the jungle.
With all this, I figured the Three Sisters Garden was done and I put it on Oscar’s list to pull everything out and put it in the compost pile.
We ran out of time – or maybe it was enthusiasm – this weekend so it didn’t happen. On Sunday or Monday, I noticed some green beans peeking out of the tangle. When I came home tonight, thinking I might find enough green beans to have with dinner, I donned a longer sleeved shirt and trekked in for one last harvest.
Look what I came out with!
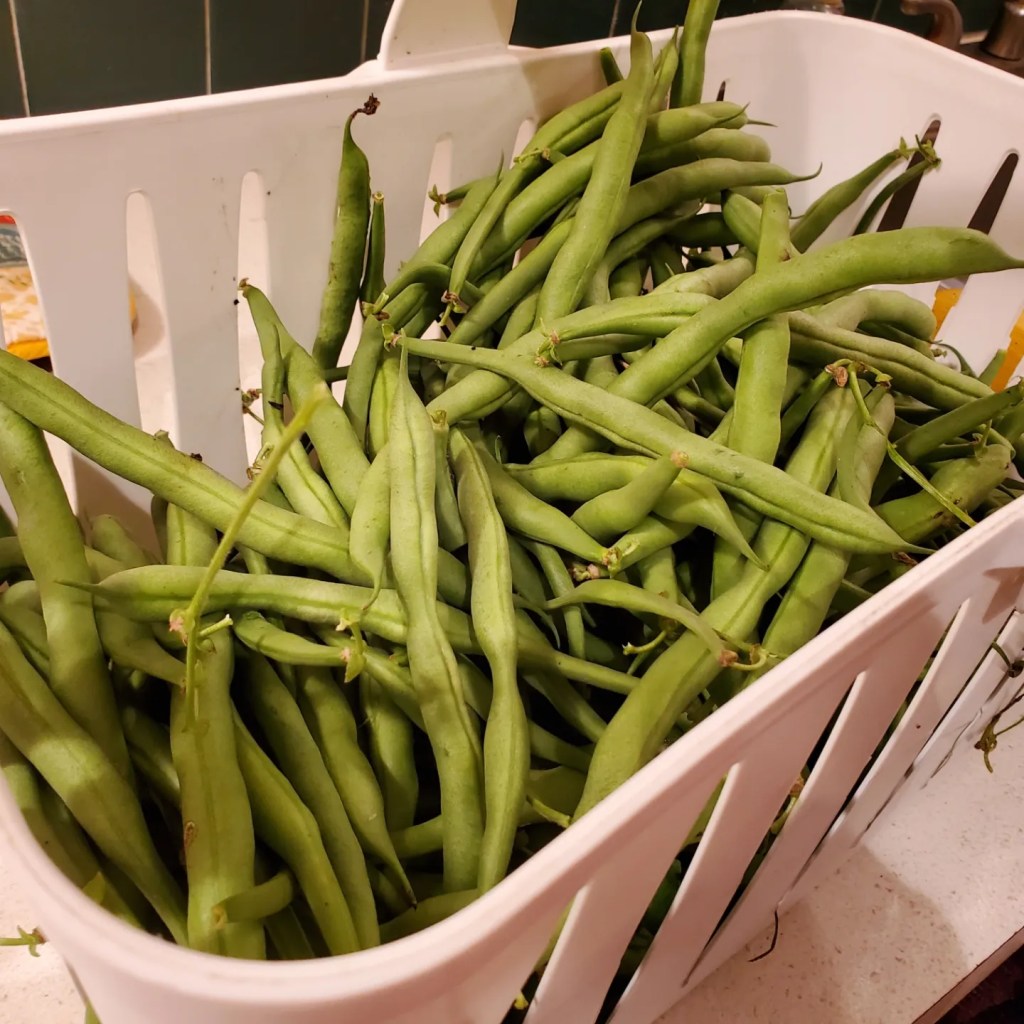
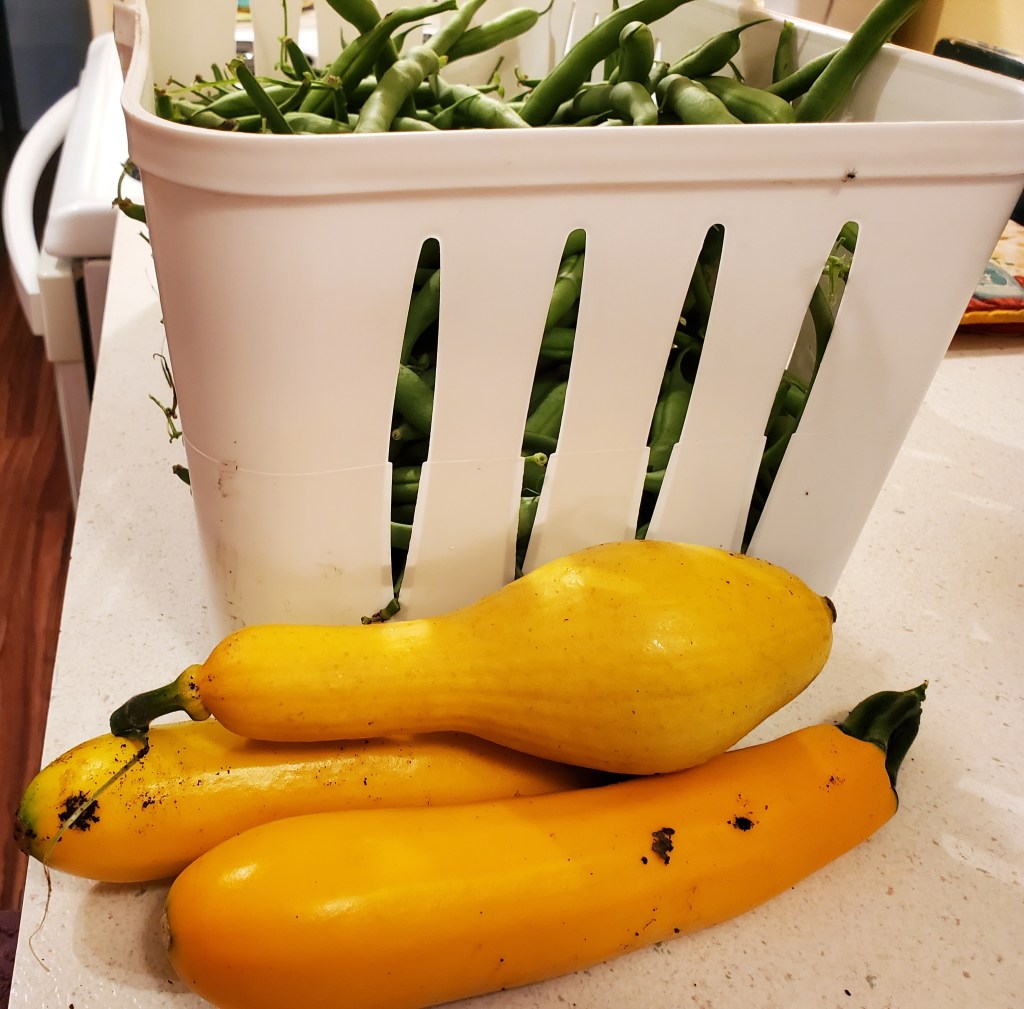
I picked almost a full basket of green beans, two zucchini, and one crookneck squash.
I should have enough green beans to can another five jars, maybe more.
Not tonight though, “longer sleeves” does not equal “long sleeves.” I need to go wash my arms, neck, and chin with Dawn to remove whatever allergen is on the bean plants that’s bothering my skin. Then I’ll add a good spritz of Windex for the itching.
PREP FOR WINTER
In North Carolina, winter is not on our doorstep by a long shot, but it’s certainly on my mind and homesteading tasks are geared toward preparing for winter.
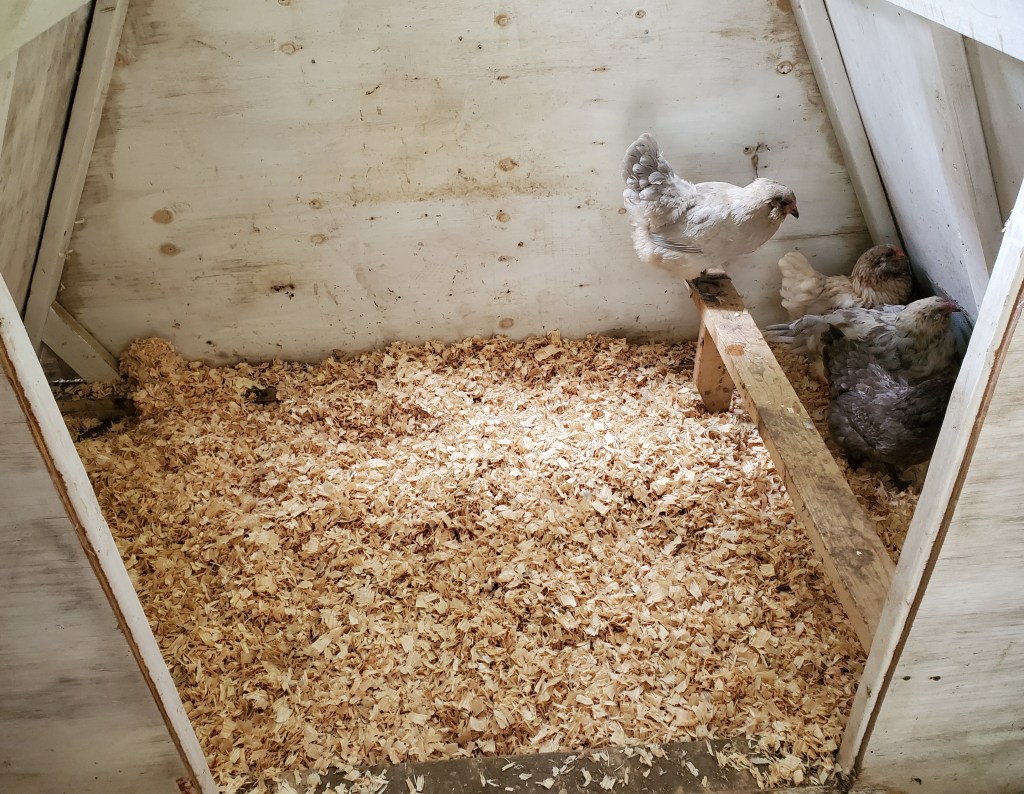
Since both of us had Labor Day off, we slept in until 8:30 a.m. Then we got right to the day’s major task: cleaning out the chicken coop. It’s a big job! Thank goodness Oscar was there to help.
I use the deep litter method in my chicken coop. The deep litter method involves allowing the chicken waste and bedding material to decompose on the floor of the chicken coop instead of being scraped out and replaced on a weekly basis. As the bedding gets dirty, you just toss on another layer of pine shavings. This keeps the smell down and the chickens healthy. Most appealing, though: you only have to clear everything out twice a year, instead of every week.
First, we emptied all the spent bedding out of the inner coop – all the way down to the floor.

The chickens were not impressed with our efforts. At first, they hid in a corner of the run. Eventually, though, we didn’t pay enough attention to keeping the run door closed and they snuck out. Oscar said, “I guess we aren’t going anywhere today.” (I only let the chickens free-range when I’m at home.)
Some of the hens kept coming in to complain that they needed to lay an egg and there was nowhere to do so. (They still refuse to use the fancy next box I have for them.)
When we finished clearing the inner and outer sections of the coop, we put a new layer of sand in the bottom of the inner coop. Then filled it with new bedding.
The compost pile received a major contribution. The spent bedding will continue to break down into some awesome soil over the winter.
We need to pick up more sand and bedding for the outer coop; but first – I need a shower!
CANNING HAMBURGER
My favorite thing to can is chicken. My second favorite meat to can is hamburger. Both are super easy to do and a great way to put shelf-stable meat in your pantry.
Recently, I cooked up four pounds of hamburger. For the inquiring mind, I have heard that you can put raw hamburger in your jars but that the texture is off – kind of like the nasty little bits of meat you get in SpaghettiOs. Shudder. So, I cook my hamburger first!
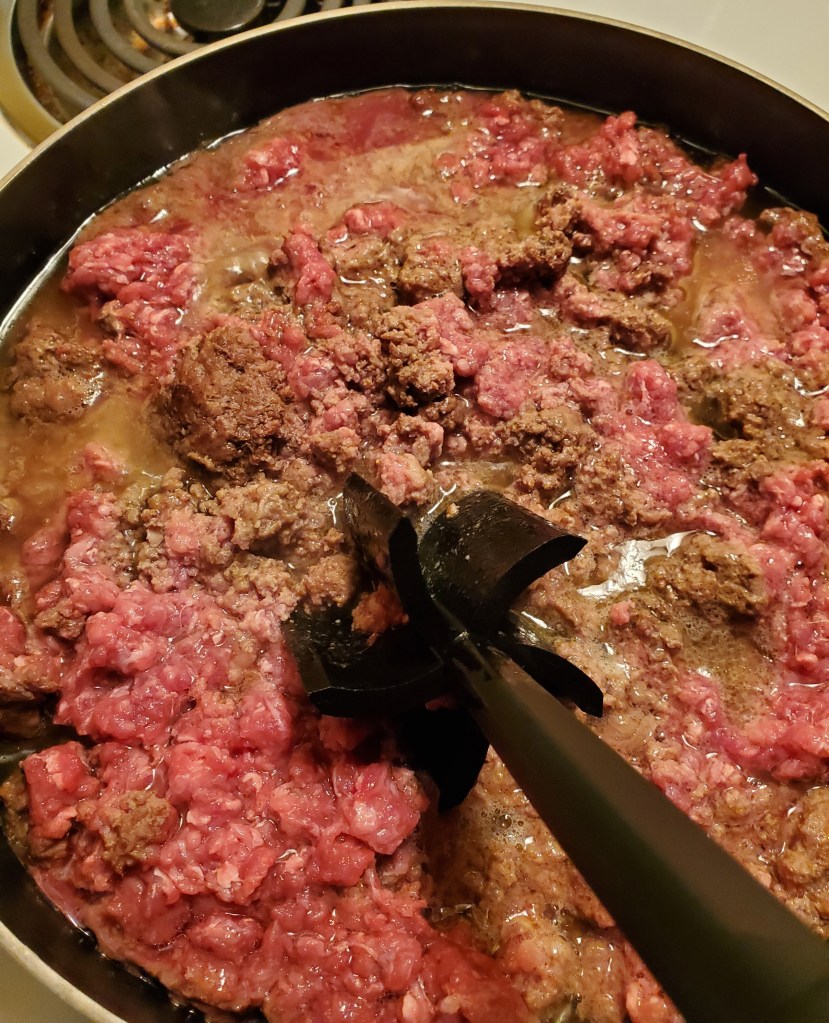
I saw this hamburger chopper on a You Tube video and was intrigued enough to buy it. It works so much better than a spatula to break up ground meat while you’re cooking it.
Once the meat is cooked, drain it, and rinse it with hot water (to remove more of the grease), especially if you are using a grade of 80/20 or below. Then it’s ready for the jars.

Pack the cooked meat into the jars. Add boiling water, leaving 1″ headspace. There are other things you can add (for example, meat broth or tomato juice) but I prefer the water as the other options didn’t add enough to the finished product to warrant the added expense.
Remove the air bubbles and adjust the amount of meat and/or water as needed to maintain the 1″ headspace. Add 1/2 teaspoon salt per pint jar (1 teaspoon per quart jar). Wipe the rims with a paper towel dampened with a little white vinegar (it does better than water to cut through any stray greasiness).
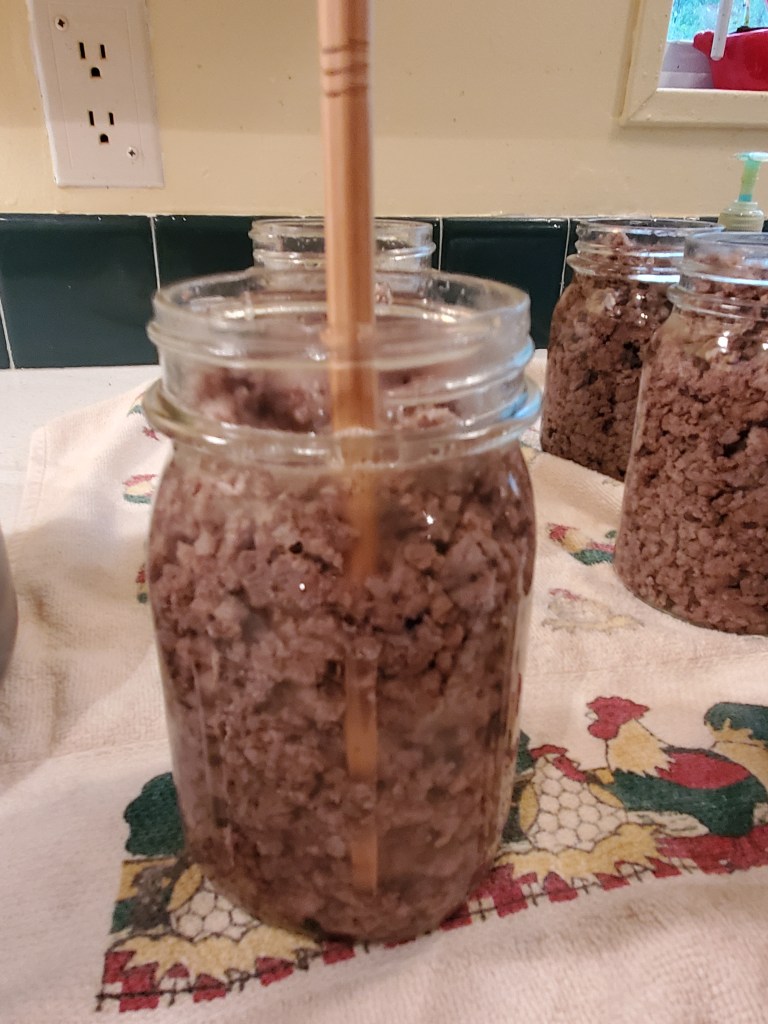
Put on the lids and rings and put them into your pressure canner.
Bring the canner up to pressure and then process for 75 minutes. Leave the canner sealed until the pressure has release naturally – at least another hour.
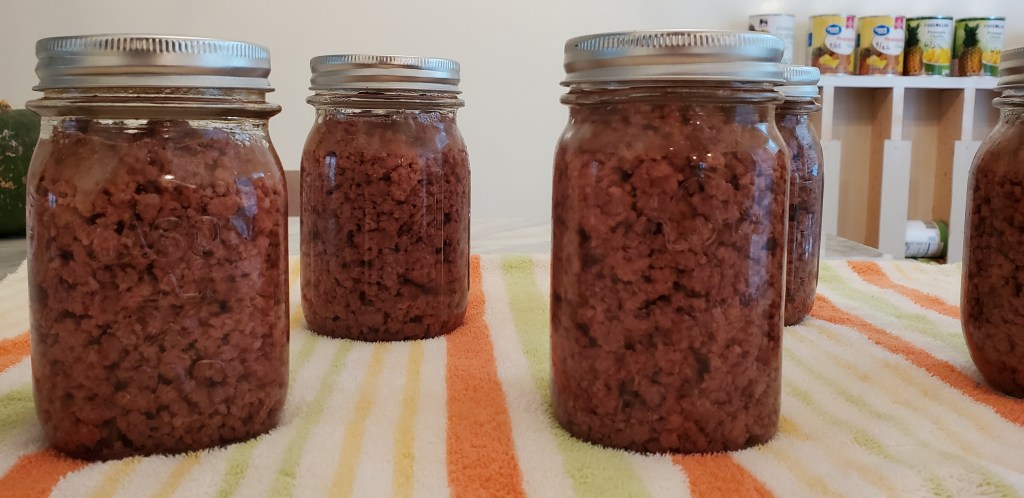
I got 5 pints out of four pounds of hamburger. That works out to just under 1 pound of hamburger per pint. That’s the perfect amount for tacos, casseroles, soups, stews, or anything asking for a pound of cooked ground beef.
Now, anytime I need a quick meal, these are waiting for me. No defrosting necessary.
GREENHOUSE UPGRADE PROGRESS
Last year, our greenhouse was more of a temporary fixture. The intent was to utilize it as a greenhouse for the winter and as a chicken tractor for meat chickens in this summer. Even though it was more of a hillbilly greenhouse, it worked so well that when I didn’t get meat chickens this year, I decided to upgrade it this year, making it a permanent structure. (Click each of the green highlights to see Greenhouse, version 1.)
The upgrade has been progressing though very, very slowly. Between Oscar-speed, the heat, the rain, and getting sick again, it’s now August and is still not done. Nevertheless, forward-movement has been made and there is hope in my mind that it will be done soon.
The step that took the longest was getting Oscar to build the doors in the front and back of the hoophouse. I gave him the project in May … he actually got around to it in July. He was still tinkering with them today.
On August 3rd, we removed as many of the containers in the greenhouse as we could and moved the greenhouse off its site so we could put down better weed barrier. What we used last year was the cheap papery stuff, intended to last only a season. Now, remember, this structure is 8′ x 12′, so two people moving it 20 feet away was no small feat.
Then I got sick which caused another two-week delay.
Last weekend, we got the new weed barrier installed. This time, we installed a heavy commercial plastic weed barrier that lets water flow through but doesn’t let weeds through.

Then we moved the greenhouse back to the original site.

It looks good with the new “floor,” don’t you think? I’m going to consolidate some of the other containers to sit outside the greenhouse, particularly the apples and elderberries.
We still need to add hardware cloth to keep critters out and then as we close in on our area’s frost date, we will add the plastic. In the meantime, the fall garden needs planting.
CANNING THE BEANS
As you’ll recall, when I went to the farmer’s market last Saturday, I brought home a mess of green beans. It has been a busy, and tiring, week so I only got to them today.
I was concerned that they were past their prime for canning (and somewhat berated myself for my dawdling). I inspected them carefully as I washed and trimmed them, discarding any rusty areas, etc. As it turned out, I only lost about a pint jar of beans. Even better, the discards really aren’t wasted – the chickens will enjoy them. Additionally, the end trimmings went to the worms, so everything got used. I felt less of a numbskull for delaying the project so long.
I’ve never canned green beans, so this was a new experience for me.

I chose to raw pack my green beans, so it was just a matter of getting the beans in the jars, adding boiling water, and 1/2 teaspoon of salt. Getting them into the jars was a bit tricky. You wouldn’t think it would be that difficult, but they needed to be as tightly packed as possible. With practice, I’m sure I’ll get better at it.
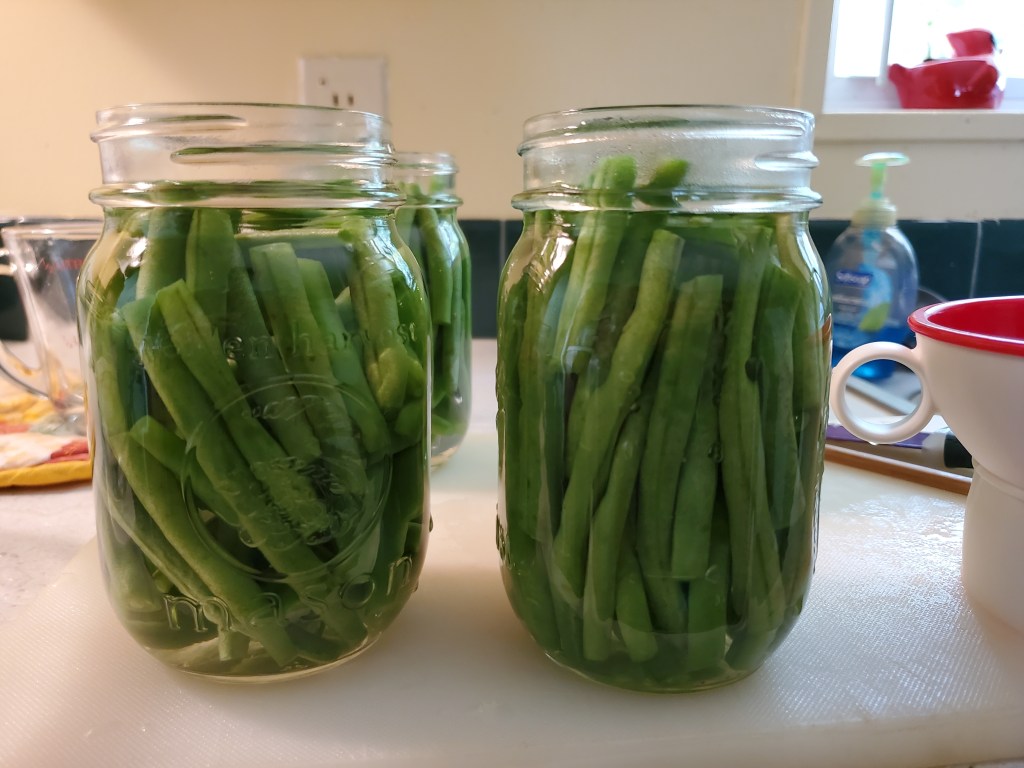
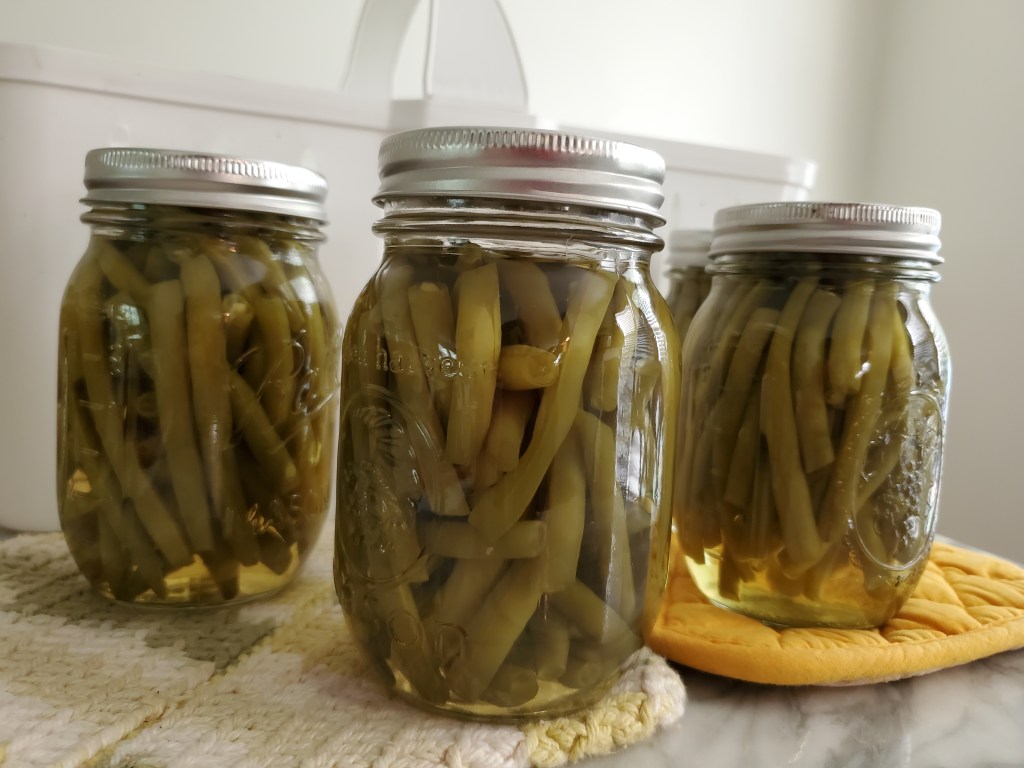
Add the lids and finger-tight rings and they are ready to go in the canner. Green beans need to be pressure canned.

Green beans don’t take a lot of processing time. Once you get the canner up to temperature and pressure, they just process for 20 minutes. Afterwards, leave the canner alone for at least an hour before opening. Opening it too soon or suddenly releasing the pressure will cause the liquid (and sometimes the product) in the jars to siphon out. We went shopping for chicken feed, and supplies for another project, so we just let the canner set until we came home.
I am still at the experience level that opening the canner is done with a bit of trepidation. While I’ve been doing well with my Nesco Smart Canner I have had some spectacular failures. So, when I unlock and lift the lid, I find myself taking a big breath while thinking, “What am I going to find this time?” Well, this time, it was a …
Keep following along as I update the blog on the other projects I’ve done this past week.
#everybitcountschallenge
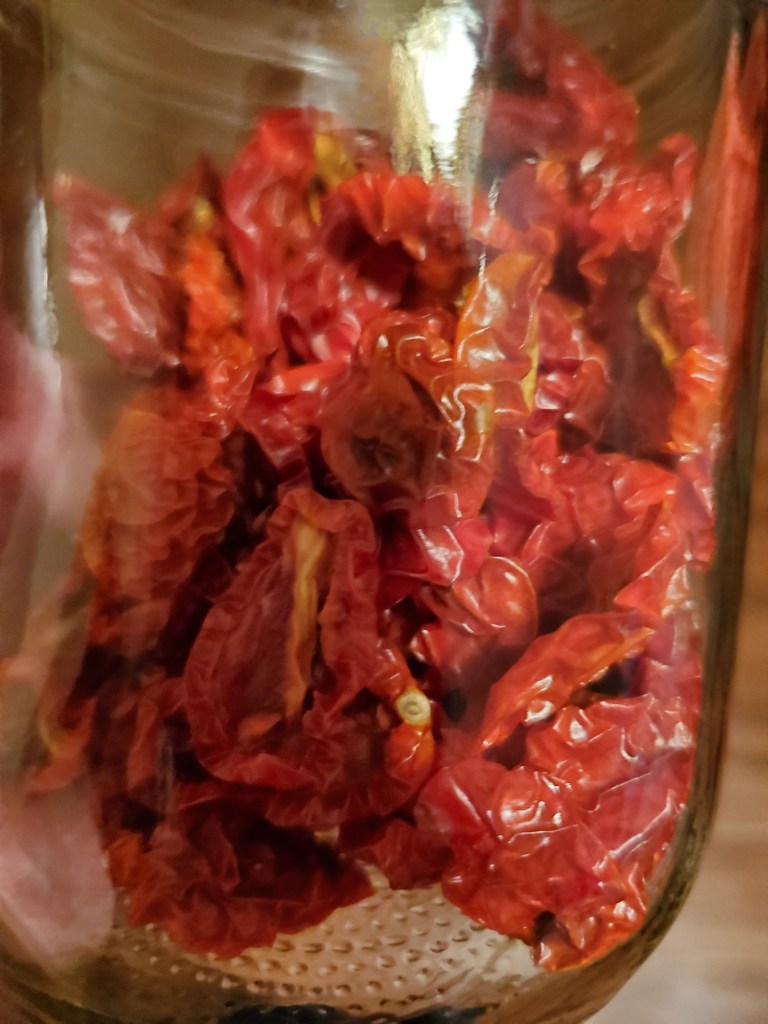
STINKY!
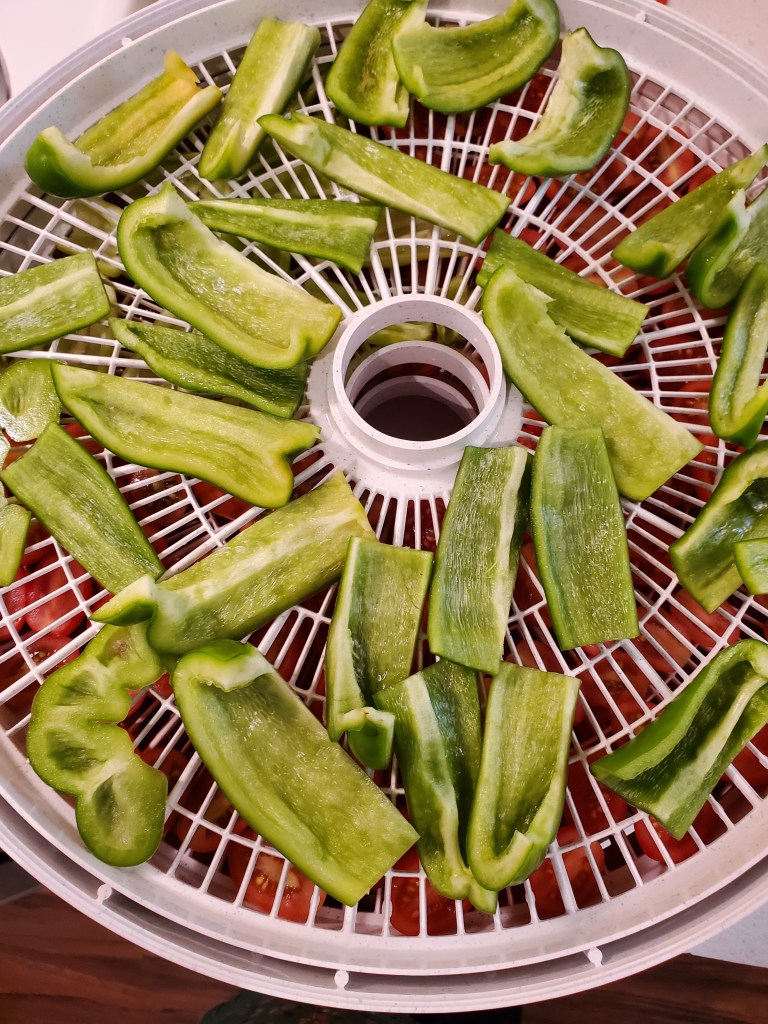
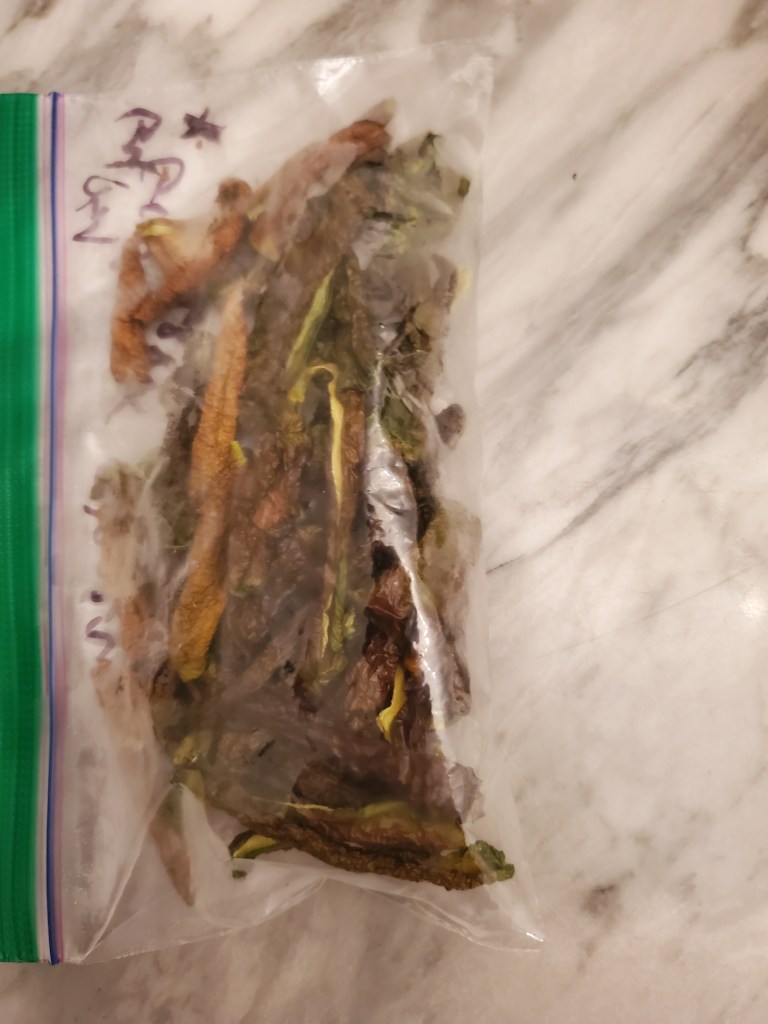
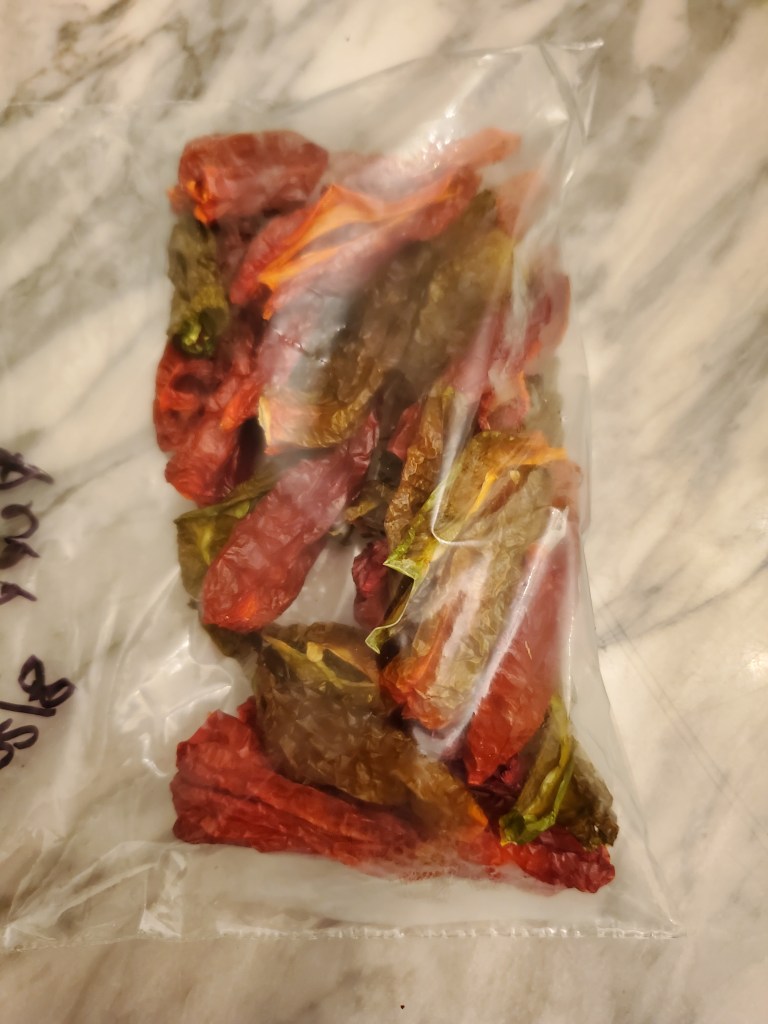
One of the several food-related projects I did this past weekend was to fill the dehydrator. I loaded 1-3/4 trays with tomatoes and finished the second tray with gypsy peppers (sweet). I didn’t get much of a harvest from the gypsy peppers. Two trays were filled with green peppers, and one tray with habanero peppers.
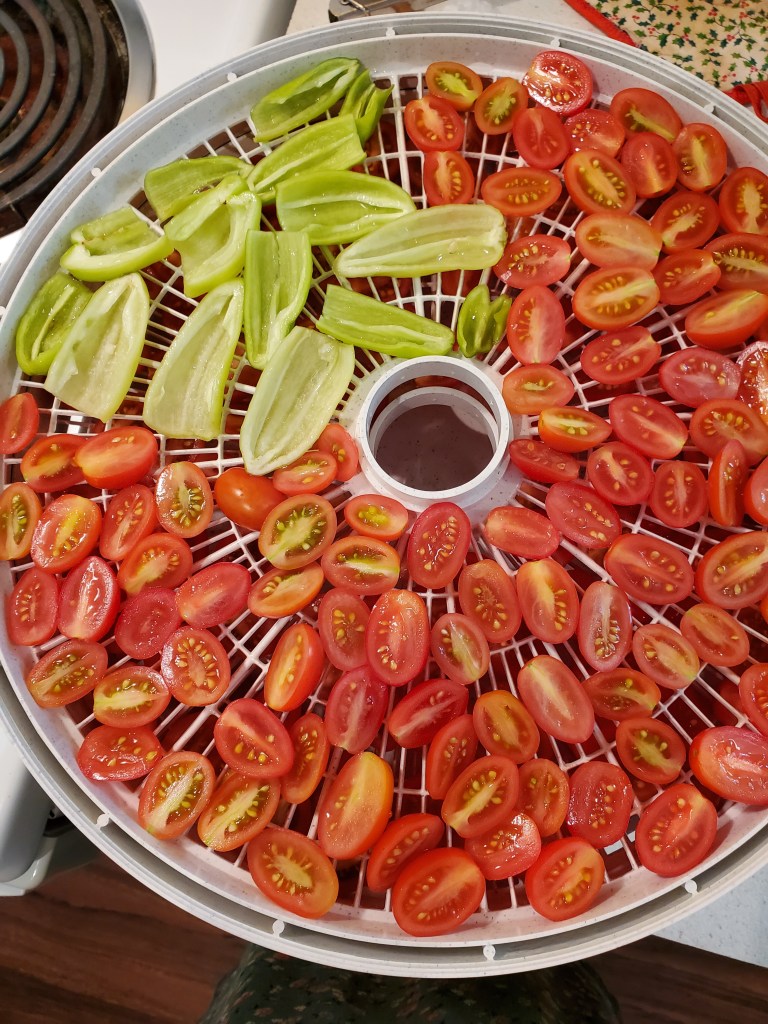
I am smart enough to know not to dehydrate hot peppers in the house. No problem – I just put it out on the porch. It works great: there’s an outlet right next to the porch and all the smells stay outside.
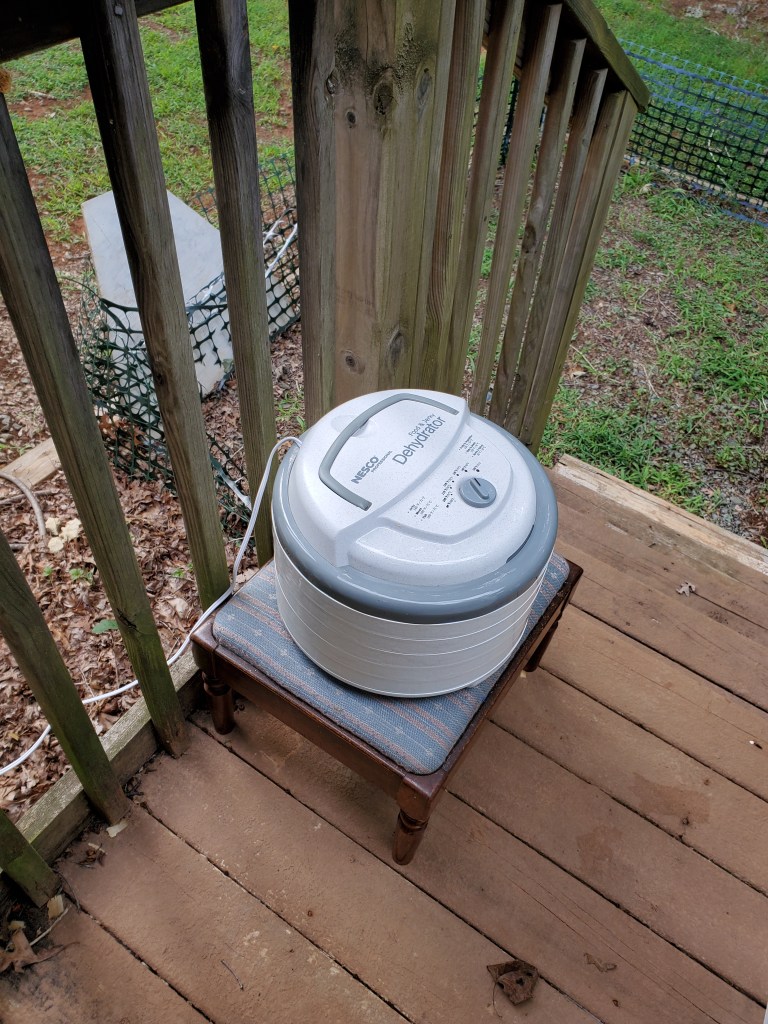
Unless it rains.
Like it did later that night.
All night long.
There’s no cover on the porch so I had no choice but to bring it inside. I hoped it had processed long enough to be past the fumigating stage. I put the dehydrator on the stove and turned on the fan (it exhausts outside) to clear any residual odor.
No such luck.
It wasn’t long before the fumes had filled the house. I haven’t got my sense of smell back from having Covid last October so I couldn’t smell them, per se. I could sure feel the fumes in my throat and lungs though. Ugh.
I could not sleep that night and the few times I dozed off my brain was actively shouting at me, “The fumes! The fumes!” convinced we were all going to die. I was exhausted Monday!
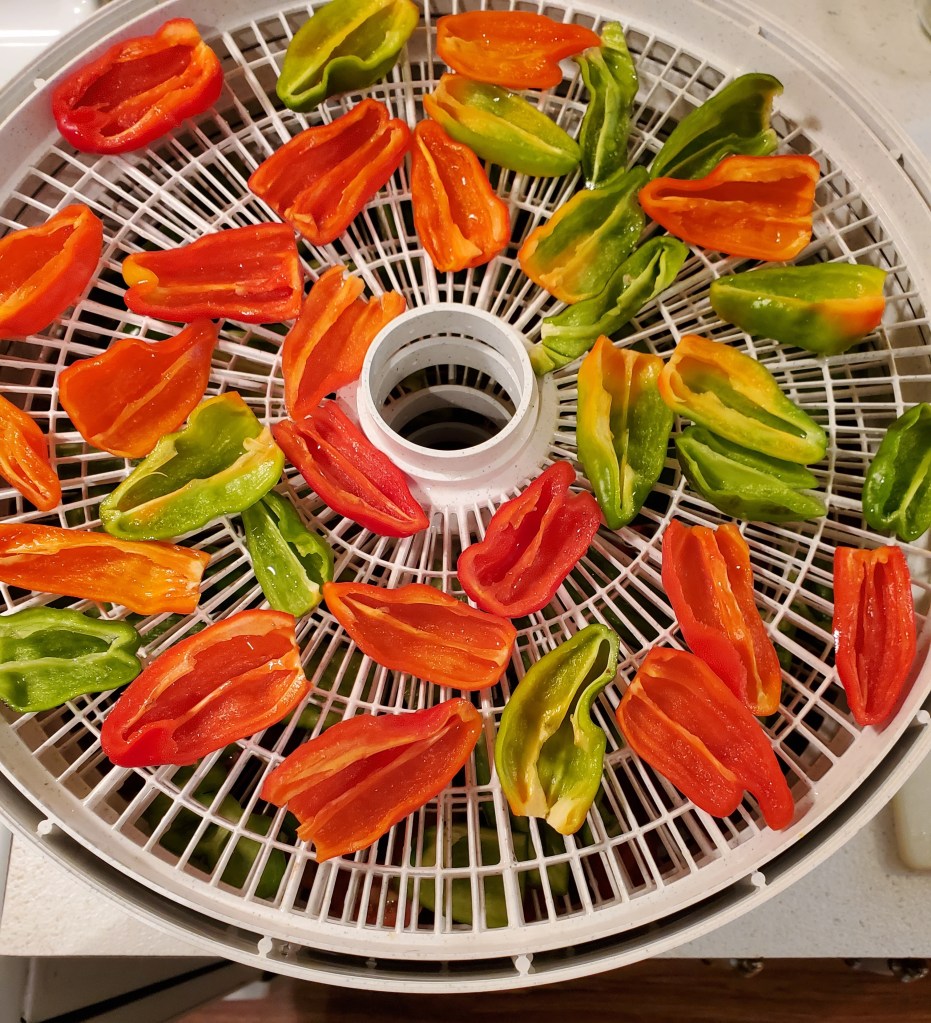
The end results from the effort were great though:
Note to self: Before I do hot peppers again, I will have to come up with a Rain Plan!
FARMERS MARKET FUN
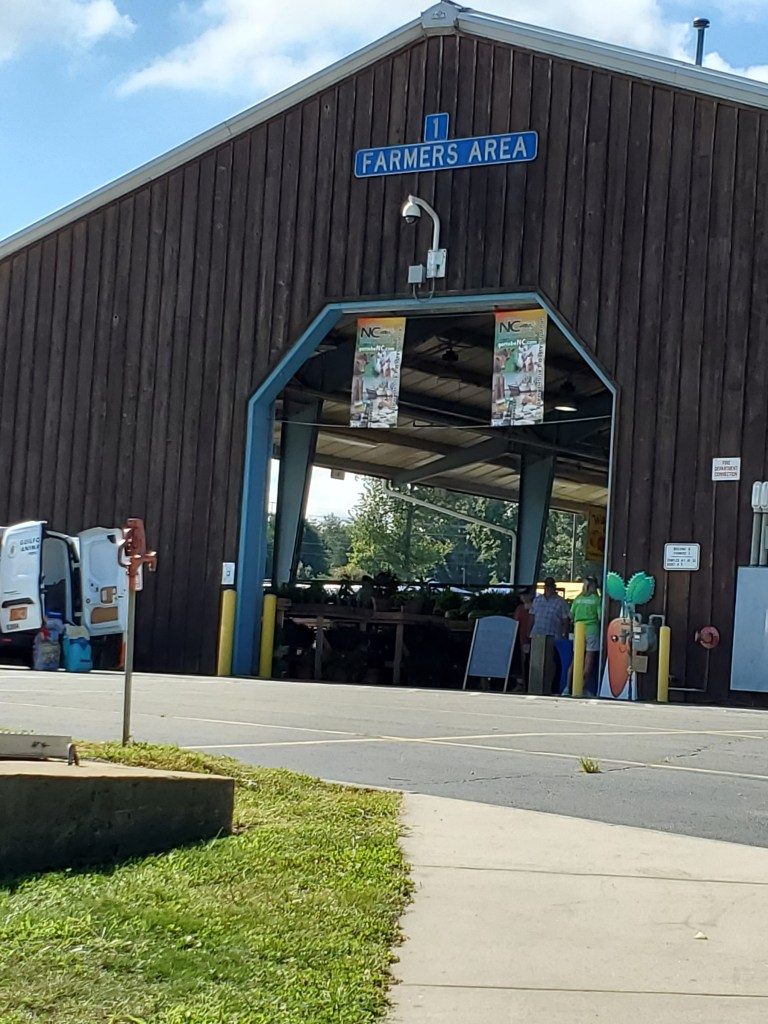
Saturday, I went back to my favorite farmers market of all time.

The Piedmont Triad Farmers Market is one of four farmers markets run by the North Carolina Department of Agriculture. You’d think, considering it has a government connection, that it would be a real mess, but in this case, it truly seems to bring the farmers and the consumers together.
There are many things I appreciate about this market but these are the primary reasons it’s my favorite: 1) it’s huge and there are many, many vendors so you can shop around for the quality and price that meets your needs, 2) the vendors are mostly farmers – there are a limited number of stalls for baked goods, value added products, and craft items (limited to handmade or homemade items made from naturally occurring raw agricultural materials) but the focus is on the farmer, 3) almost all of the farmers are from North Carolina (out of state producers are allowed but their space rent is double that of those located in North Carolina).
Here are a few pictures of some of the sites to see:


I purchased green peppers to dehydrate, potatoes, green beans, and plums to can, and some seedlings for my fall/winter garden (since the ones I tried to start a few weeks ago all died).

Do you see what’s missing? Yep, I made it all the way home before discovering that the potatoes I bought did not come home with me. Drat. Since it’s an hour drive each way, I did not go back for them.
It’s going to be a busy week!
BUSY WEEKEND
I didn’t start the weekend with the intent to make up for the time lost from being sick but, looking back, it sure looked like that’s what I was doing!
In addition to the usual household chores this weekend I:
Went to the farmer’s market and bought seedlings and veggies
Laid new weed barrier where the greenhouse goes and moved it back to its spot
Tilled and amended one of the beds for the winter garden
Harvested worm castings
Canned hamburger
Dehydrated tomatoes and peppers
Harvested yet more tomatoes, zucchini, and squash from the garden
I am tuckered out! I will post about these various adventures through the week. For now, however: Goodnight!

STILL AT IT
I am finally getting some oomph back and have managed to get some small things done after work each day this week.
For example, tonight I finished roasting pumpkin seeds and also sliced zucchini to make chips in the dehydrator.
Roasted pumpkin seeds are an inexpensive, nutritious and easy-to-make snack. Pumpkin seeds have been shown to improve heart health, blood sugar levels, sleep quality and may even protect against certain types of cancer. They are a great source of protein, fiber, Vitamins A, K and E, riboflavin, folate, potassium, magnesium, iron, zinc and many more nutrients. The antioxidants in pumpkin seeds reduce inflammation and protect your cells from free radicals and many diseases.
I first tried making them five or six years. They were just okay, so I haven’t felt inclined to repeat the effort again, until now.
I spread out the pumpkin seed prep over three evenings but you really could do it all at once.
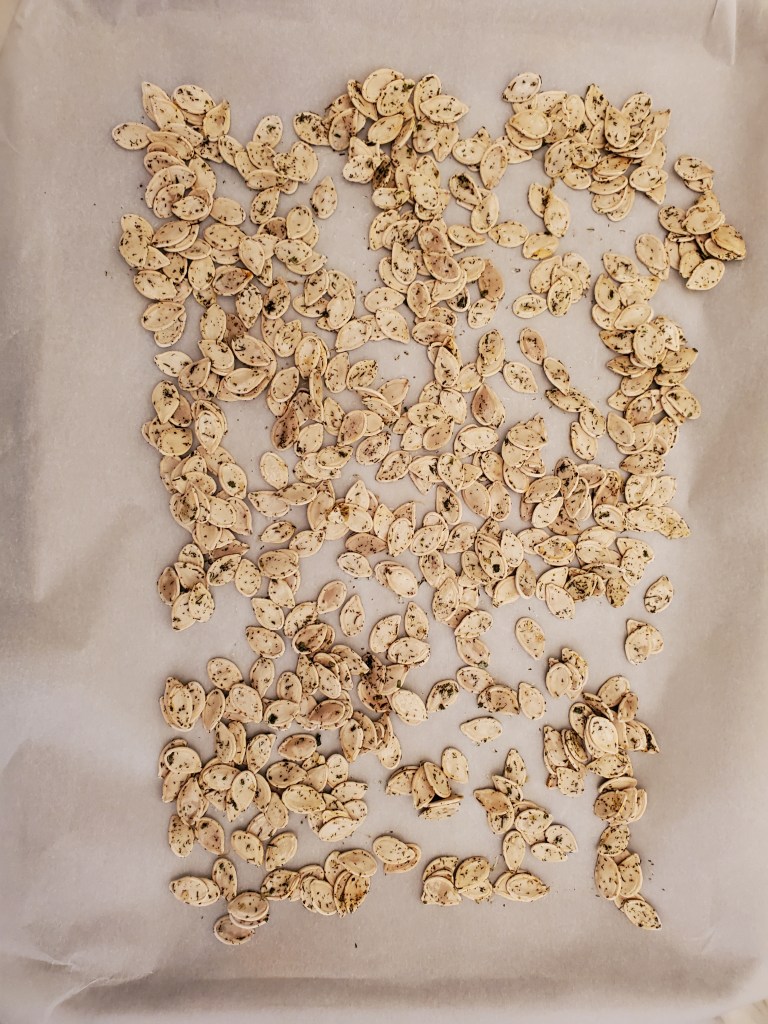
Tuesday, I cut the pumpkin, scooped the seeds into a bowl, which I put in the fridge. The pumpkin was fed to the chickens as a tasty snack that also serves as a natural de-wormer.
Wednesday, I washed the strings and pulp off the seeds and drained them in a colander. After I got them as clean as I could, I put them in a saucepan, covered them with water and added a teaspoon of salt. I brought them to a boil and simmered them for 10 minutes then laid them out on paper towels to dry overnight. I read that the drier you can get them, the better texture you will get when you roast them.
Finally, tonight, I sprinkled a tablespoon of olive oil and a tablespoon of ranch seasoning and stirred them until they were well coated. They were spread out on a tray lined with parchment paper.
I baked them at 350 degrees for 20 minutes total, stirring after 10 minutes.
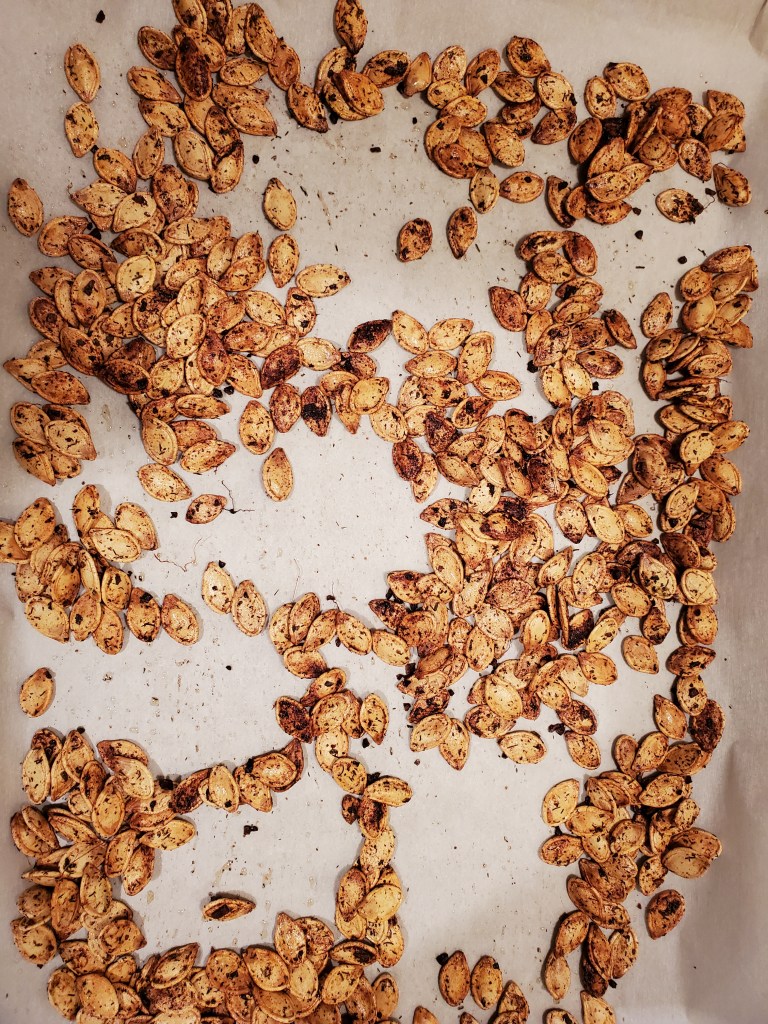
These were so much better than the ones I made the first time. I really think that was because I boiled them. This not only helps get the last bits of pumpkin and string off them, it also gets the saltiness deeper into the seed and the final product comes out crispier than if they aren’t boiled.
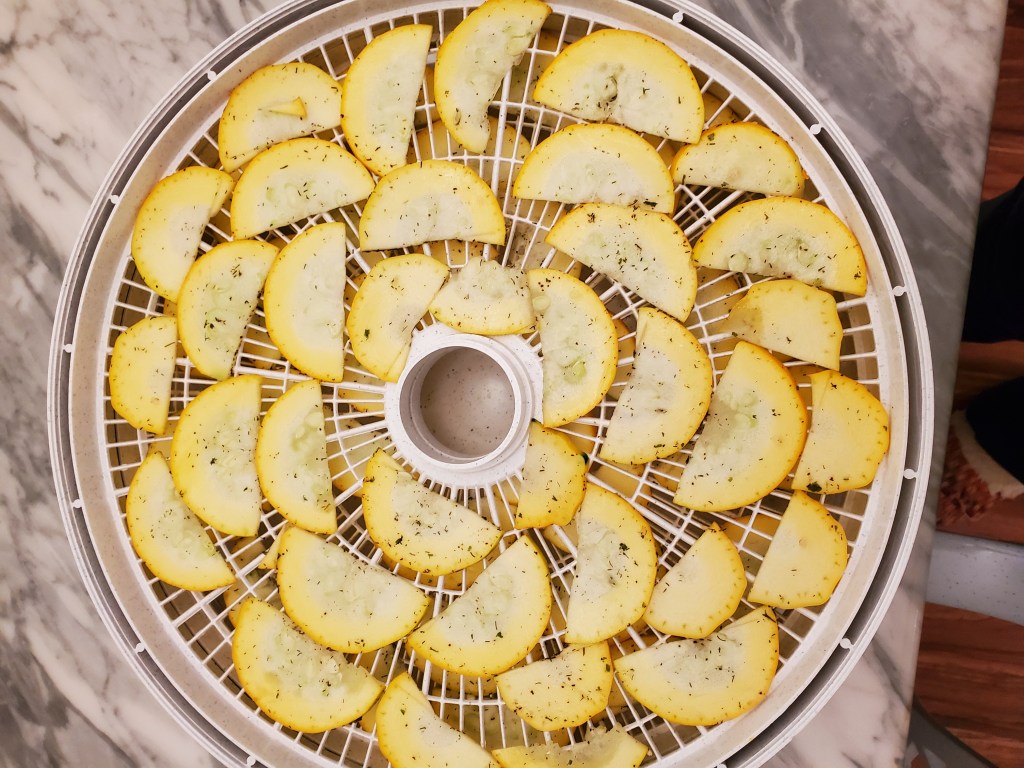
While the pumpkin seeds were baking, I sliced a large zucchini on the mandolin slicer (without cutting any of my appendages!) to make zucchini chips. The first batch I made were a big hit and I wanted to try a different seasoning.
I repeated what I did with the pumpkin seeds and stirred the zucchini slices in a couple tablespoons of olive oil and ranch seasoning (I used this much because of the large quantity of slices I had) until they were as evenly coated as I could manage. These were put into the dehydrator. Tomorrow I will get to try Ranch Zucchini Chips!
#everybitcountschallenge

You must be logged in to post a comment.