A PREPAREDNESS REMINDER
Recently, Tropical Depression Chantal provided an excellent preparedness reminder for residents in my area of Central North Carolina.
For most, Chantal did not cause the catastrophic destruction seen in Western North Carolina and Eastern Tennesse last year from Tropical Storm Helene, nor the ravaging destruction of the July 4th Guadalupe River flood in Texas caused by Tropical Storm Barry.
A lot of people were away from home when Chantal dumped 9 – 12 inches of rain on our area in just a few hours. Creeks and rivers rose; roads and bridges were flooded and/or washed out. Those who were away from home often needed to find alternate routes to get home safely. Some needed to find alternate places to shelter or had to shelter in their vehicles. First responders completed hundreds of water rescues. 25,000 people were without power for lights, cooking, running the refrigerator/freezer, water, etc. Six people have been found dead. Many crops were destroyed. Water treatment plants in several communities failed and those communities are under boil water warnings for drinking, cooking and handwashing. Commuting to work the next day was tricky due to detours caused by downed trees and flooded roadways.

There are several preparedness reminders local residents should have picked up from this event. 1) Know multiple ways to get to and from places you frequent. 2) Have an emergency kit in your car. 2) Keep your car gassed up and in good condition. 3) Have a supply of emergency water for your home. 4) Have alternate sources of power for your home. 5) Have a communication plan in place for your family members. 6) Have a community of friends and family you can turn to when stranded or evacuated from your home. 7) Keep ready-to-eat food stuff for short term power issues and/or alternate means of cooking.
Preparedness is less about end-of-the-world situations and more about the small chaoses that come into our daily lives. If we are prepared, we need not suffer or be afraid. We must continue to improve our personal level of preparedness by acquiring tools, skills, and other necessary items to allow us to function outside of our normal lifestyle and modern conveniences. The time to prepare is Before it’s needed.
(A note regarding the Texas disaster: yes, sadly, there are some events of such magnitude that all the preparing in the world will not be enough. The area had a limited ability to send or receive communication. Despite emergency communications systems, the warnings went out after most people were asleep. The water rose so fast that even those who got the warnings had little time to evacuate and often got caught anyway. In such situations, we can just be grateful for mercies, blessings, and miracles and for people who step in to help with the aftermath. Thankfully, these types of situations are rare.)
AND JUST LIKE THAT, IT’S OVER
Goodness, the month of June has flown by!
My youngest grandson stayed with me this month and I really enjoyed his visit. Despite being dragged into participating in many of my tasks and projects, he said he had a good time, too.
In addition to harvesting and dehydrating the garlic to make this next year’s supply of garlic powder, I pulled out all the chicken carcasses I had in the freezer and made and pressure canned 15 pints of broth.
Look at how well the figs are doing this year!

I guess the next thing I need to research is how to tell when figs are ready to harvest and what to do with them.
Once the recent heat wave broke, I planted marigolds in the bed where the garlic had been grown the past two years. I started with 8 plants from the nursery and will add marigold seeds to fill in the space more.

I chose marigolds because they can actually improve soil quality. Also, in addition to repelling mosquitos, aphids, cabbage worms, tomato hornworms and a few other pests, they actually reduce the number of pest nematodes in the soil. That’s one of the pests that can plague garlic.
I also managed to purge some items from the house this month. I gave away a bed and rocker and shredded/burned my mother’s financial records from the 1970’s that I discovered in the garage. (SMH – Why she still had them when she moved to Arizona in the 90’s, and why I then lugged them to Wyoming and then to North Carolina is a mystery.) Sadly, there are several more mystery boxes we discovered in the garage that need attention – sigh.
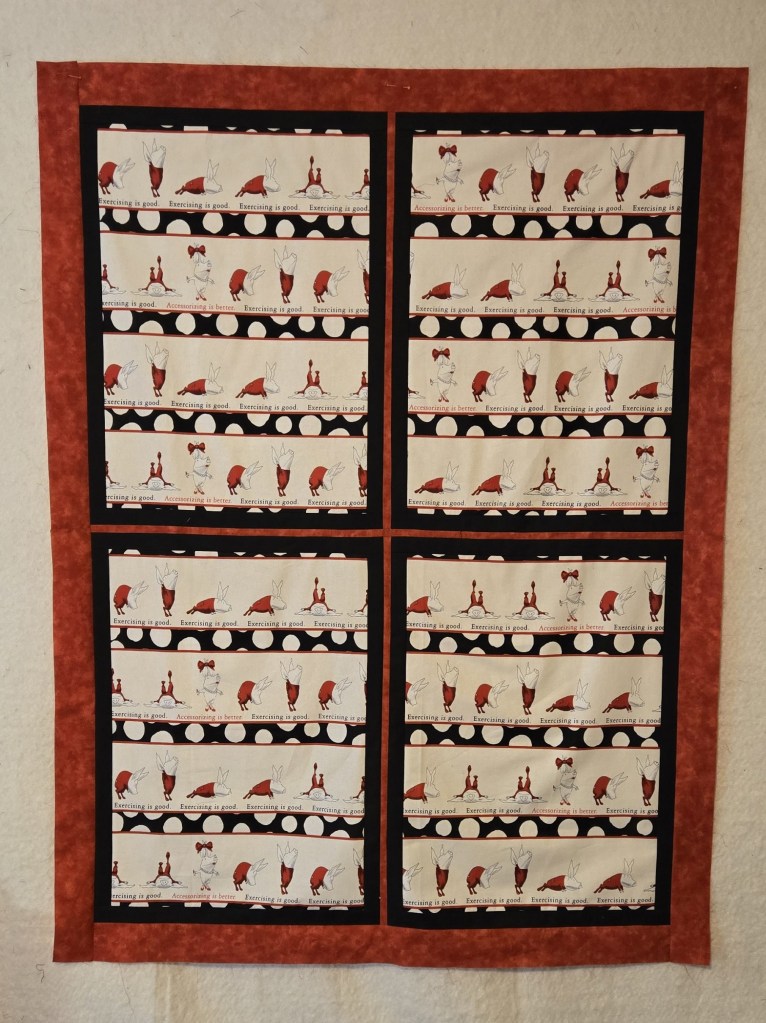
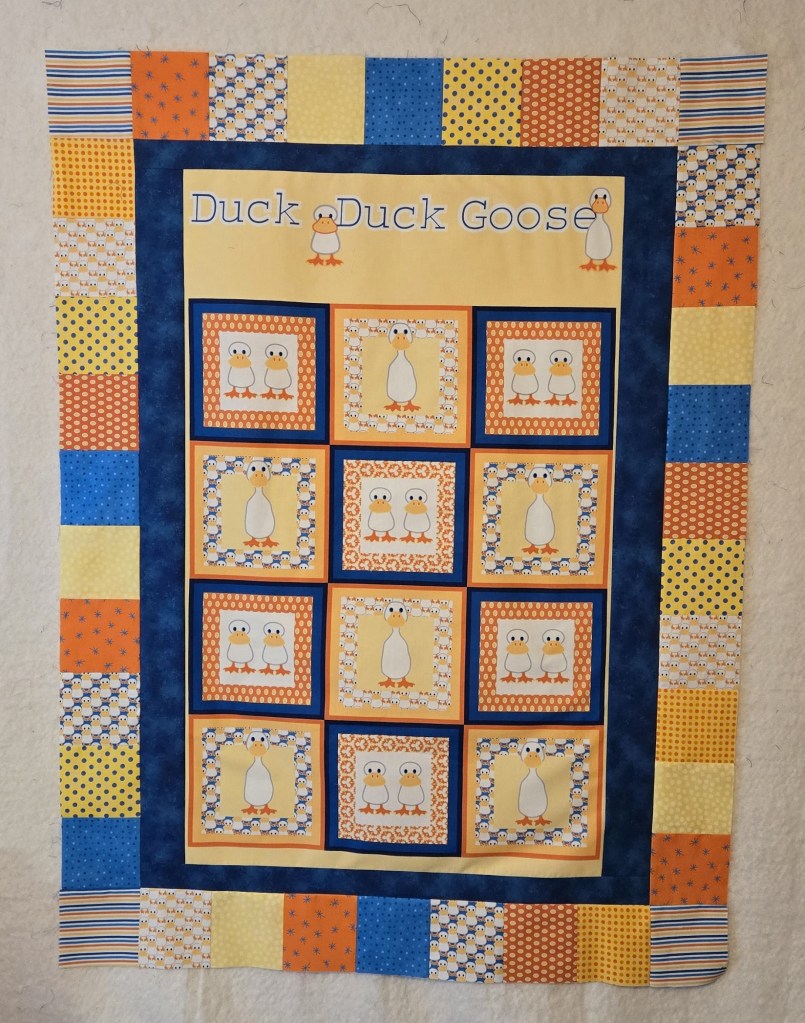
This month I completed two quilt tops:
On to July!
IF YOU GROW IT, YOU MUST PEEL IT
Garlic is a lovely, set-it-and-forget-it kind of a crop. If you will recall, I planted my bed of garlic in October. The only time I had to pay attention to it was to water it if there were too many dry days – which did not happen often.
Last year, I felt I harvested a little early. I thought I had to pull it when the plants started to die back. As a result, I had very small bulbs. Also, about a month after that, a You Tuber I occasionally watch, mentioned he was harvesting his garlic. This this is all I got last year – you can look HERE for last year’s harvest & processing to compare to this year’s.

We had a very rainy spring so when I checked at the beginning of June, the plants had just started to die back. We continued to get a lot of rain after that, so I had not paid it any attention until last Thursday when I noticed the garlic plants had entirely disappeared! I feared the worst – that something had gotten it – but that was, fortunately, not the case.
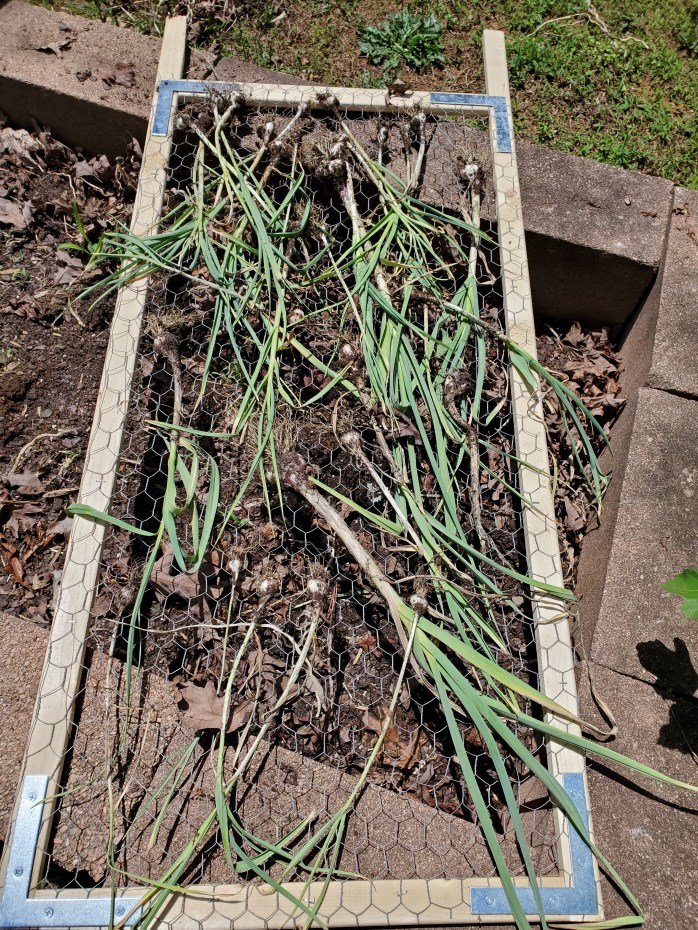
When we harvested it last Friday, we had to feel around for the bulbs and dig them up. Usually you would just pull them up by the plant. My 14-year-old grandson was visiting so I “let” him help. After all, the following generations need to know where their food comes from, too! I took additional advantage of the help and had him completely turn over the bed as we were removing the garlic, getting it ready to plant something else.
Without much plant attached, I harvested a whole bucket of garlic bulbs.

I trimmed it up and because I am going to make it into garlic powder, not prepare it for long-term storage, I found out that I don’t have to let it cure for several weeks like I did last year.
Instead, because they were so muddy and wet, I put them on a paper towel and ran a fan on them for a few days, rotating the paper towel a few times a day.

I’m glad I did this because that’s when the little worms started showing up. Hmm, I didn’t think garlic had any pests but, according to some articles I read, yeah, it does. I never did determine what the worms were but they didn’t harm the garlic so that was good. Through this research, I also learned you should not grow garlic in the same bed every year – something that I’ve seen other gardeners do. Well, now I know, so I’ll just have to find another plot next year. In the meantime, the fan did the trick with the worms, causing them to leave the garlic and then dry out and die.
After that, I separated the cloves and let them dry under the fan a little longer.
I remembered how sore my fingers were from peeling garlic last year. With so much more of it this year, I was not looking forward to that task! Usually, I just smash the clove with the flat side of a knife and pick off the skin. I couldn’t do that this time though – it was just So Dirty. So, I Googled to see if there were other methods.
There were two other ways that I decided we could try. One was to put a few bulbs at a time into a container and vigorously shake. This sounded like the perfect activity to utilize the 14-year-old for again! Surprisingly, it worked. However, because there was so much dirt, even though most of the cloves were peeled, they were now covered in dirt. We peeled about half the cloves this way. The other way we tried was to soak the cloves in hot water for a minute or two. We really liked this method – the peels often just slipped off. If one was too stubborn, we’d just plop it back into the hot water for a bit longer. The best thing about this method though is that the cloves also came out CLEAN. In the future, this is the method I will use!

I prepared the cloves for the dehydrator by smashing and slicing them. I had so much garlic that I filled the entire dehydrator, not just a couple of trays.
Running the dehydrator with that much garlic was a stinky business, and overpowering, so it ended up on the porch for the first 24 hours. Then, when the smell was not so pungent, it was allowed to come into the house to finish.
Thursday morning, we ran the dehydrated pieces through the blender and bottled them up. I have quite a lot more garlic powder for this next year!
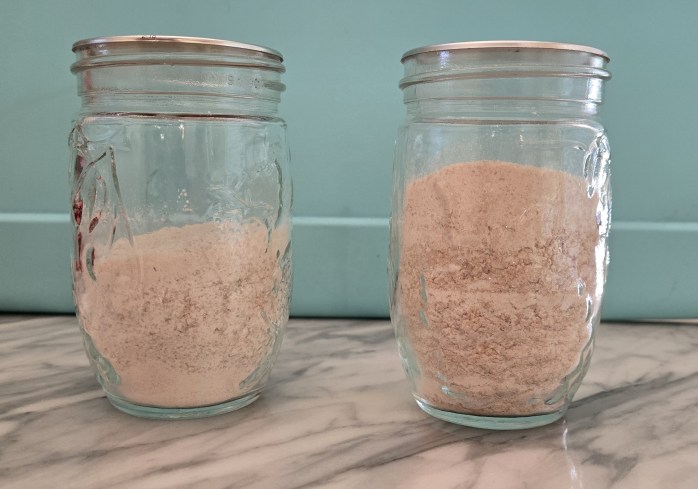
Is all this effort worth it? To me, yes it is! That’s especially true after finding the hot water method to peel it. The flavor of this homemade garlic powder from home-grown garlic is so much better than the stuff you get at the grocery store. Plus, every time I use my garlic powder, I get a feeling of satisfaction that this is here by my own efforts.
THE ART OF REVERSE SEWING
The most dreaded term in the world of quilting is “reverse sewing.” This is a euphemism for ‘you messed up and have to rip out all the stitches you just completed’. While usually easy enough to accomplish, it’s aggravating and is sometimes accompanied by a few self-berating words.
I seem to be plagued with more incidents of reverse sewing than I remember having in my previous quilting eras. There are three main reasons this happens: 1) my sewing machine automatically starts in a default stitch position that I do not use and I frequently forget to reset it before starting, 2) I stitch the short ends of the pieces together instead of the long ends or vice versa, or 3) I stitch the wrong side of the fabric to the right side instead of the right side to the right side.
Despite the “extra work” I create for myself, I managed to get three projects done in May.
First, I wanted to contribute something to a Silent Auction for a Youth fundraiser at church, so I finished a table runner I had previously pieced and quilted. I just needed to add the binding.

I tend to not follow patterns. A lot of my quilts are made up as I go. The result of this is I bought fabric with just the hint of an idea, not knowing exactly how much fabric I would need since I don’t know what direction I will end up going. Now you know one reason why I have so much material right now.
In 2009 I made a queen-sized quilt called “Barrel Star” for a friend who competes in barrel racing at rodeos. With the leftover fabric from that quilt, I made this top:

I also have material from the Sweet Baby Jane fabric line left from a quilt I made and sold in 2007 called “Spring Treat”. I made this with the leftover fabric:

Can you believe it? Despite making these two quilt tops, I still have enough fabric from each of these collections to make yet two more quilt tops!
THEY’RE GONE!
Oh, no, something got the finch eggs!
I don’t know what got them. I noticed yesterday that I wasn’t seeing blue under the female. Then today, the male came and inspected the nest while she looked on, they seemed to agree that the eggs were indeed not there, and then they both took off.
Drat! I was looking forward to seeing the chicks hatch and fledge.
Sigh. I’m really bummed.
NEST WATCH
No one should be surprised that once I discovered the nest on my front porch, my curiosity would be activated. I couldn’t stand not knowing what was going on up there so I had Oscar place a camera so I could watch the proceedings!
Meet my neighbors, the House Finches:


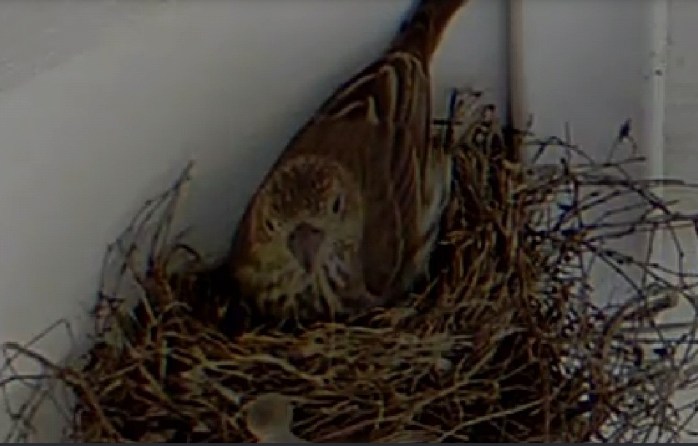


Click the arrows to view several camera shots
I check on the nest (via the camera) several times a day and even when I wake up in the middle of the night.
Apparently, the eggs hatch in 12 – 14 days. Since it’s been a week since I first spotted the eggs, I expect I’ll have more exciting news in about a week.
Click HERE to learn more about the House Finch.
WHO’S BEEN EATING MY EGGS?
Since I retired in March, the buyer pool of my chicken’s eggs has dramatically decreased. As a result, the eggs have been stacking up!
I currently have a backlog of 8 dozen eggs.
The only real bother is that I’d rather SELL the eggs and have the chickens at least pay for their own food. Never fear though, they do not go to waste. When supply outstrips demand, I just scramble the excess eggs and feed them to the chickens.
It’s a drag, though, to cook up a bunch of eggs and clean up afterwards so I decided to try something new. Instead of cooking a few eggs in a skillet on the stovetop, then have to wash all the dishes, I tried baking scrambled eggs in a sheet pan.
I whipped up 3 dozen eggs and poured them in a large (17″ x 12″), foil-lined sheet pan and baked them at 350 degrees (F) for 25 minutes, with a stir partway through. (When using a standard 15″ x 10″ sheet pan, only use two dozen eggs and cook for 12-15 minutes.)
No fuss, no muss (the foil means no pan to clean) and I have three containers of treats ready for the chickens!

Yes, Timmy got to enjoy some scrambled eggs, too!
I HAVE NEW NEIGHBORS!
I have lived at my house for almost 13 years. A couple years after I moved in, Manuel and Maria moved in on one side of me. Several years after that the pot smokers moved in on the other side of me. That house is across the gully, so I don’t really see the people over there and only know someone is home when a stray waft of weed works its way across to my side.
Now I have someone new living nearby.
Really nearby.
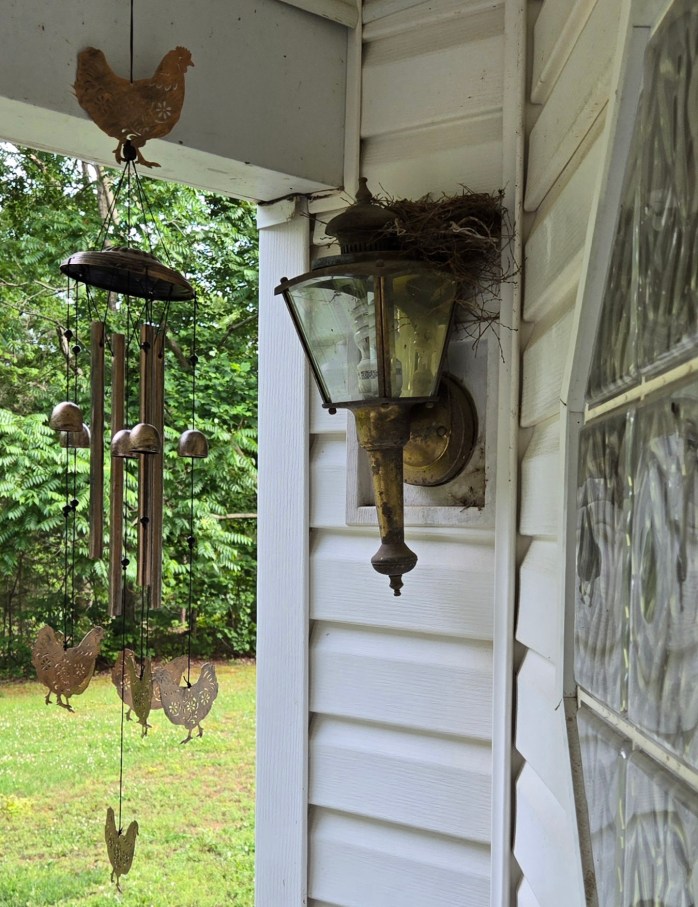
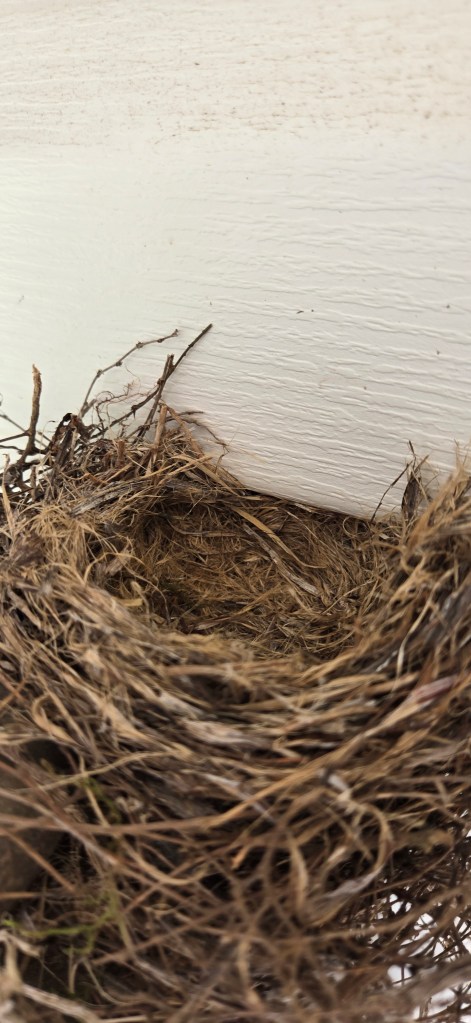
Last week, I interrupted some little brown birds in the middle of starting a nest on top of my front porch light. I figured they wouldn’t come back once they discovered the amount of traffic the front porch gets. Over the course of the next couple of days, though, they continued adding sticks and bits of nesting material until they had a lovely nest built.
Yesterday, I took a tour of the inside of the nest and stuck my phone up there for a picture.
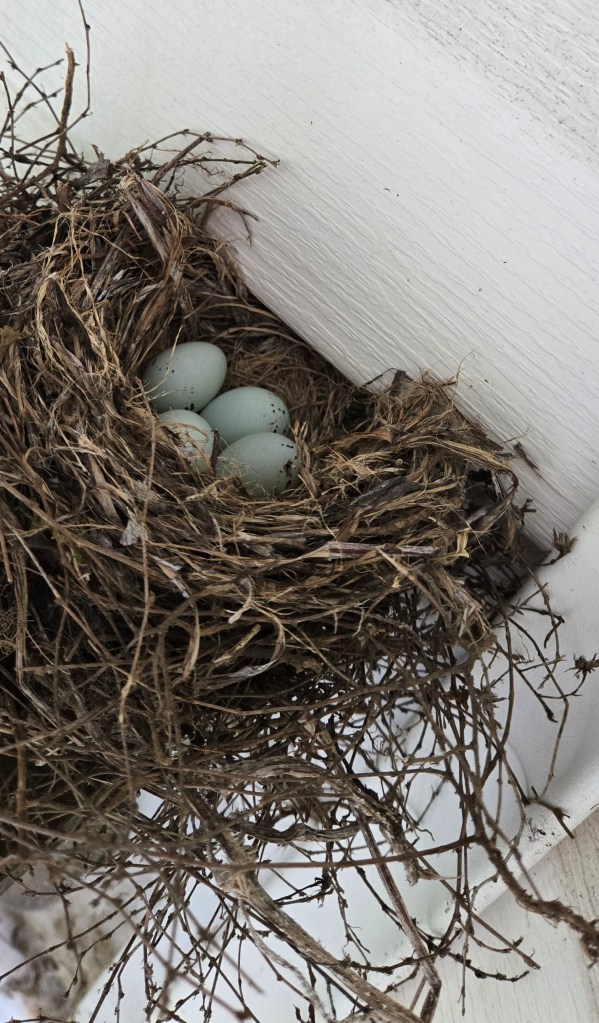
Someone has been busy laying eggs!
They don’t seem to be around the nest much. I hear them chit-chatting out there now and then, but they skedaddle the second there is any movement behind my door. Despite several attempts to get a better look at the parents, by the time I can see onto the porch, the birds have flown away!
A Google search of “little brown bird that lays blue eggs in North Carolina” yielded: Eastern Blue Bird, American Robin, Blue Grosbeak, Tree Swallow, Barn Swallow, Eastern Phoebe, Carolina Wren, Tufted Titmouse, and Indigo Bunting. I have found no match between “the glimpse” and pictures of each bird on this list.
So, the puzzle of the week is: Who is my Neighbor?
TRIAL BY NAAN
In the continuing quest to find a bread recipe that will free me from grocery store bread, my next attempt was to make Naan bread.
My experiences with Naan bread are fairly recent – probably within the last 5 years or so. My grocery store sells them in the bakery section. They are pricey enough that I’ve only purchased them once or twice. They are a nice addition to a meal, make a nice snack, and I’ve even had them for breakfast.
When I made bread for my youngsters many years ago, I always kept some dough aside to make fry bread. Yummm, hot fry bread with honey on top – that was a treat! The only apparent difference between fry bread and Naan is that Naan has yogurt in it so this should be easy, right?
I found a nice, straightforward recipe for my first try here:

This was one of those weeks that everything I touched became a challenge. The Naan bread attempt was no different. The recipe may have been straightforward and easy, but the process sure wasn’t!
The dough is super wet and sticky. I thought at first that I had made a mistake following the instructions but, no, all the measurements were correct. The dough was all over my hands. I’m sure I lost at least a couple of Naan pieces in the process. I had to add a significant amount of flour to make it the least bit handleable (and then realized that, in my panic, I had picked up the container of pancake mix instead of the flour). Even with all the extra flour, it still stuck to my rolling mat. By the time I got the dough to the griddle, I was worried the bread would be extra tough.
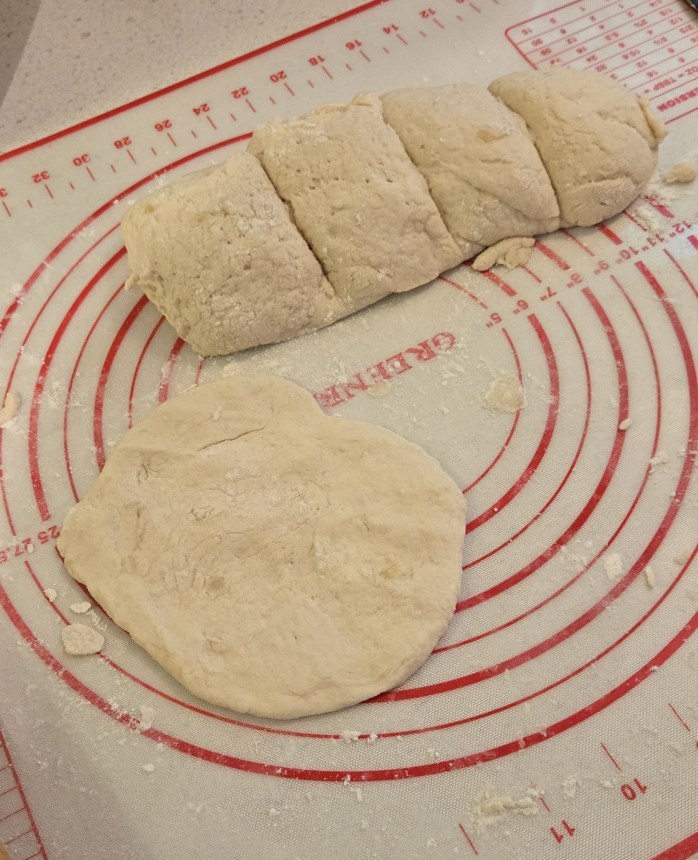


They were tasty plain, but when I put some of my Strawberry Freezer Jam on one, all my discouragement melted away.
I am willing to forgive the Universe for the frustration I was feeling and will try this again. I think I’ll cut the water by half next time.
TALK ABOUT LAZY
I’ve not accomplished terribly much this past week but here goes:
I was completely out of canned ground beef, so I processed a batch. This time though, I threw in some onion when I cooked the meat. I’ve not done that before and am interested to find out if it improves the end-product.

Shelf-stable meat adds another layer of usability and security to your food supply. It sure is nice to be able to take a jar of ready-to-use hamburger out of the cupboard and just dump it in your casserole, tacos, spaghetti, or other ground beef recipe. It is definitely a time saver. Also, you don’t have to worry about losing your entire meat supply if the electricity goes down. In fact, just a few days after I canned this batch the electricity was out for 8 hours. I didn’t lose anything in my fridge or freezer, but I could have if the outage had lasted much longer.
I only have a few jars of chicken and only one of pork in the cupboard, so I seriously need to get busy and build up my meat supply.
I enjoyed myself getting a little planting done this weekend.
Saturday, I went to my local garden center and purchased some yarrow, lemon grass, marigolds, and lavender. Since it was Mother’s Day weekend, they threw in a free geranium, too! I was extra happy about the yarrow as I had searched everywhere for it the past couple of years with no luck.
Every one of these plants was chosen for their bug repelling properties. Last year’s plantings were so effective that I am continuing with them.
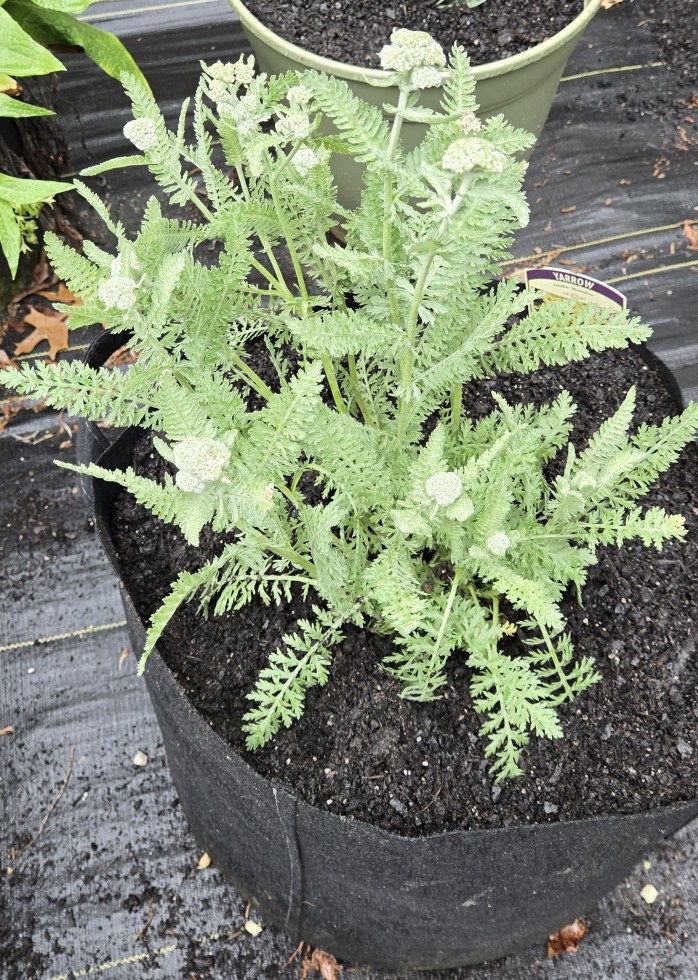
Yarrow contains compounds that emit a scent that repels mosquitos. Yarrow also attracts dragonflies, which are mosquito predators. If you soak yarrow leaves and flowers in vodka for two to six weeks and then strain it, you will have made a natural insect repellant. Yarrow has several medicinal benefits, too.
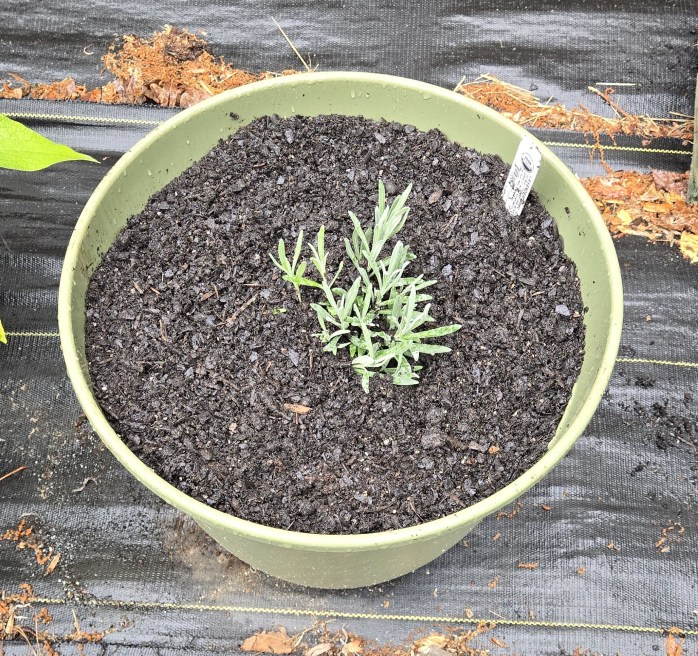
Lavender is known to keep away moths, mosquitoes, and flies. There are other inside pests it is effective against, too.
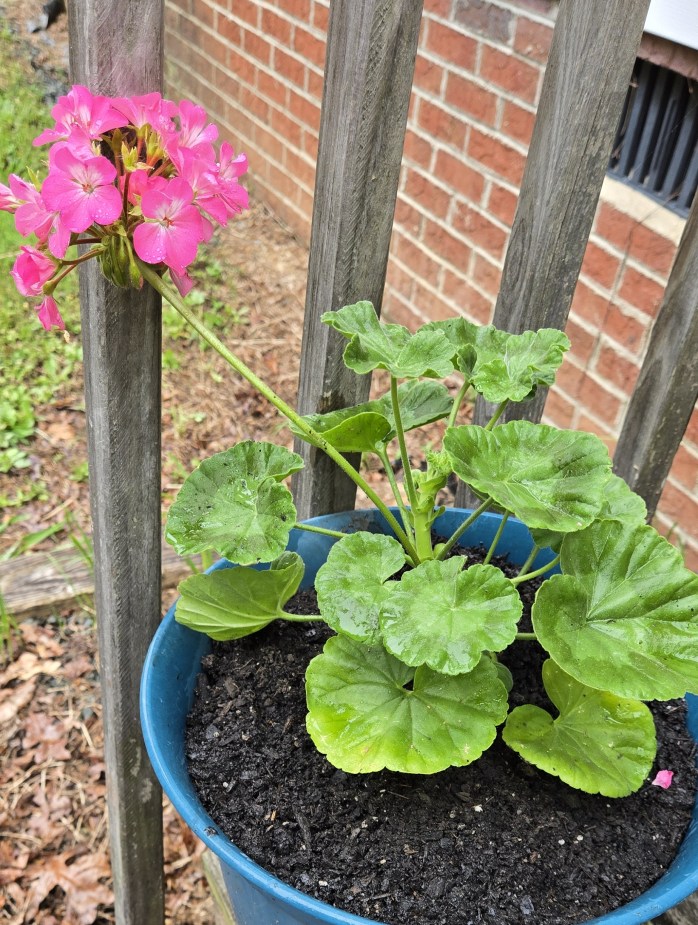
Bugs such as cabbageworms, corn earworms, Japanese beetles, and mosquitoes are known to avoid areas where geraniums are planted. Now, one plant is really not going to make much of a difference but it’s pretty and it was free, so I planted it.

Lemongrass repels mosquitos, flies, ants, ticks, fleas and gnats while marigolds repel flies, mosquitos, aphids, wasps, Japanese beetles, and snakes (though I doubt 4 little marigolds will chase off a snake!). I made one pot for the front garden and a second pot to put out by the chicken coop.
Bug repellant plants that came back from last year include my rosemary (mosquitos, flies), lemon balm (mosquitos, flies), peppermint (mosquitos, flea beetles, ants, squash bugs).
In addition to the geranium, I was able to plant another spot of color, just for the joy of it.
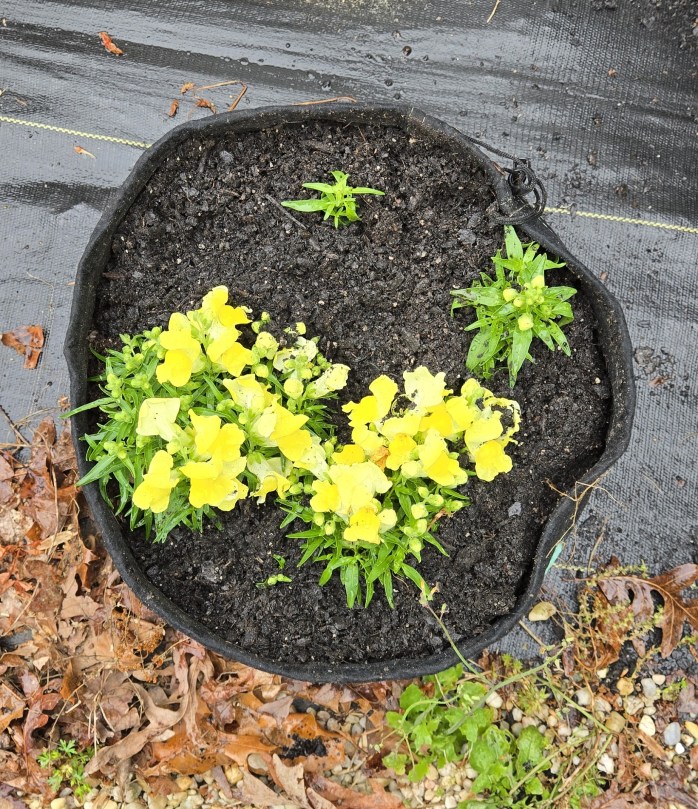
These snapdragons were volunteers that came back from last year! Last year’s snapdragons must have dropped some seeds on the ground that germinated. So, I just pulled them out of the ground and planted them in the same pot as last year. Hopefully they will survive that upheaval.
It’s going to be a rainy week, so I won’t even need to water the garden. On the other hand, the rainy weather is a motivation killer for me so this might be another unproductive week!

You must be logged in to post a comment.