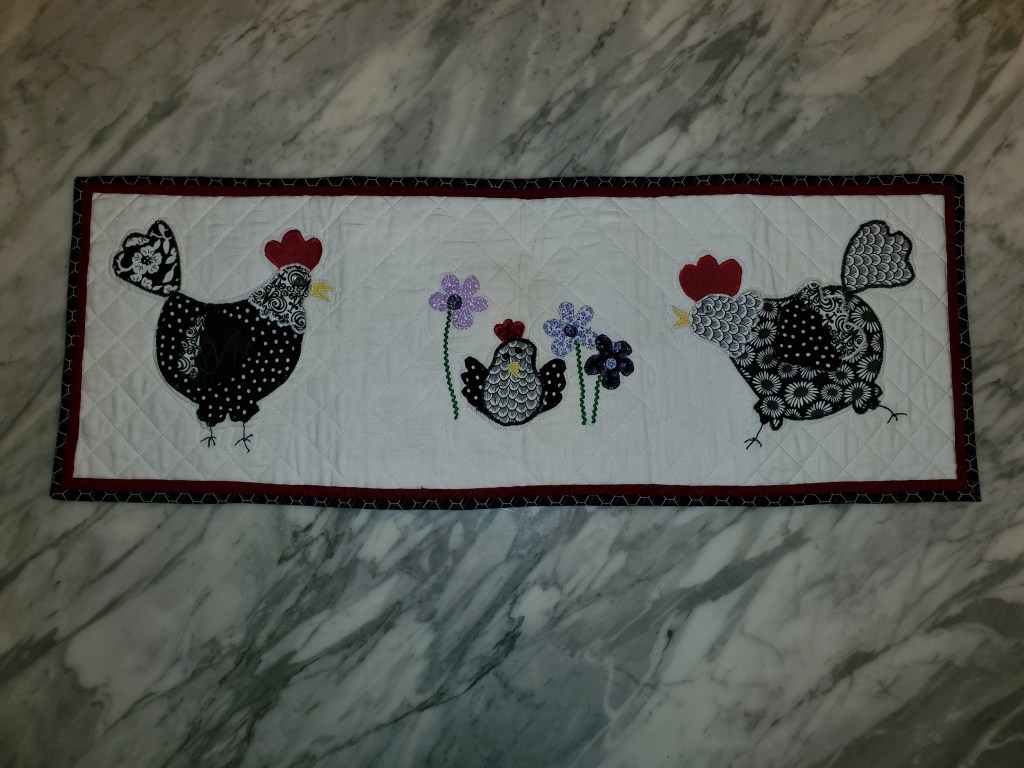
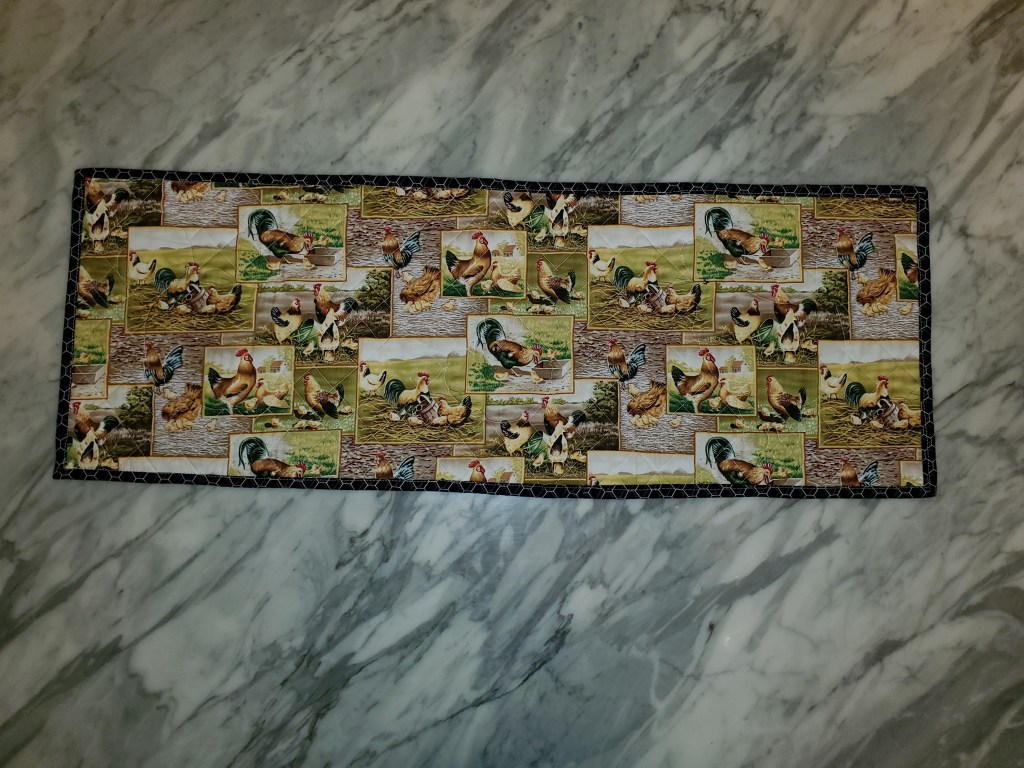
ANOTHER SURPRISE
My friend Holley made me a reversible table runner for my birthday! Isn’t it awesome?
ORDER! ORDER ON THE SHELF!
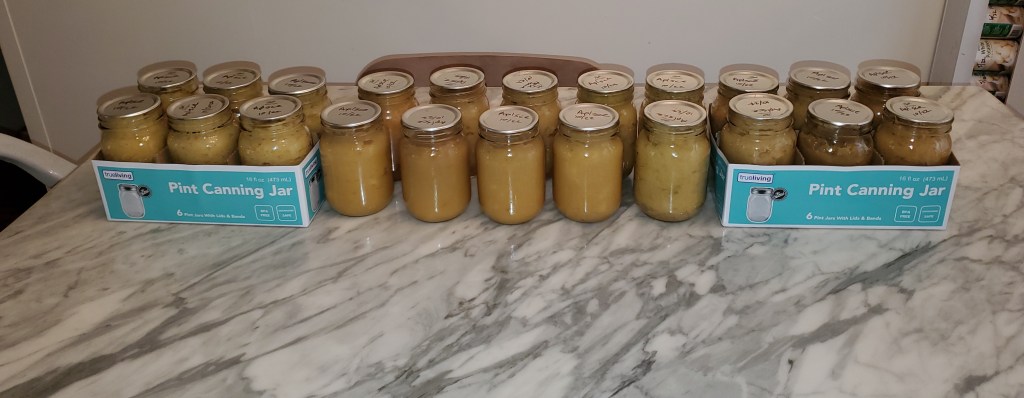
This weekend we added three of the shelves from the shelving unit purchased last week to an existing shelving unit, converting it from a 5-shelf unit to an 8-shelf unit. This is going to work so much better. As you can see, the sweet potatoes now fit where I could only fit half before and there is room to expand my growing supply of home-canned food.

The jars at the top are for the upcoming series of chicken canning. The bottom shelf is holding my supply of lids and rings. Hmm, those boxes aren’t very attractive. Maybe I’ll get nicer looking containers to hold those supplies.
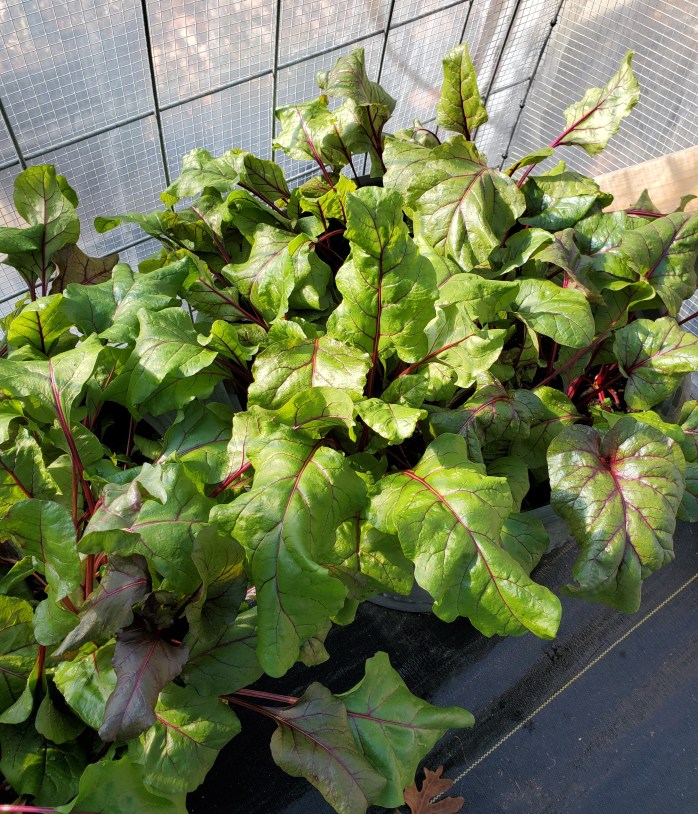
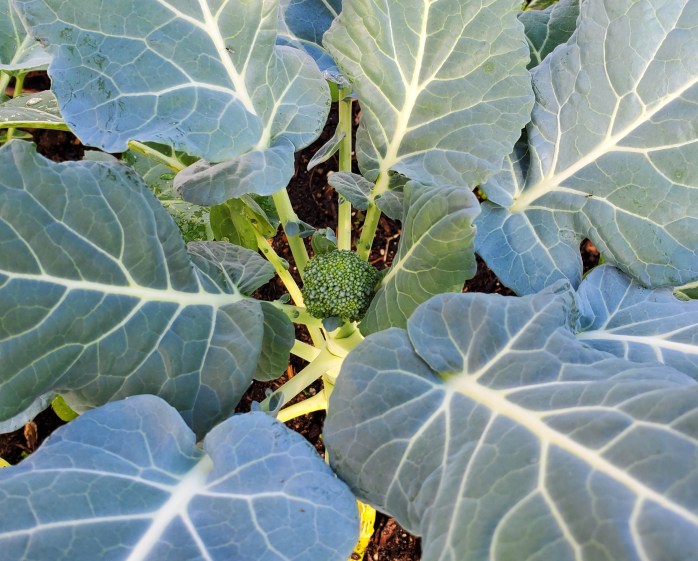
The greenhouse has been doing its job throughout the cold weather we’ve been having. The only thing that did not survive was the basil, which wasn’t surprising at all. As you click through the images below, you’ll see that the mixed greens are coming along nicely (the chickens are going to enjoy those), the beets greens are luxurious (I hope there are beets growing underground), and I even discovered a broccoli head forming.

I am enjoying the slower pace of winter. I can tidy and organize the house – which had become a dumping ground as we moved from one project to another – while preparing for next year’s projects and, of course, planning next year’s garden! To that end, my daughter Erica is sending me a copy of the 2023 The Whole Seed Catalog which is to gardeners what the Sears Christmas Catalog was to children of my generation.

BRRR
After the hurricane, the Arctic blast.
Hurricane Nicole merely brought rain and a bit of wind to this area. Reportedly, a tornado passed overhead, though it was polite and just kept going without visiting.
While yesterday was quite nice, today was definitely coat weather, barely cracking the 50’s. I know there are those who are scoffing but, here, that’s cold. The low temps will apparently last through next weekend. We even had to bring in the chicken water so it won’t freeze.
I really enjoyed having the Troutman contingent of the family come to the homestead yesterday. They provided the motivation to get more done than would have otherwise been accomplished.
Aaron, my son-in-law, rousted Oscar and his brothers out to clean the garage. Aaron is a great garage cleaner and, after they finished, it’s a place where you can actually find stuff!
A little of the momentum continued to today and Oscar Finally finished pulling up the azalea roots. That project has been on his list for nearly all year. His procrastination has been a sore point with me, so I am grateful it is done. Now we can start preparing the area for more garden space.
My Saturday was spent doing normal household tasks. I got my hair cut, cleaned the oven (thank you, whoever invented self-cleaning ovens!), bought groceries, did laundry, etc. I also put a new layer of bedding in the chicken coop, which will keep them clean and warm during this week of cold weather.
My daughter, Jessica, and I went to Target so I could get another shelving unit. I’ve run out of shelves to put my canning jars and sweet potatoes. When we got to the register, she purchased them for my birthday present. What a nice surprise! Once they are assembled, I will be able to get the rest of the sweet potatoes out of the box and the applesauce that’s been sitting on my dining table since October 15th will have a place to belong.
It was a pleasant, non-hectic weekend that was nevertheless was productive.
I MIGHT HAVE DONE A THING
So, I picked up something today.
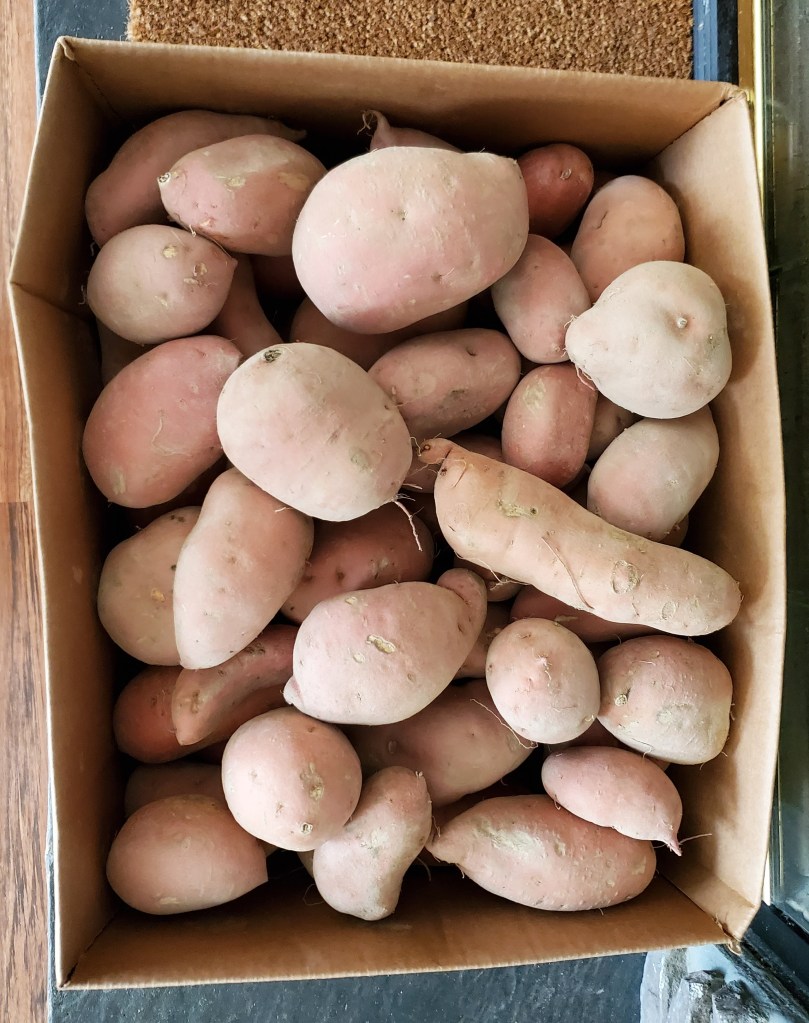
Yep, I’m the proud owner of 50 pounds of sweet potatoes!
What am I going to do with so many sweet potatoes?
Well, besides the occasional baked potato (topped with butter, brown sugar, and cinnamon), apparently, I’m about to learn how to can them and freeze them. Maybe I’ll even dehydrate some sweet potato chips.
Hmm, now I’m wondering if I bought enough…
THINGS I LEARNED – PART 2
Continuing my discussion about the new tools and techniques I used when I processed applesauce recently…
PEELING
The best new tool I tried while process applesauce came about after this year’s weeks of peach peeling. My hands hurt so much from peeling so many peaches that I knew I had to come up with a better solution for the apples. I decided to take a chance and bought an electric peeler.
Oh, my goodness! What well-spent money that was!
Not only did it save me from pain in my hands, because of the electric peeler, the peeling and slicing went so quickly that I could skip the step of putting the apples in a bowl with lemon juice. Anything that saves time – and dishes – is a-okay with me.
I was also pleasantly surprised at how little apple was left on the peel.

I love, love, love using the electric peeler.
CORE & SLICE
The second new tool I tried was not so successful. My basic slicer corer did okay on the Golden Delicious apples, but the Granny Smith apples are denser and were really hard to push the slicer through.
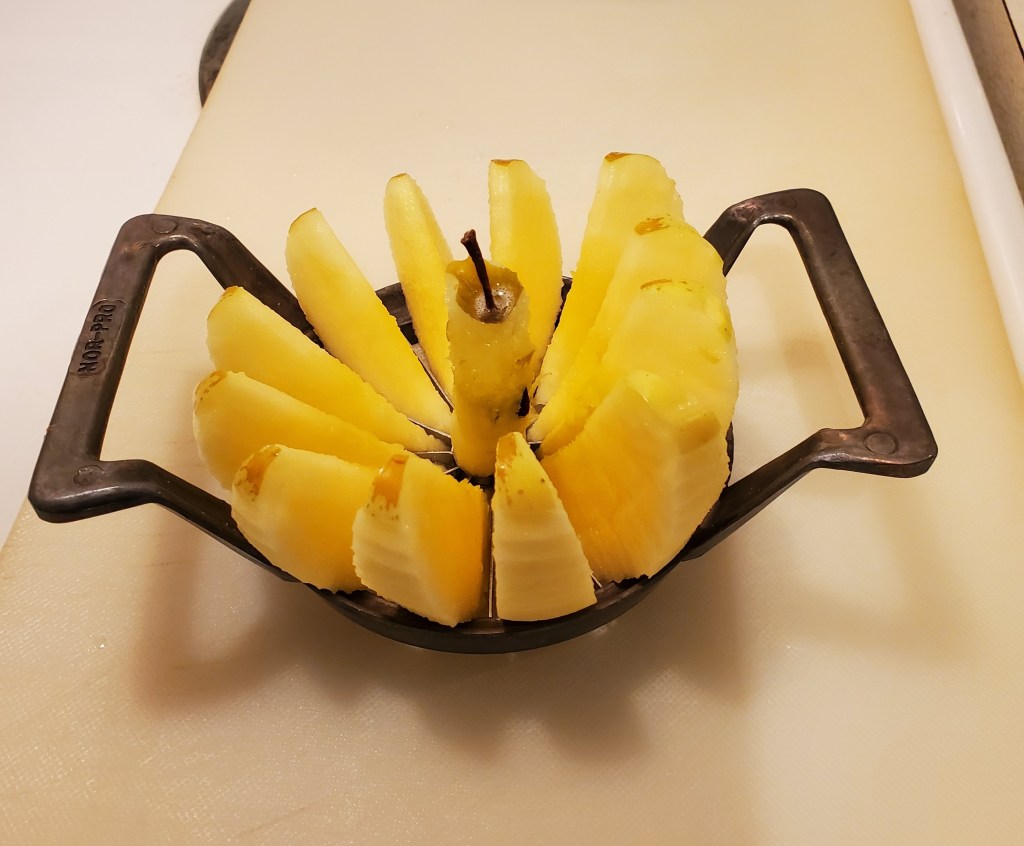
My old slicer corer did okay with the softer apples but needed Oscar-strength for the Granny Smith’s
Thinking it was difficult because I’ve used this slicer corer for more than 20 years, and it is probably a little dull, I decided it was time to get a new one. As long as I was getting a new one, I decided to try a new design. Two features I wanted (besides sharp blades) was a slicer corer that prevented me from slamming my knuckles on the cutting board and also would cut all the way through the bottom of the apple, so I didn’t have to pull each slice free. I found THIS.
It is sharp, it does cut all the way through the apple, and I don’t bang my knuckles every time I slice an apple with this slicer corer. Unfortunately, there are two issues with it that were not so pleasing.
First, the core it cut was huge and created too much waste. See how much bigger the core on the right is? That’s what the new corer slicer leaves behind.

Second, the design that allowed it to cut all the way through the apple made it nearly impossible to clean.

Apple bits collected in the grid at the bottom. I tried soaking, rinsing, and running a long-bristled brush through the bottom without success. The only way I could get the bits of apple out was to dig them out with a toothpick. It was a very tedious process. This slicer corer is likely going to end up in my next Goodwill donation bag.
SQUISH
To “sauce” the apples after they are cooked and soft, I usually use a potato masher. This works well, especially if you like chunky applesauce.
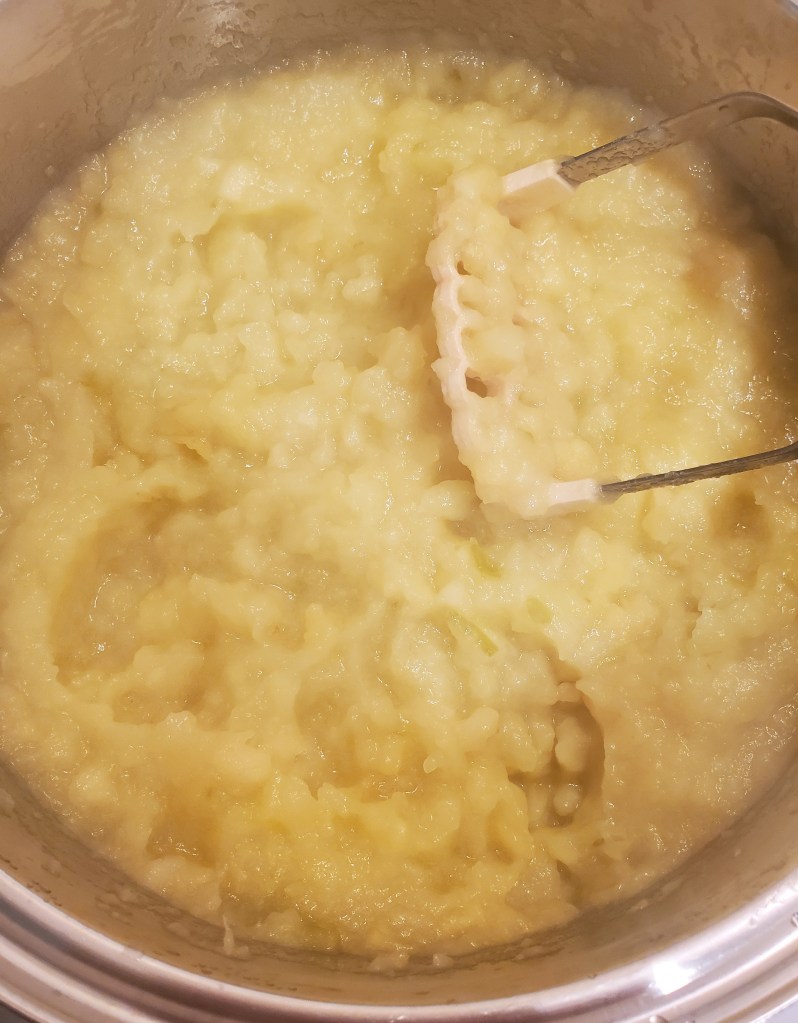
I wondered what could be used to make “less chunky” applesauce though, so I tried a couple of other methods.
I tried an immersion blender, but the results really weren’t any better than with the masher.
A food mill produced a smooth sauce but was a mess to work with and a mess to clean – I did not like using that at all.
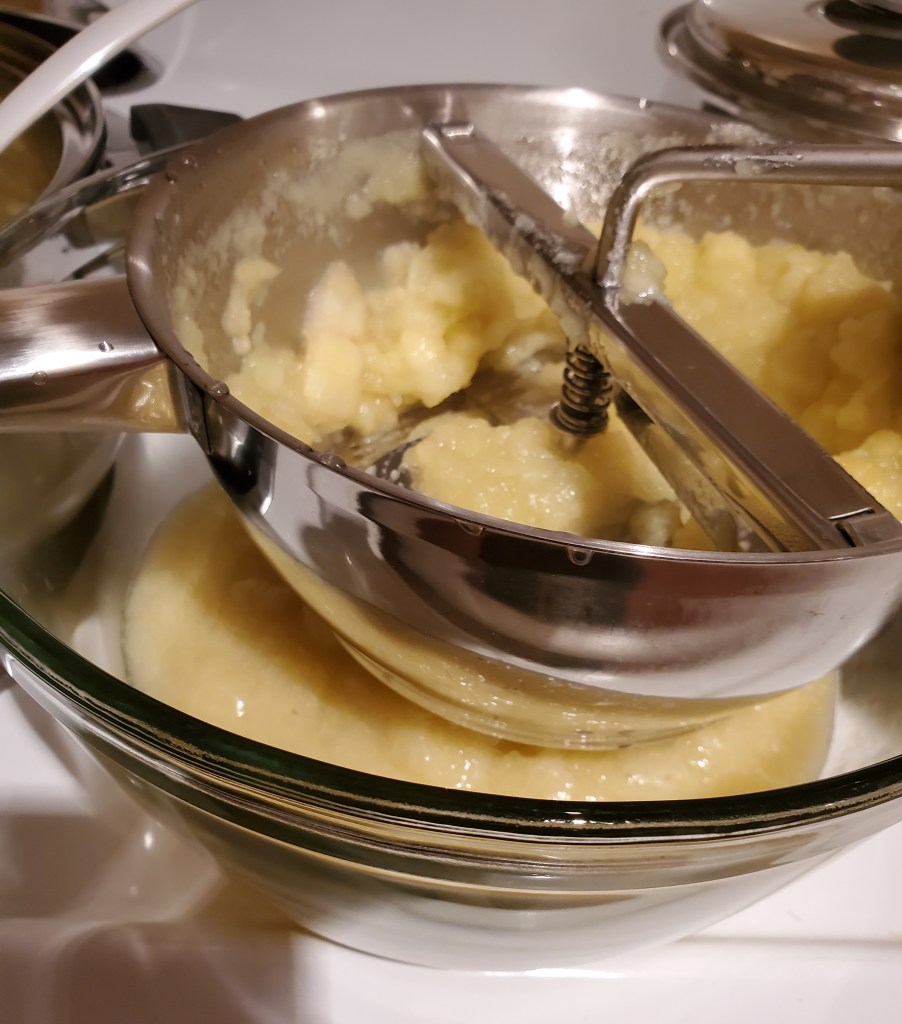
A hand mixer did quite a bit better than the potato masher and was definitely superior to the immersion blender and food mill.
I’m sure a blender would do the best job turning chunky apples into smooth applesauce and y’all can do that if you want but I’m just not devoted to smooth applesauce enough to transfer hot apples to a blender and then have an additional mess to clean up. Call me lazy if you will but: my applesauce, my choice!
Coming next: wait until you see what I accomplished!
THINGS I LEARNED – PART 1
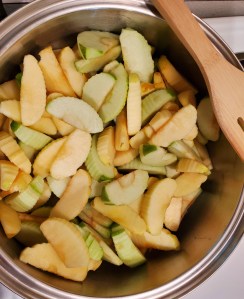
Making applesauce is super easy. You peel, core, and slice some apples, cook them until they are soft, and mash them. Just like that, you have applesauce.
As I processed applesauce this year, I tried some different techniques and tools than I’ve used in previous years. Rather than record the steps involved in making and preserving applesauce, I’m going to report on what I learned with this year’s batch.
COOKING
I played a bit with the cooking of the apples. Normally, I use my big soup pot to cook them.
For one of my batches though, I used the crockpot and really liked the results. The downfall, of course, is that it takes three or four hours to get the apples cooked and mashed. Since I do much of my canning at night, after work, using the crockpot would rarely be feasible. That’s fine — I know the option is there on the weekends if I want to use it then.
PRESERVING
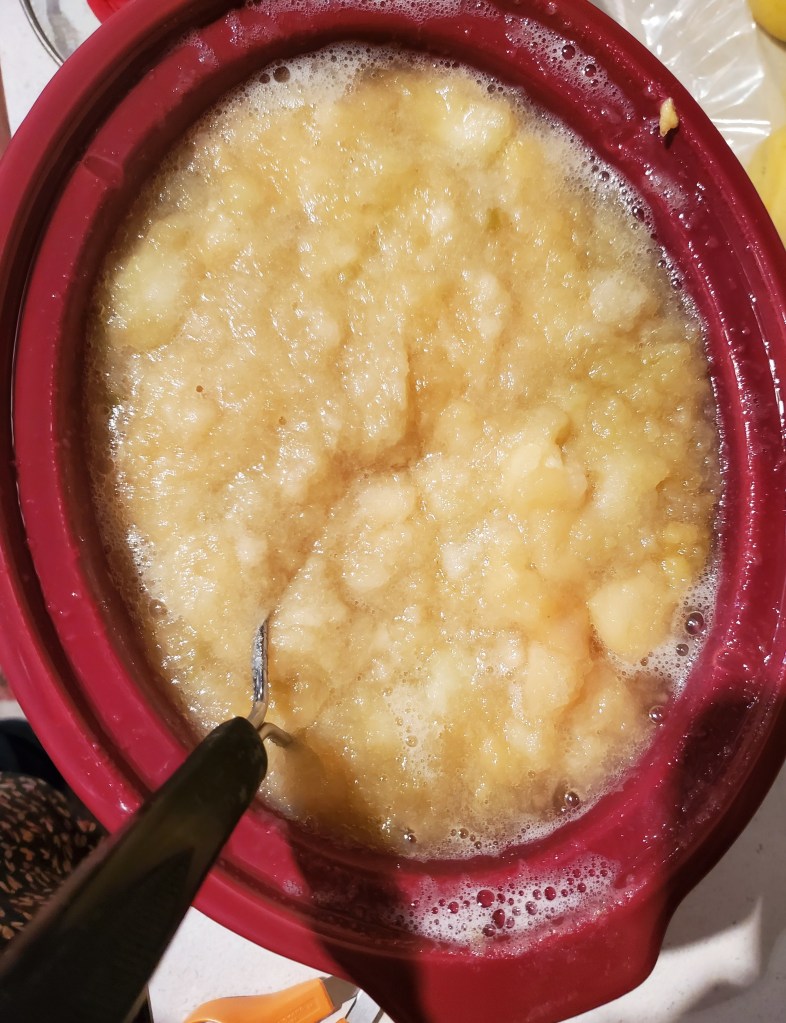
In prior years, my preserving method was to put two cups of applesauce in a sandwich-size baggie, seal it, and freeze it flat. It is such an easy process. This year, though, I canned all the applesauce I made. Amazingly, I had never canned applesauce before.
Canning it was a bit more work than freezing it but doing so provided me with a shelf-stable supply of applesauce. This removes concerns about losing the food if the electricity goes out for an extended period. Canned applesauce is also more useful for those of us who forget to take food out of the freezer. I can use this applesauce without planning ahead since I don’t have to thaw a bag before using it.
Using my Nesco Smart Canner, though not a new tool, certainly made the process easier. For one thing, since it is made specifically for small-batch canning, preparing and processing four or five jars of applesauce at a time was just about all my back could handle.
Another nice thing was that while the Nesco was coming to a boil (this takes about 20-30 minutes), I could get all of the clean-up done. Once it produced a steady stream of steam, I could push the button and walk away. With no further intervention, it would process for the amount of time I set (15 minutes for pints at my elevation for applesauce), and I could come back to remove the jars at my convenience. Now that I’m getting the directions between water bath canning and pressure canning straight in my mind, the Smart Canner is the thing makes it possible for me to keep canning.
One new thing I figured out with the canner this time is that I need to process a minimum of 4 jars. Even though I’ve seen You Tube videos where the user put a single jar in the canner to process, I always seem to have problems (e.g., floating jars that siphon) when the canner is not fuller. So, this time, when one of my batches of applesauce ended up filling only 3 jars, I followed the guidance from the National Center for Home Food Preservation to add a jar filled with water to the batch. This jar can be used as water storage so it’s not really a waste. I really don’t like using up a canning lid for something like that though. My next question is: can I just put an empty jar (of water) with no lid in the canner? I suspect the answer would be yes with water bath canning, no with pressure canning.
HOW MANY APPLES?
I struggled with finding the correct number of apples to use per canning jar.
I thought I knew what I was doing as my “The Complete Guide to Home Canning” manual said it takes an average of 21 pounds for 7 quarts or 13.5 pounds for 9 pints. I tried to convert the math to figure out how many pounds for 5 pints and just kept missing the mark. I finally settled on 1.5 pounds, or 5 apples, per pint … maybe.
There’s more to tell so check back in a few days for Part 2.
SLOWER PACE & ADDITIONAL HARVEST
As the Fall Season progresses, the outdoor chores slow down. The weather, on the other hand, has been great for working outside.
This weekend’s chores revolved around clean-up. We cleaned up the debris and bits and bobs left out from the previous weeks. The wheelbarrow was put into the barn, pieces of wood were picked up and either stored or discarded, empty feed bags were put into the garbage, etc. The property is ready to be mowed once the rest of the leaves fall off the trees.
We also added bedding to the coop and filled the chicken’s dust bath bowl with sand and peat moss. The remainder of the bag of sand was poured along the edge of the run where the chickens have scratched ruts into the ground. If left unfilled, they could become points of entry for other critters.
To begin prep for next year’s garden, we put a tarp over the space used for this year’s Three Sisters Garden. While I’m not going to use that method again, I do want to use the garden bed for some yet-to-be-determined crops in the next growing season. Covering the area is meant to kill off remaining weeds and plants and prevent new ones from growing while the soil rests.
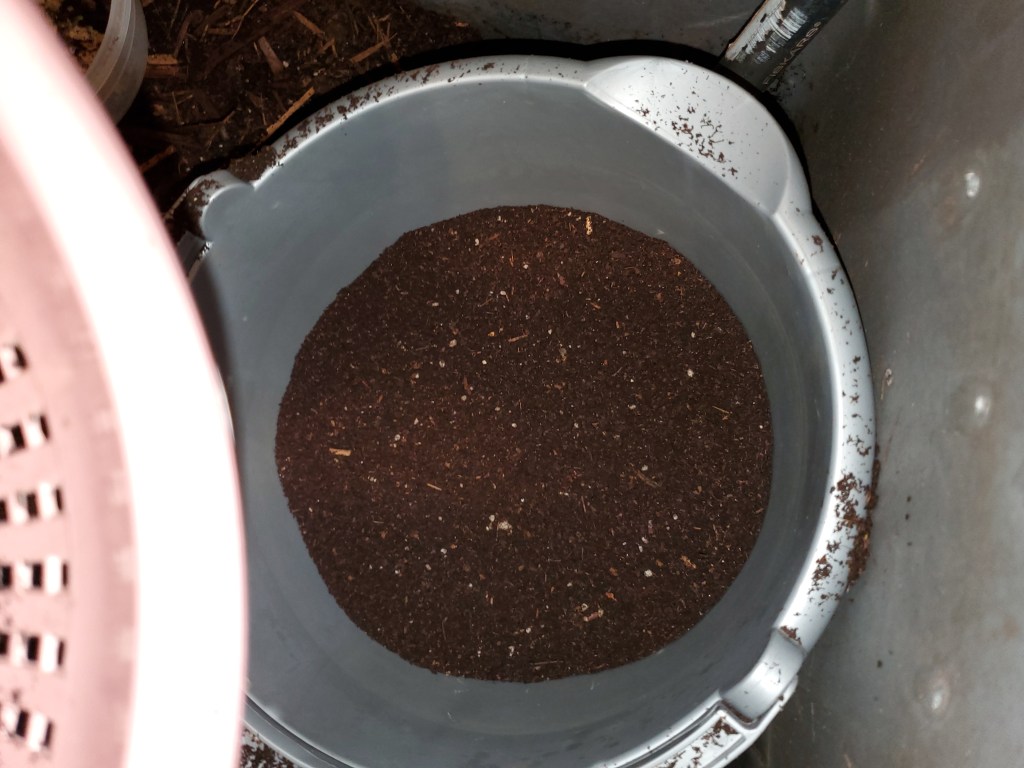
The summer growing season is done but harvesting continues — from the worm bin.
I don’t do it as often as I could/should. That’s not because it’s difficult to do but because I lose track of how much time has passed.
The first time I harvested castings, I had Oscar drag the whole box outside and tried different methods of screening until I settled on one that I liked. Since then, I’ve worked out a nice process and can do it neatly and quickly in the house. I don’t need to rely on Oscar for any part of it.
I just sit on a chair at the end of the box I’m harvesting (I harvest one end of the box one time and then harvest the other end the next time). I scoop worm bedding into my colander and shake-shake-shake it into a bucket. When there’s only a pile of sticks and chunks left in my colander, I dump that back into the bin for the worms to continue processing. In my bucket, I’m left with a surprising amount of beautiful, rich castings.
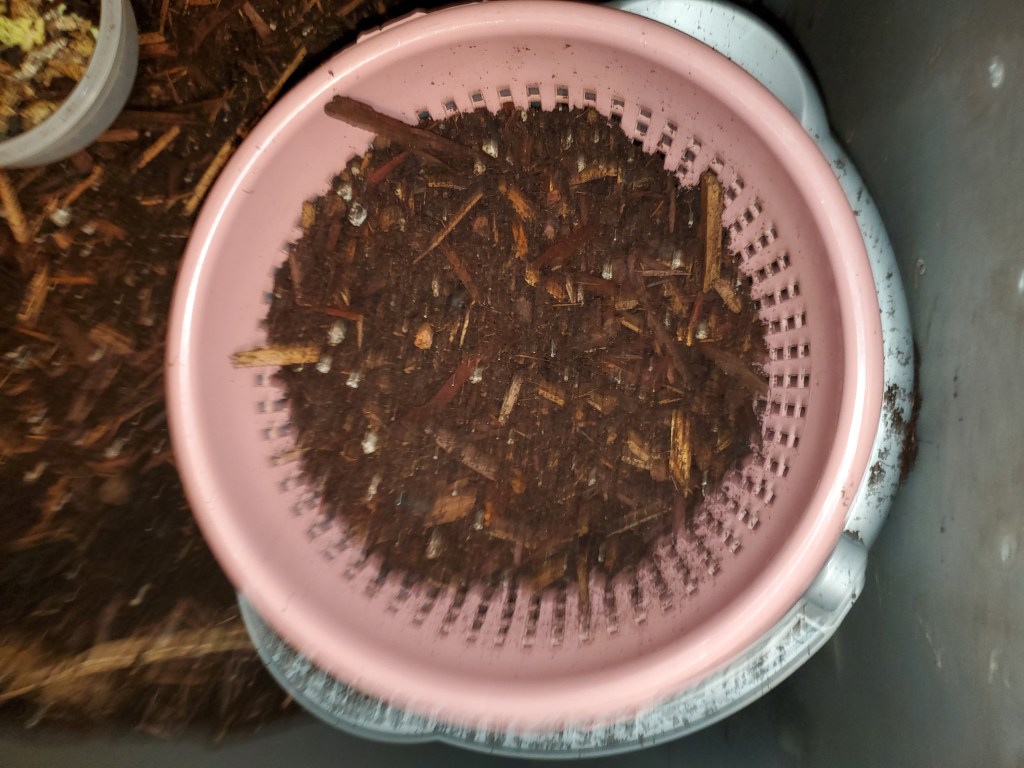
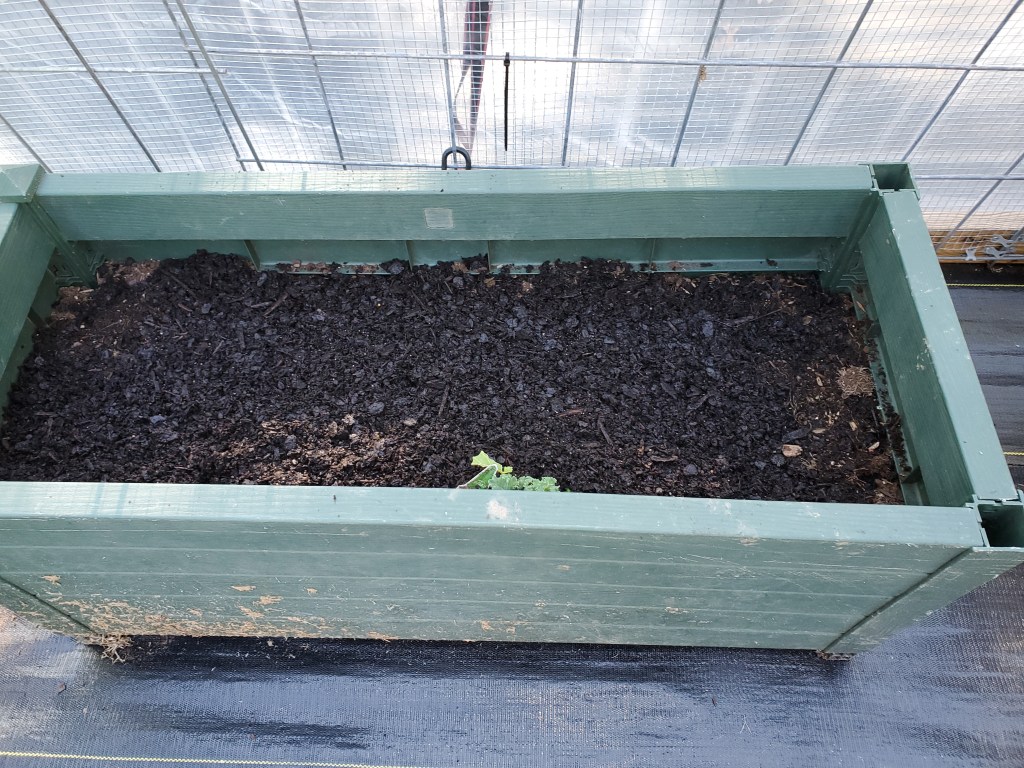
When I’ve finished with that half of the bin, I add moistened peat moss to the bin and aerate the whole thing with my garden trowel. It takes about 30 minutes, there’s nothing to clean up, and I have a gallon or two of ready-to-use fertilizer for the garden.
Then I start feeding the worms at the end of the bin I just harvested so they will move out of the other end, which I will harvest next time.
The apple trees were blessed with this batch of worm castings. Throughout the winter I will just collect and save it in plastic storage bags over the winter to use in my Spring Garden.
To purchase worm castings costs around $18 per gallon so keeping a worm bin is beneficial for the wallet, too.
I’ve been asked what became of the apples I bought earlier this month. Well, the applesauce processing went well. I tried some different techniques and tools, and my head is so full of information that writing the post has become something to avoid. I guess it boils down to Procrastination is now spelled A-P-P-L-E.
RAT-A-TAT-TAT
The trees are signaling autumn not only by their leaves changing color but also with acorns falling. Lots and lots of acorns. For two weeks It has been “raining” acorns.
The creepy thing is when they hit the roof, the car or some other hard surface it sounds like a gunshot. Sometimes it’s so loud the sound actually causes me to duck. I have been getting extra exercise with all the ducking.
I don’t remember a year when there have been so many acorns on the ground.
This had me asking, “Does this mean it’s going to be a rough winter?” Well, the folklore of the past two hundred years says that a heavy acorn crop is a sure sign that the coming winter season is going to be a doozy. However, the size of the acorn crop is likely no more likely to predict the weather than the size of the stripes on woolly bear caterpillars does. (Who measures the stripes on woolly bears?!)
This overproduction of acorns is what botanists refer to as a mast year. Every 2-5 years trees seem to synchronize an overproduction of nuts, fruits, or berries, providing a bumper crop. In masting years, there’s so many acorns that the birds and animals can’t keep up with them, allowing some of the acorns to sprout and become seedlings. Did you know only one in 10,000 acorns grows into a tree?
There is a ripple effect attached to a mast year. In big acorn years like this, the species that depend on them as a food supply will be fat, happy and mating. So, we will have more mice and squirrels. More mice and squirrels mean more predators like foxes, coyotes and hawks will fatten up as well.
Well, I guess I’d better get raking and shoveling – there’s thousands of acorns in my yard!

FIRST FROST
We got through our first frost with ease since the greenhouse was finished before it got so cold. The next week is forecast to be in the low 70’s during the day and the 40’s and 50’s at night.
The beets are flourishing:

The cabbage is failing, while the cauliflower and broccoli are just sitting there:

The herbs and nasturtiums are doing fine.
I took that all to signify that it was okay to sow more seeds. So, I did.
I planted a package of Hoss Premium Greens Mix in the big planter I used for tomatoes this summer. (I found a fat grub in there that the chickens found tasty, too.) I wasn’t able to plant them sooner because I knew Oscar would not keep up with the more frequent watering needed by seeds and seedlings while I was gone. This will be a nice test of the greenhouse.
This seed mix contains Tatsoi, Mizuna, Arugula, and Red Mustard and has a maturity time of 21 days. I know it seems late in the season but I’m hoping the greenhouse will make a difference and we’ll have a successful crop. I’m certainly willing to give it a try!

The chickens did fine with the frost, too, even though they are still molting. The run lately looks like there’s been a bloodless massacre in there because so many feathers are on the ground, rather than on the chickens.
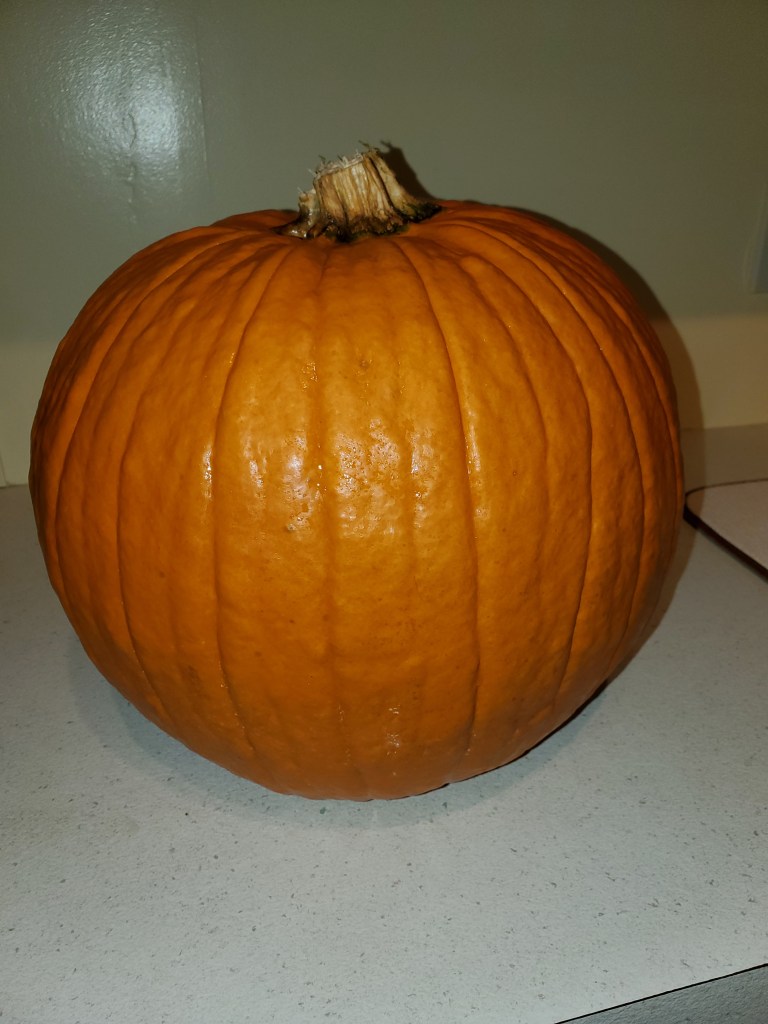
The price of pumpkins has dropped since they first appeared at the grocery store three weeks ago. Today I bought a good-sized pumpkin for $6 for the chickens to enjoy — after Oscar cleans the feathers out the run … again.

You must be logged in to post a comment.