TAKE STOCK – WEEK 3
This week let’s Take Stock of our supply of Condiments.
A condiment is a supplemental food, such as a sauce or powder that is added to some foods to impart a particular flavor, enhance its flavor, or, to complement the dish, but that cannot stand alone as a dish.
Different countries and cultures use different condiments, but the ones frequently found in the American refrigerator include:
Steak sauce
Worcestershire sauce
Barbecue sauce
Ketchup
Mayonnaise
Mustard
Pickles and pickle relish
Salsa
Tartar and cocktail sauces
Horseradish and/or wasabi
Salad dressings
Soy sauce and other sauces used in Asian-inspired dishes
Tabasco, taco, and other hot sauces
WHY INCLUDE CONDIMENTS IN OUR FOOD STORAGE?
1) Condiments tend to be kind of pricey. What else would you buy that you need to pay nearly what a whole meal would cost – well, at least a home-cooked meal? Keeping extra condiments would mean you are able to buy them when they are on sale, or at least at a time more able to spend your grocery budget that way.
2) While it wouldn’t be the end of your world if you ran out of one of these items, they sure make your food more enjoyable. Having a backup on hand ensures you can always “have it your way” as Burger King used to advertise.
3) Studies have shown that, during difficult times, keeping your food familiar really does make things easier.
The amount you keep of each condiment will vary with each household. For my household, I’ve learned to keep two or three of the condiments we use frequently on the shelf. Otherwise, I keep only one spare on the shelf.
HOW OLD IS IT?
Another reason to Take Stock of our condiments is that we tend to keep opened containers of condiments in the refrigerator longer than we should. I was told I should discard open condiments after a year. A recent Google search gave such varying results that I think I’ll just stick with that as a rule of thumb.
The problem of course is, we open various bottles and jars throughout the year so when do you clear them out? I certainly don’t advocate emptying your refrigerator door every January – that would be expensive and wasteful.
At the same time, does anyone enjoy the anxiety of looking at a jar that smells okay while wondering if the color looks right or if the crusties in the lid mean you could use it or should throw it away?
To resolve that particular source of angst I started writing the “opened” date on the jar(s). Doing that means I don’t have to count on my memory to recall that I opened that seldom-used tartar sauce last March when I bought some shrimp on sale at the grocery store.
My mom left behind containers of spices that I remembered from my childhood. Don’t let your refrigerator door become a graveyard of old condiments.

BONUS!
Last weekend, my son-in-law, Oscar’s dad, came to the homestead. The two of them worked on his 1986 GMC C-2500 pickup truck in my barn/garage.
I don’t go in the barn often as it’s usually full of unsightly piles of gear/supplies/junk Oscar has stuffed in there “for now” instead of putting away. Bonus 1: they had to deal with that mess before they could do their own work.
That wasn’t the best part though.
Later in the afternoon, after letting the chickens out for a bit of a walk-about, I stopped in to see how the guys were getting on. As I was admiring how much better it looked in there, I spied something of great value.
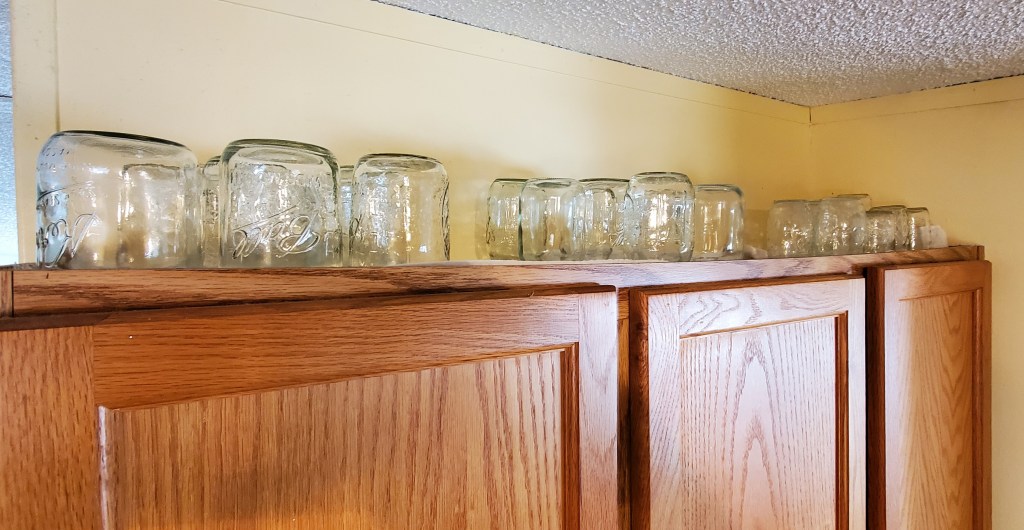
Canning jars! Quite a lot of canning jars.
I had Oscar bring them to the porch this weekend (the boxes were too dirty to bring into the house) and I am getting them cleaned out and sterilized.

This was a Bonus and a Blessing. My supply of pint jars was getting pretty measly.
While I’m working on cleaning the new-found jars, I have ten pounds of chicken thawing to fill those jars.
My canned meat supply is about to become a bit more respectable!
WORM BIN REBOOT – PART 3
This will seem anti-climactic but, the worm bin reboot is Done.
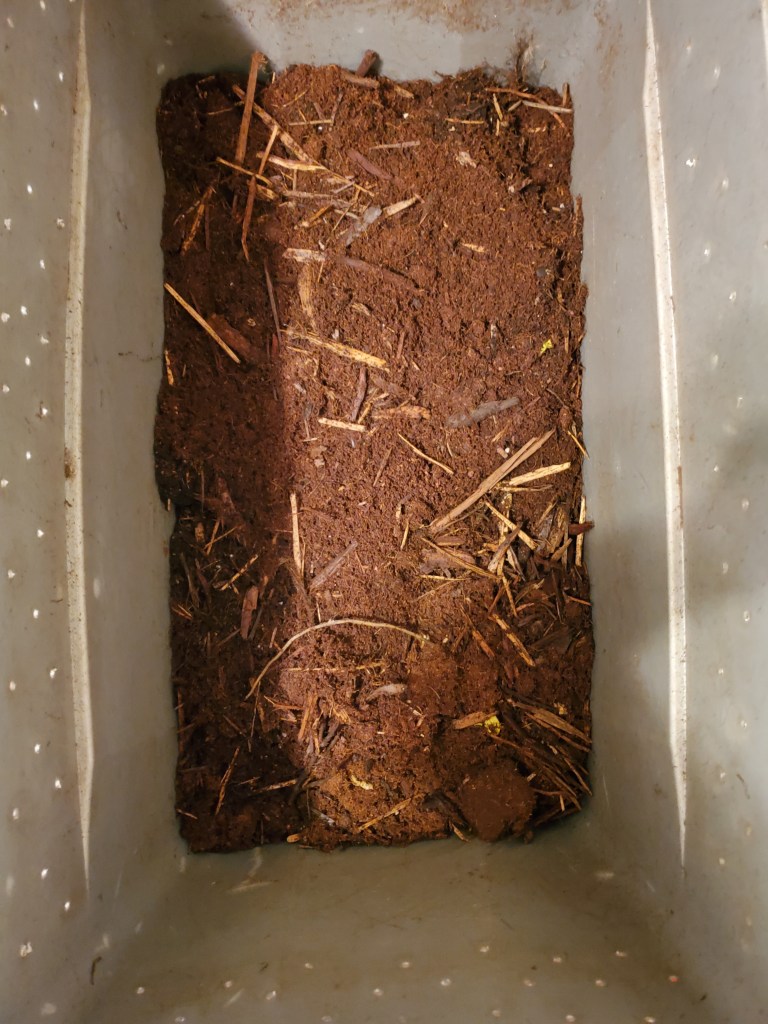
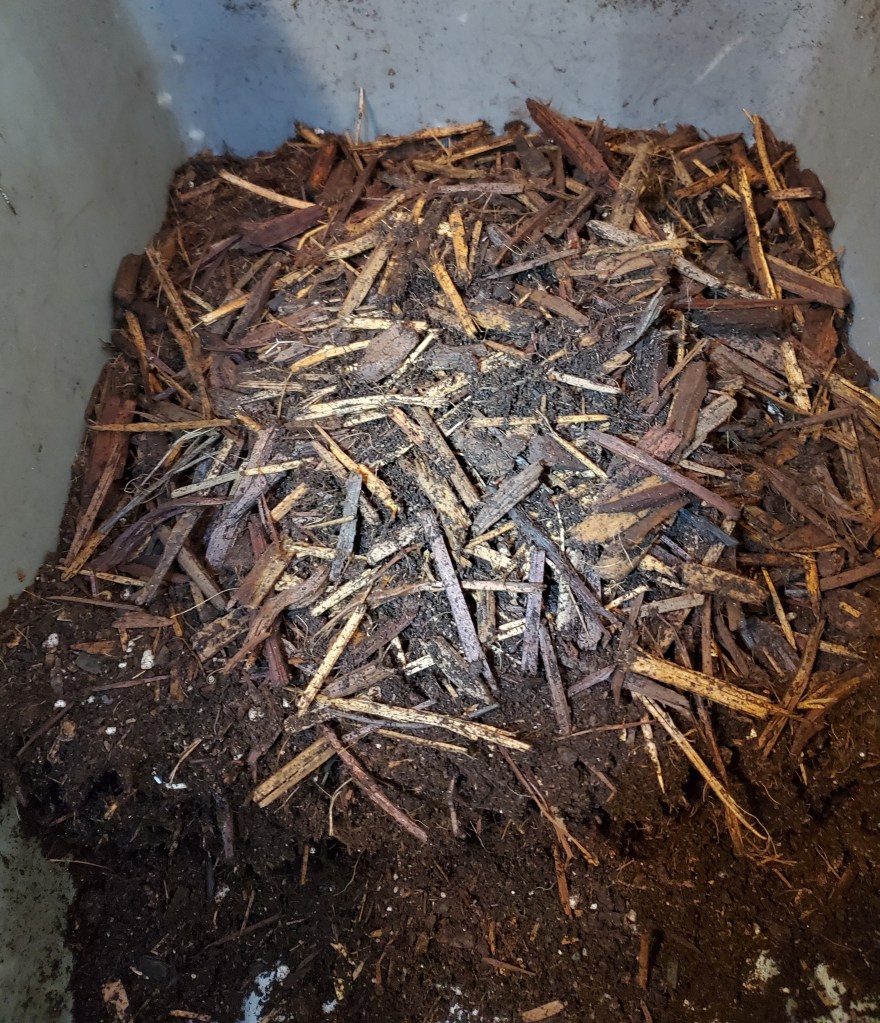
If you’ll remember from Part 2, having scooped out all the old bedding (except the wood), I left the bin looking like this:
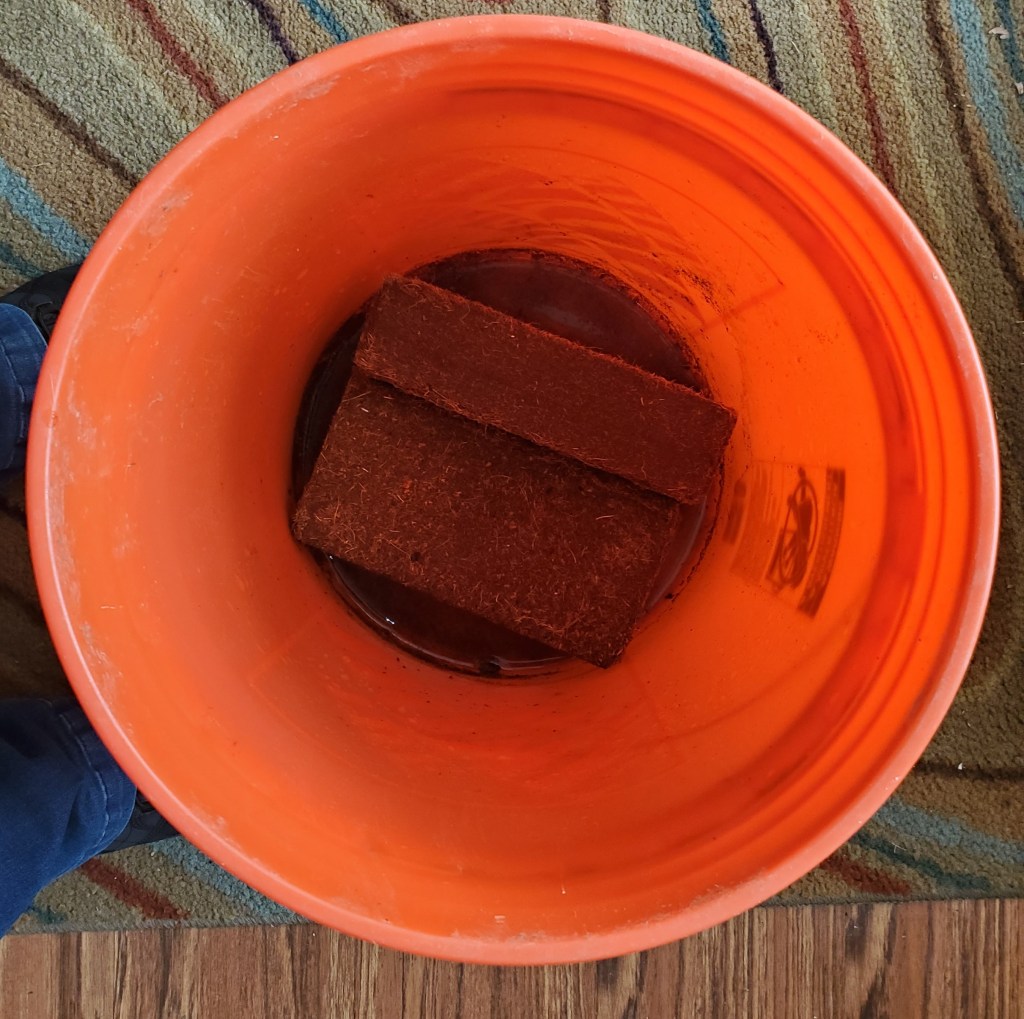
I was fussy while re-hydrating the coconut coir bricks this time. I didn’t want a repeat of Part 1, where I ended up with it being too wet and had to dry it out in the oven. This time I used a 5-gallon bucket, so I’d have plenty of room to stir it. I added only a couple cups of water two or three times a day, followed by a good fluff with my hand trowel. It took four days, but I ended up with perfectly hydrated bedding.
Now, the bin looks like this:
I gave the whole bin a good stir, verified that the moisture, temperature, and Ph were where they needed to be, buried some turnip greens, said, “Goodnight wormies,” and closed the lid.
I hope they are Happy Wormies.
TAKE STOCK – WEEK 2
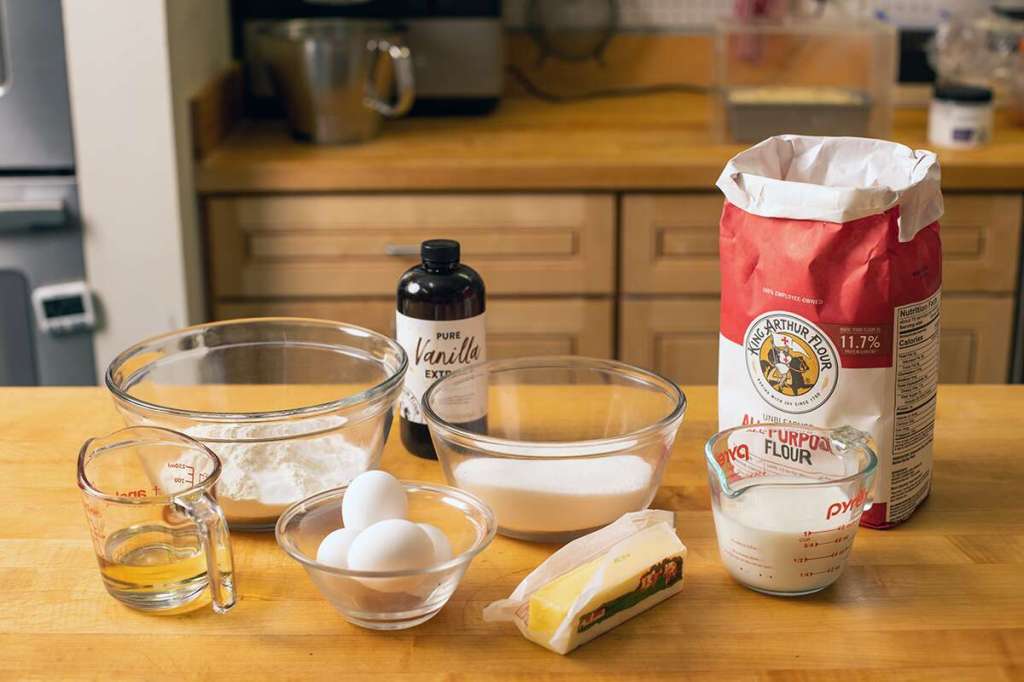
The Holidays are over and, by now, even the leftovers have been consumed. If your kitchen was as heavily used as is traditional in November and December, your baking supplies may be getting low.
This week, continue your efforts to review where you are in your temporal preparedness by taking stock of the essential building blocks in your baking pantry. Be sure to have plenty of supplies on hand and check that they are not close to their expiration date!
1. Flour: All-purpose flour is the baking staple that can be used to create everything from cookies to pancakes to muffins to bread, and beyond. However, you can also stock whole grain flours (wheat, spelt, quinoa, einkorn, etc.) , cornmeal, gluten-free flours, and other specialty flours depending on your dietary needs and the type of baking you do.
2. Leaveners: baking soda, baking powder, and yeast give your baked goods the lift they need.
3. Sugars: Granulated sugar,powdered sugar, and brown sugar are the basics but you might also stock up on other sweeteners like maple syrup, honey, molasses, corn syrup.
4. Salt: standard granulated table salt, kosher salt, and sea salt.
5. Dairy: butter, eggs, and milk. While these ingredients are generally kept in the refrigerator, not the cupboard, maybe it’s time to add shelf-stable versions of these ingredients to your pantry. Alternative milks (coconut, soy, almond, oat, etc.) keep for a pretty decent time on the shelf. Even better, include powdered milk, powdered butter, powdered buttermilk, powdered cream cheese, powdered eggs, and powdered sour cream for more long term storage. You’ll be surprised at how easy these powdered ingredients are to use in baking and they store so much longer than the fresh ingredients.
6. Fats: vegetable oil, butter (see above), shortening (this comes in powdered form too!), and lard.
7. Extracts and Flavorings: pure vanilla extract is a basic pantry item but don’t forget there’s a whole world of flavorings to explore – almond extract, lemon extract, mint extract, the list goes on.
8. Spices: cinnamon, cloves, allspice, nutmeg, and ginger are basic spices used to make your baked goods sing but you don’t have to stop there.
9. Add-Ins: chocolate, unsweetened cocoa powder, dried fruits such as raisins and cranberries, nuts (store in the freezer to extend their shelf life), jams and jellies, peanut butter, coconut, etc. take your food from blah to yum so they definitely have a place in your pantry.
What else can you suggest we add to our baking pantries?
WORM BIN REBOOT – PART 2
I am in the midst of rebooting my worm bin. If you missed Part 1, click HERE.
Is it necessary to re-boot your worm bin? No. I just hadn’t harvested worm poop in quite a while or added new dirt and my brain got stuck on imagining those poor wormies living in their own poop and knew I needed to do better for them. Yes, a bit dramatic on the imagined injustice but it just seemed like a re-freshening would be nice.
In Part 1, I moved all of the existing bedding to one end of the bin and put in fresh coconut coir for bedding on the newly emptied side. I’ve been feeding them on that side for a couple of weeks to get them to move from the old side. Worms are the ultimate definition of “food-motivated” and they definitely moved!
Today, I started Part 2 – sifting and removing the old bedding that I had piled up on one end of the bin.
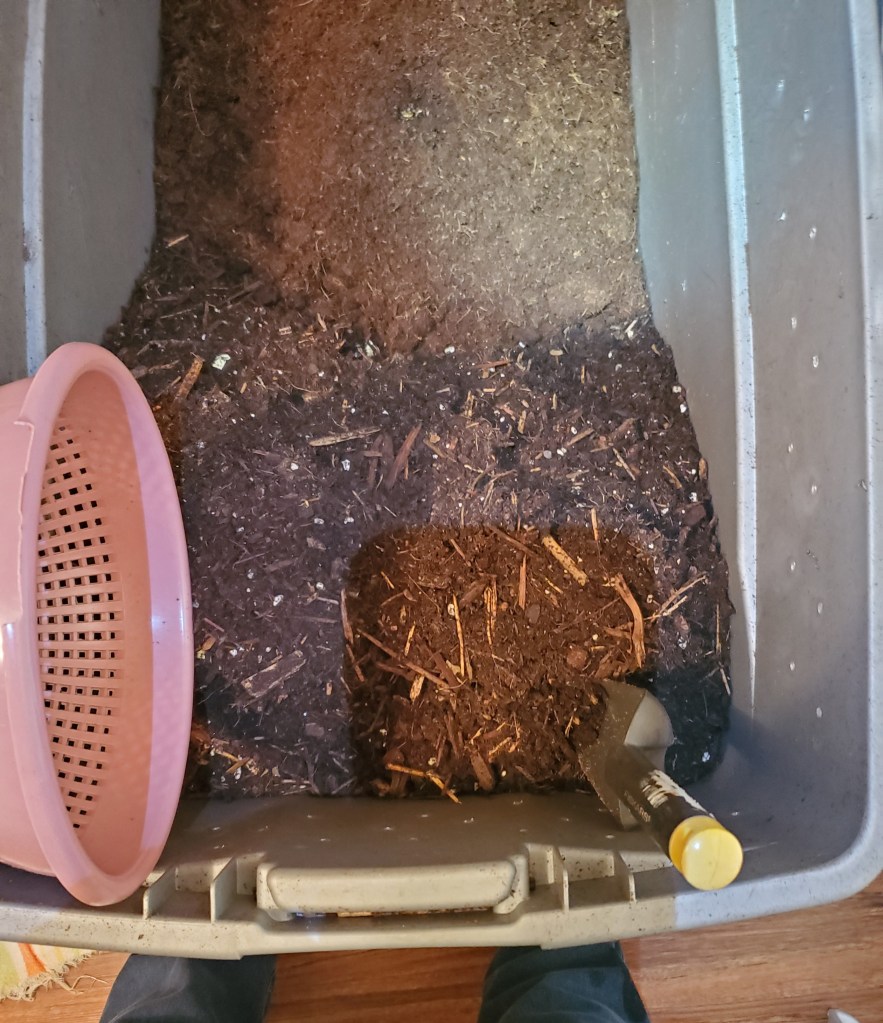
As I dug and sifted colander upon colander of bedding, I recycled a goodly amount of the wood bits back into the bin. The wood has several purposes: 1) moisture – the wood stays moist longer than the “dirt” so it helps keep the moisture level in the bin steady, 2) aeration – the wood keeps the bedding from getting too compacted, 3) nutrition – wood balances the carbon-to-nitrogen ratio, supporting a healthier environment for the worms, 4) entertainment – what worm wants to wiggle in a straight line when it can twist and turn around bits of wood obstacles? I mean, how boring would that be?
LOL, I’m just kidding about the last one!
It took some doing but I finally got down to the bottom of the bin.
I wish I could show you the difference in the richness of the “dirt” I removed compared to the new dirt I put in a couple of weeks ago. The camera just couldn’t pick it up though so you’ll just have to believe me when I say I can just envision some future plant closing its eyes in wonder and saying “AHHHH” when I use this stuff in the garden.
In the end, I got 4 gallon-size bags of lovely, luscious worm poop and 8 – 10 gallons of some of the loveliest compost ever. I’ll mix the compost into my garden soil at the beginning of the season and use the Gold as side dressing for my herbs, trees, and other perennials.

In preparation for the final step of this refreshening, I am re-hydrating two more bricks of coconut coir. Having learned lessons from Part 1, I put these bricks in a nice, roomy 5-gallon bucket. It will take a couple of days before I can go on to Part 3.
This project is almost done!
ONE OF MY FAVORITE THINGS
Last night, after I got home from work, I got to do one of my favorite things.
I canned Chicken!
I think it’s a favorite thing to can because it’s also the easiest thing to can. Now that I’m using my Nesco Smart Pressure Canner, it’s even easier, too!
Here’s all it takes to can chicken:
COLLECT THE SUPPLIES
4 wide-mouth pint canning jars (that’s how many fit in my canner)
4 pounds (ish) of boneless, skinless chicken breast (you can do thighs too)
Salt

I’ve been buying boneless breasts and thighs over the past few months for this project.
PACK THE JARS
Shove a whole chicken breast in each jar – squish it in there real good – leaving an inch of space at the top of the jar. Add some smaller pieces if the jar isn’t quite full. Add 1/2 teaspoon of salt to each jar.
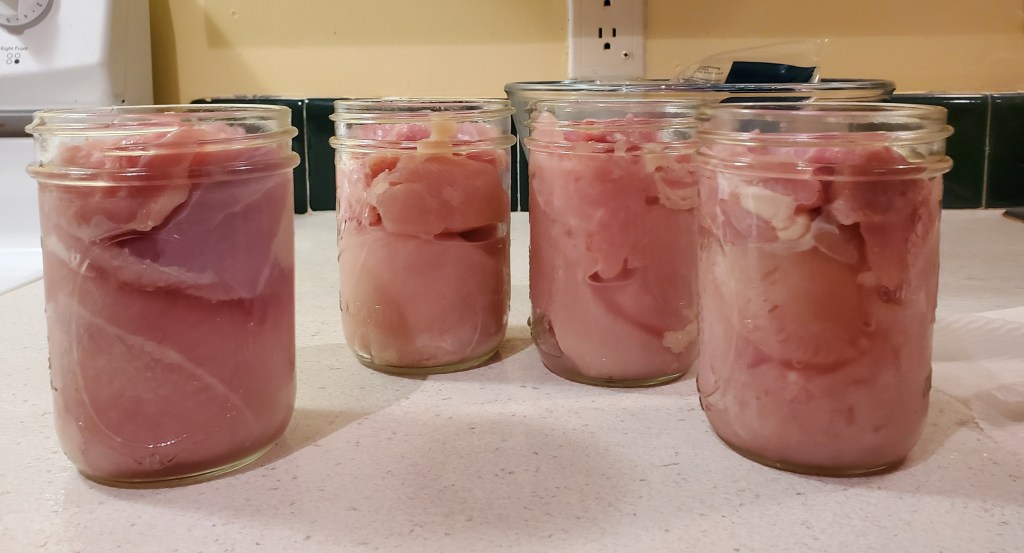
Packed with chicken
Wipe the rims and put on the lid and the ring.
Put the jars in the Nesco electric canner. Add 8 cups of water to canner. Set the timer to 75 minutes (90 for quarts).
PROCESS
Once the canner is up to pressure, the Canner will beep to indicate when to switch the valve from Exhaust to Airtight. At that point, my work is done! I don’t need to do anything else for 2 1/2 hours or so — when it’s time to unload the jars from the canner.
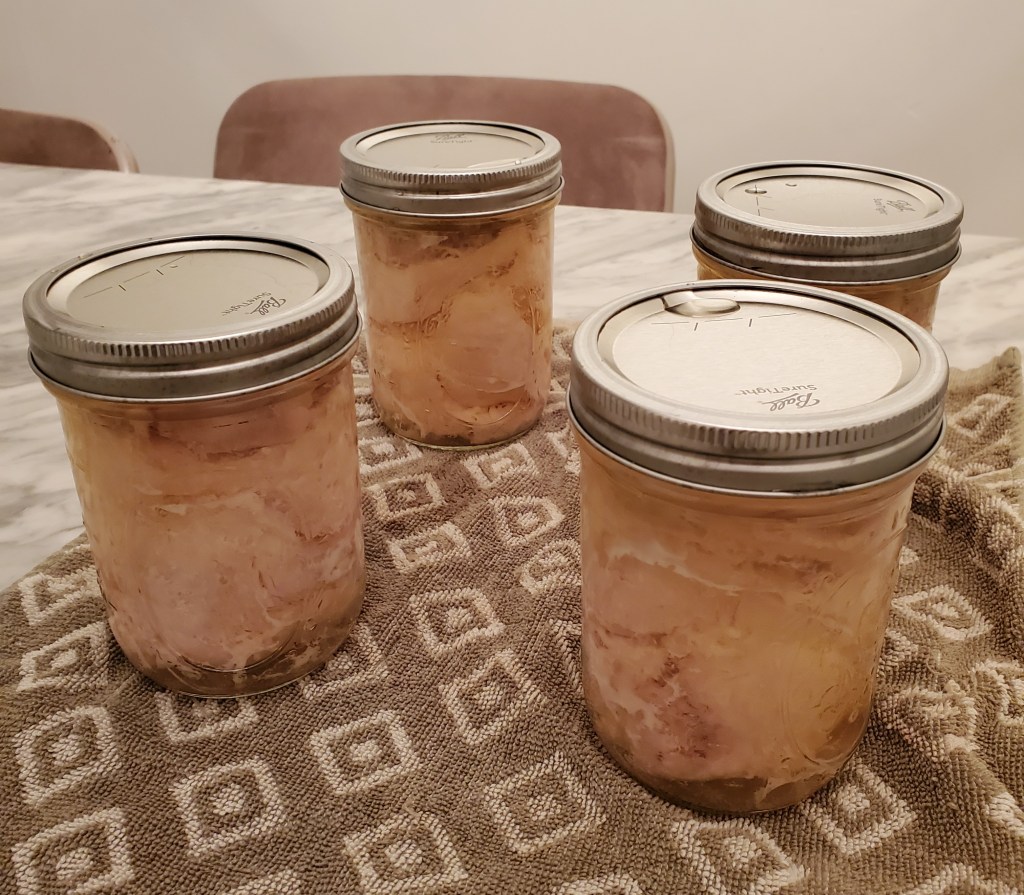
With so little effort, I have shelf stable meat to use in any recipe that calls for cooked chicken. Each pint jar holds about a pound of chicken (a quart holds two pounds).
Do you see why it’s my favorite thing to can?
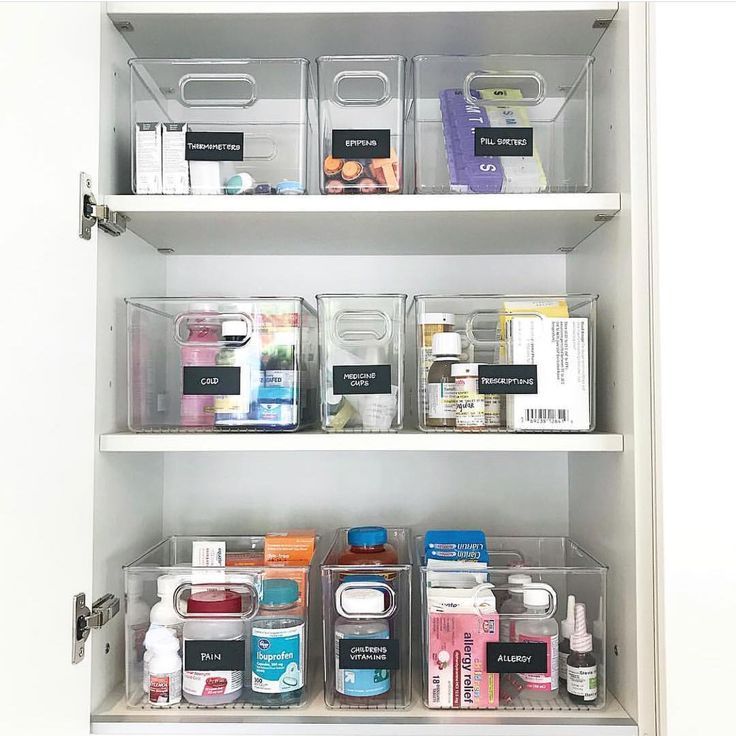
TAKE STOCK
January is a good time to take stock of where you are in your temporal preparedness.
This week, since we are in the middle of sick season, go through your home medicine cabinet. Discard expired items, inventory what you have on hand, and replenish supplies you are almost out of. Organize everything so you can find it when you need it.
What medicines should you include in your medicine cabinet?
- Your prescription medications (discard any leftovers you are no longer using)
- Acetaminophen and ibuprofen for pain and fever relief.
- Allergy medicine and allergy eye drops (we are in the South after all)
- Regular eye drops
- Calamine lotion, an antihistamine cream or spray, or hydrocortisone cream for itchy skin or allergic reactions
- Antibiotic ointment for cuts and scrapes
- Decongestants and cough drops for cold or flu symptoms
- Activated charcoal for accidental poisoning
- Medicine for digestive upset, such as calcium carbonate for heartburn, antacids for indigestion, and antidiarrhea medicine
- Phenazopyridine (brand name Azo) to relieve the pain and symptoms of the occasional bladder infection until you can see a doctor
In addition to basic medicines, be sure you have these basic supplies on hand (and that they are not as old as your children are):
- Adhesive bandages, gauze bandages
- Cotton balls and Q-tips
- Alcohol and hydrogen peroxide
- Soap
- Thermometer
- Tweezers for splinter removal
- Tick Twister for tick removal
- Safety pins and scissors
- Medical exam gloves
- Nail clippers
- Pill cutter
- If you wear glasses, keep an eyeglass repair kit on hand
- If you wear contacts, you also need contact lens cleaner and solutions
- Everyday dental basics, like toothbrushes, toothpaste, mouthwash, and floss
What other items do you think should be in our medicine cabinets?


THE MEANING OF CHRISTMAS
C is for the child born that night to be our light.
H is for holy is His name.
R is for rejoice with gladness and joy.
I is for Immanuel, God with us.
S is for the star that led the Wise men to Him.
T is for the truth and grace that was sent our way.
M is for Mother Mary laying him in swaddling clothes in the manger.
A is for angels singing songs of joy.
S is for salvation.
by Johnnie DesRochers

You must be logged in to post a comment.