
SISTER FOUR’S TURN
After just a week, Sister One (the corn) was sprouted in 10 of the 11 mounds in the Three Sisters Garden. If I don’t see something in that last mound in a few days, I’ll plant more corn seeds. The corn needs to be knee high before it’s time to plant Sisters Two and Three.
This weekend I planted bachelor button and sunflower seeds (Sister Four) in the Three Sisters Garden. These are meant to act as attractants to pollinators and distractors to birds. I think they will add a nice touch of color too.
In other garden news, the flower seeds I planted in the brick bed last weekend have also sprouted and we removed the plastic from the hoop house greenhouse.
Originally, I intended the hoop house to be dual purpose. In the Spring and late Fall it would be used as a greenhouse. In the summer it would be used as a chicken tractor to raise meat birds. The meat birds did not come to fruition this year though. Perhaps next year? In the meantime, one of Oscar’s projects this summer is to put doors on each end and cover the cattle panel with hardware cloth.
It was a delight to open my last container of strawberry freezer jam the end of February and enjoy that fresh strawberry flavor. So, the fact that it’s strawberry season here now, you can bet I went to my favorite strawberry farm this weekend. I’ve been getting strawberries from Kildee Farm in Ramseur, North Carolina, for the better part of a decade. They have always provided gorgeous, ripe, tasty strawberries.
I purchased three flats (three gallons) of strawberries. Yes, my zeal, as usual, overcame my good sense. Nevertheless, they are home and I’ve been working to get them processed as soon as possible.
My first strawberry activity was to load up the dehydrator.
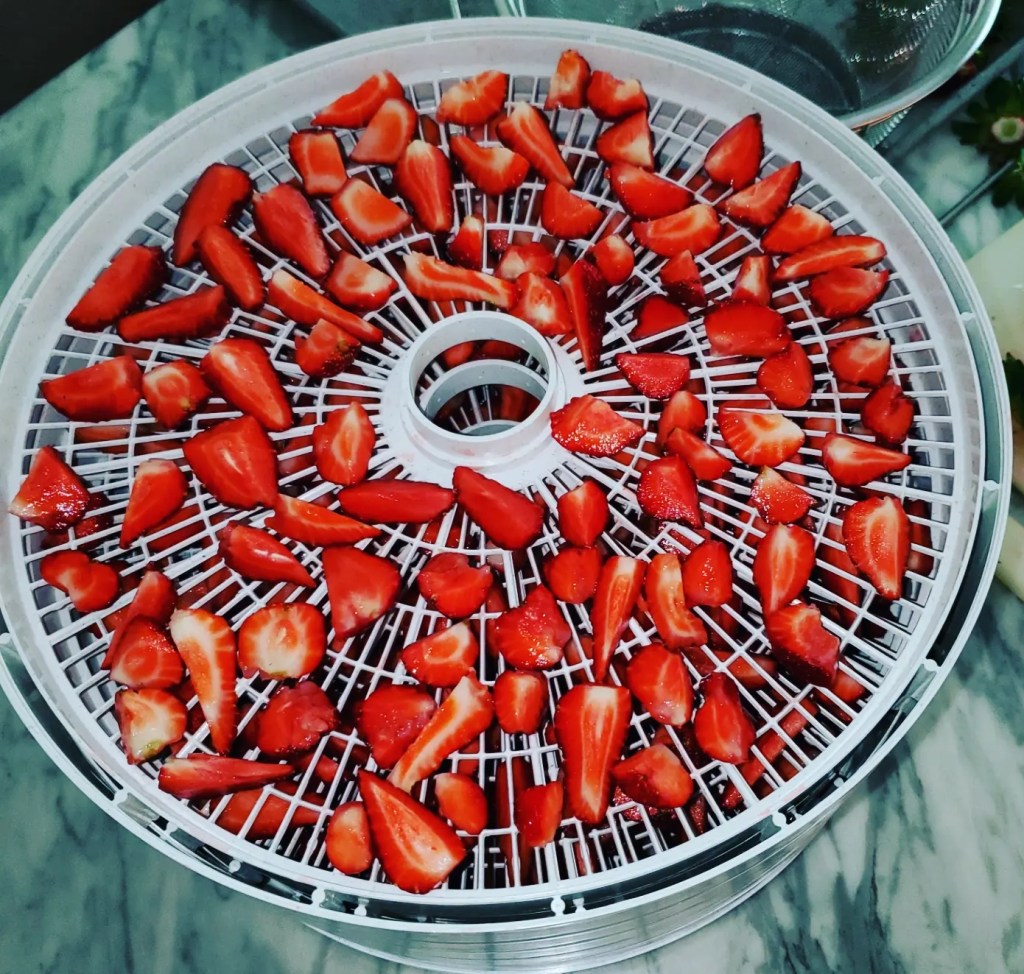
Oh, my goodness, the smell in the house was divine!
My daughter asked, “You can smell them?” knowing that there is not much I can smell after Covid. But yes! I could smell them while they were processing in the dehydrator and enjoyed every minute.
The next morning, I emptied the trays and am now the proud owner of two snack-size bags of dehydrated strawberries.

Getting two small baggies out of 2/3 of a flat of strawberries may not seem like much but each little nugget packs a powerful flavor punch. Not only are these great to snack on, but they are also useful additions to cake, cookies, muffins, pancakes, salads, and other dishes. No, these two baggies won’t last until next season, but I’m not done with the dehydrator!
The second strawberry project was to make jam. I don’t usually make cooked jam as, somehow, I always manage to make a mistake. I wanted to try again so I’ll have jam on my shelf rather than taking up freezer space (though the freezer jam tastes so much fresher!). This time was no exception in the mistake department. Let’s just say, we’ll see if I have jam or syrup.
I have about a gallon and 1/4 left to process but they’ll have to be done after work this week.
Luncheon menu – this week, the worms got a smorgasbord of cauliflower stems and florets, pea plant thinnings, and strawberry trimmings. Last week’s lunch was all gone so I think I’ll check mid-week to see if I’ve given them enough food. I spritzed their bin with a little water as it seemed a little dry to me. Last time I over-wetted it, so I used my spray bottle judiciously.
The chickens are doing well and laying 6 – 8 blue, green, sage, and brown eggs a day. This week I sold five dozen eggs. That money goes straight back into buying chicken food.
There were requests for another three dozen, but the buyers didn’t show up. That’s okay, my eggs never last more than two weeks from lay. On the other hand, grocery store eggs can legally be two months old by the time you buy them from the supermarket).
Gosh, I wish I could eat eggs!
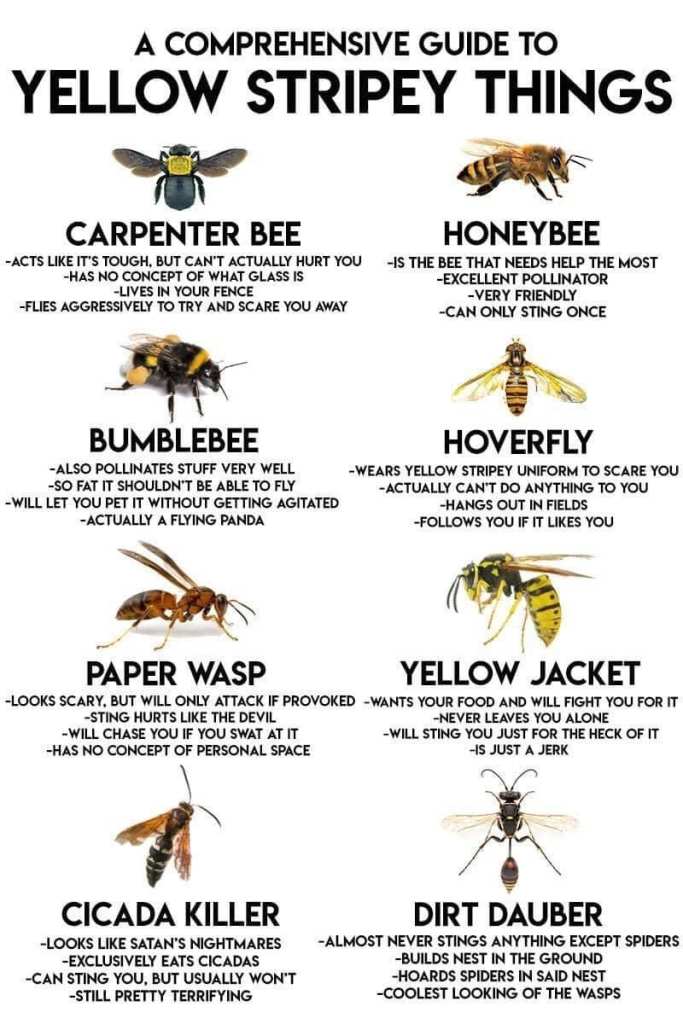
YELLOW STRIPEY THINGS
The bugs own the South. Most I leave alone as long as they leave me alone. Except mosquitos. And ticks. Those must go! When some of the yellow stripey bugs are flying and buzzing around you, sometimes it’s hard to know whether to be calm or to exterminate. This guide might help. Oh, and stay calm. Always stay calm. Sometimes as you rapidly leave the area.
ONE SISTER IS DONE
The Three Sisters Garden is taking shape. We spent a few weekends putting up a chicken wire fence around the garden space, then transferring dirt into the fenced area and shaping it. We also lined the edges of the area with mulch to reduce the amount of lawn that tries to sneak back into the area.
This weekend, we planted Sister Corn. We planted 4 sets of corn seeds around a ten-inch circle at the top of our 11 raised mounds. We put two corn seeds per planting hole to ensure germination. If everything sprouts, we’ll have to do some thinning, but that’s okay, the chickens will eat the extras.
Once the corn is about knee high, I will plant the other two sisters: beans and squash.
Next weekend, though, I am going to add a fourth sister – sunflowers. It was something that was suggested to attract pollinators and distract birds. Besides, it will be nice to see that bright spot of yellow in that section of the yard.
I bought a couple of already started flowers (a little instant gratification is wonderful in the garden) and planted them at either end of the brick bed. In between the two flowers, I scattered various flower seeds. That bed is being used as a flower garden this year to give the area a break from vegetable-eating pests.
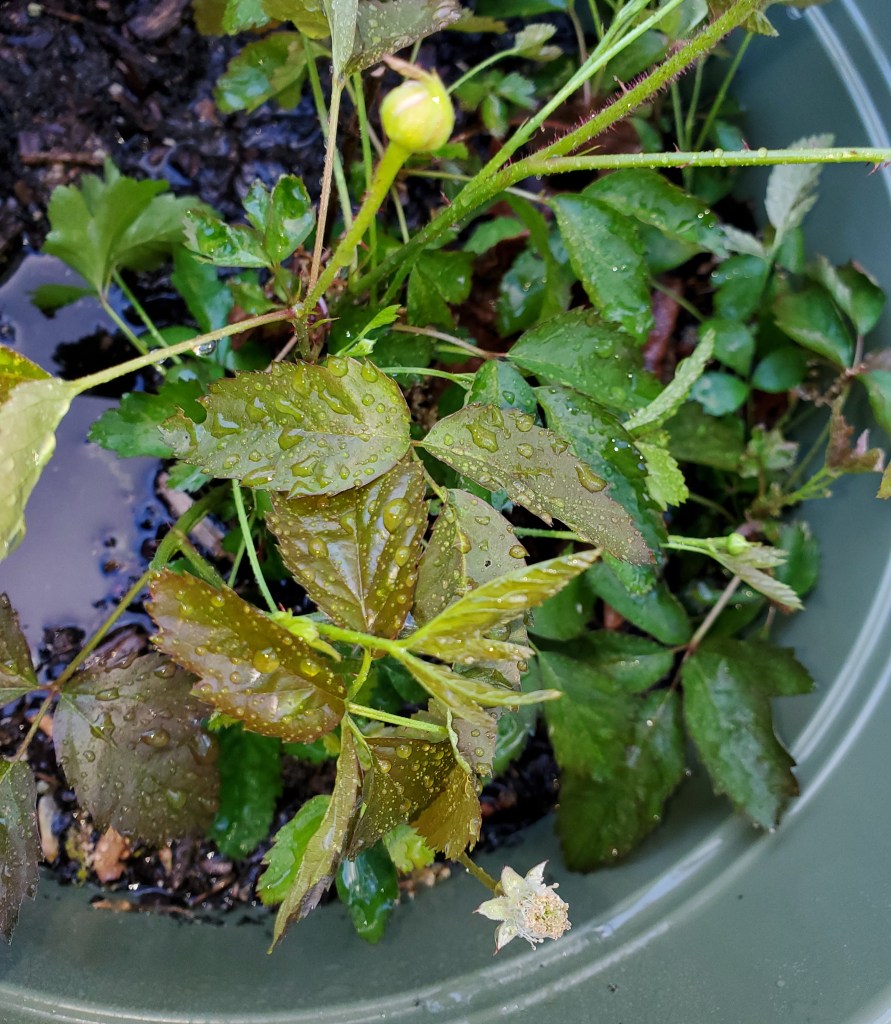
The apple trees and boysenberries are now fully leafed out. There were even flowers on one of the second year boysenberry bushes! Dare I hope for berries this year?
The Great Worm Rebellion
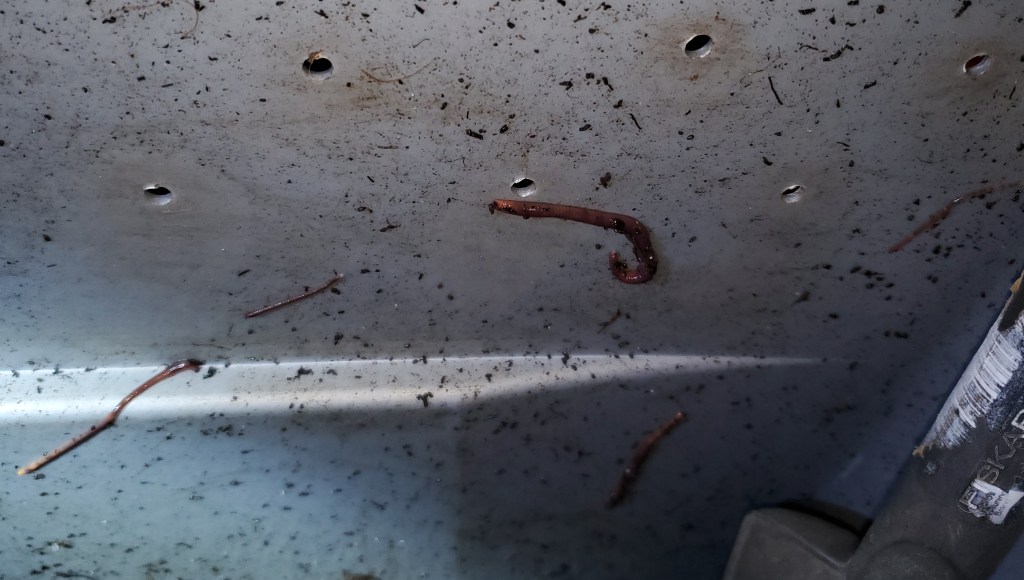
I received my moisture meter Monday, a couple days after I expressed concern about my ability to keep a happy worm habitat. When I opened their bin to check the moisture and Ph level, there were, what seemed like, a hundred worms (or more?) trying to get out!
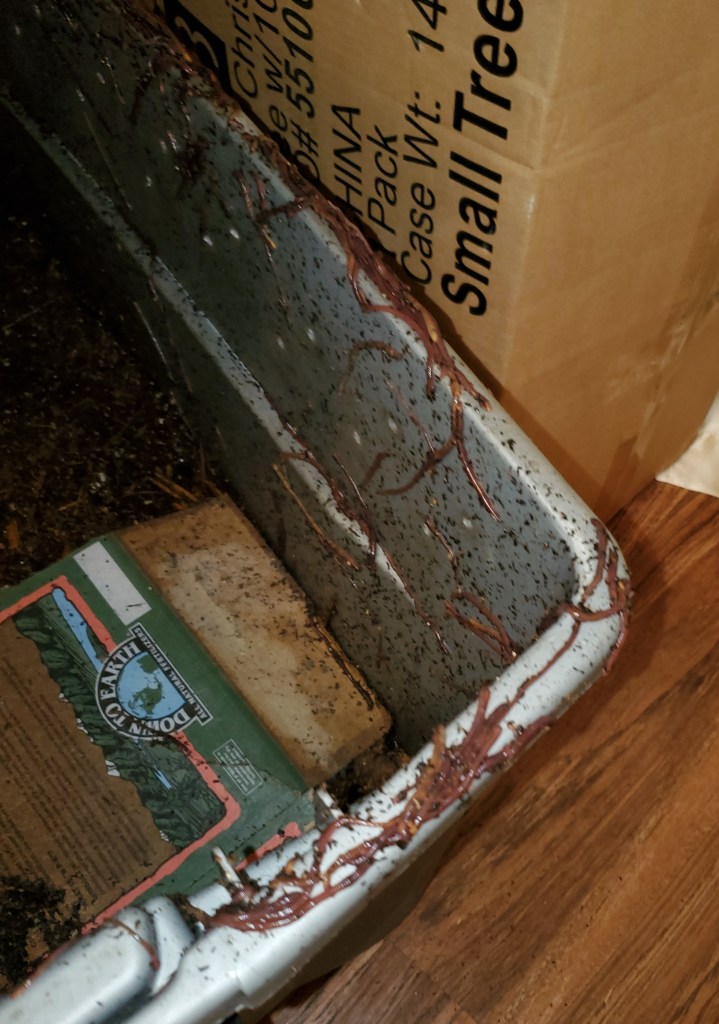
The meter showed that the bin was on the high end of moist, but not wet. Nothing else was wrong / missing so, apparently, that was just too much, and they didn’t like it. There were too many squishy worm bodies than what I could handle bare-handed (shudder), so I got a glove and picked every one of them off and put them back on the dirt. Then, for a couple of hours, I left the lid off to help dry the area a bit while leaving the overhead light turned on so they wouldn’t climb out (they don’t like the light). The next evening, they were still climbing so I did the same thing. By Wednesday, they were apparently happy again as there was no one climbing the walls. They’ve been fine ever since.
The days have been steadily heating up and it won’t be long before we won’t be able to spend much time working on outside projects, so we are steadily chipping away at them. I have company coming in a few weeks though so maybe it’s not so bad that I pay a little attention to the inside of the house!
EASY FOOD STORAGE
We’ve all noticed the empty shelves at the grocery store and the rapidly rising prices – of everything. This may be disconcerting if you have not been keeping a stocked pantry.
We have become accustomed to running to the store every week; sometimes more frequently if we run out of something or want a quick dinner of a rotisserie chicken and a bag of salad. However, we’ve been counseled to store food so that when hard times / food shortages / illness / natural disasters happen, we will still be able to feed our families.
Isn’t that hording? No! This is not like in the pandemic when some people cleared the shelves of toilet paper, requiring the grocery stores to put a limit on how much you could purchase. You are not going to leave this food on your shelf ’til the end of time. You are just eating what you purchased a few months ago rather than what you picked up today.
How much food storage should you keep? Ideally, a year supply of food. That, though, can be really overwhelming – and expensive – especially if you are just starting out. So, if you can, build a storage of two weeks, then a month, then three months, and so on. Before you know it, you will have a reasonable supply of food to get you through many of the miseries and afflictions that come along.
Would you like an easy way to start gathering your food storage? Something that will not break the budget?
Here is one suggestion: Set a goal to buy 5 cans of food for storage each week. One week it can be a variety of corn, tuna, pinto beans, soup, fruit cocktail. The next week it could be potatoes, chicken, green beans, peaches, yams, or maybe baked beans, peas, tomatoes, pears, beef stew.
Continue purchasing a variety of five cans of food each week. In a year, you’ll have 260 cans of food. The food stored will keep your tummy full and will be diverse enough to provide you with necessary nutrients.
Canned foods are still relatively affordable. Five cans a week are rarely going to break the budget. Five cans when you have no money for food, however, will be golden. But, if you really can’t do five cans, do three. Just do something and do it consistently.
Something’s on sale one week? Hallelujah, buy five cans of that one thing that week. You don’t want to pass up a chance to save money! Remember, the price can’t go up on the food that’s already on your shelf.
Not a meat eater? No problem. Don’t pick up the canned meat. In fact, that falls right into one of the “rules” of food storage – store what you eat. In other words, don’t buy canned beets if you don’t eat beets.
As you start building your food storage this way, eventually you will identify other items that would pair nicely with your canned food. That’s when you are ready to start buying pasta, condiments like mayonnaise and ketchup, or maybe baking items like flour, sugar, baking powder, etc. Don’t worry about that until you are ready to take that step though.
This is just a place to start. It’s easy. It’s inexpensive. It’s do-able.

FEEDING TIME FOR THE CRITTERS
The new critters have been here for a week and it’s time to feed them.
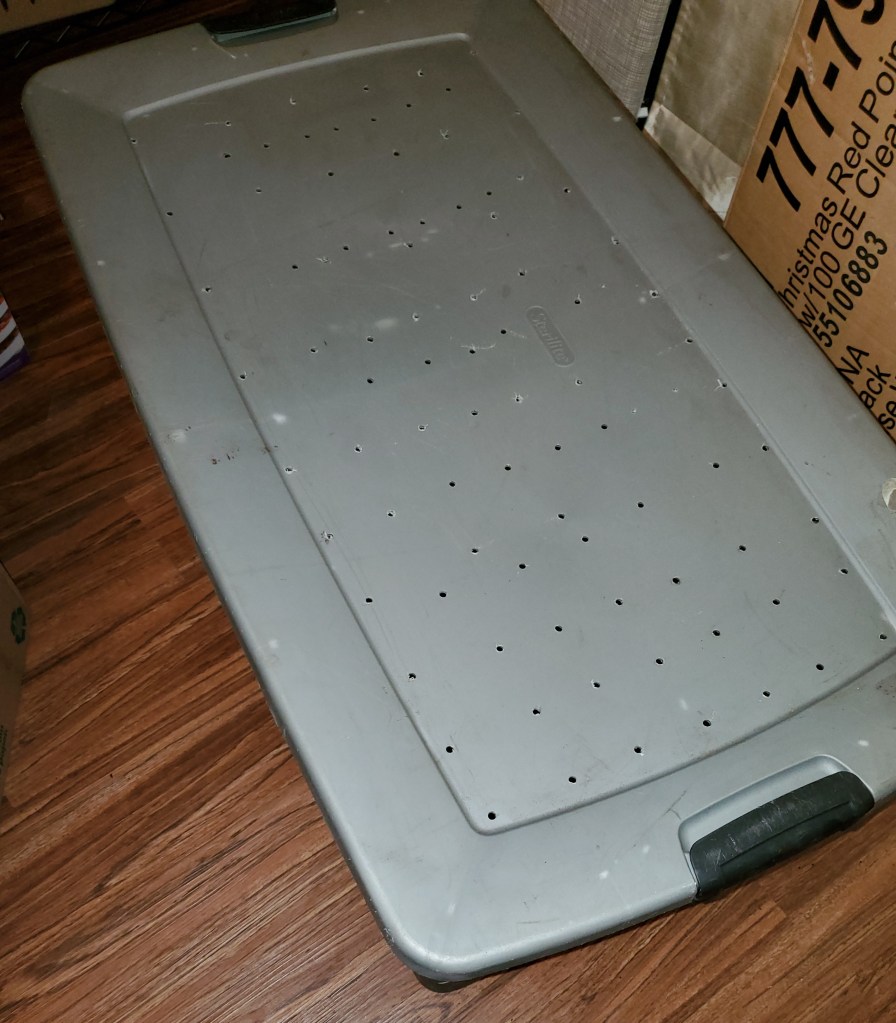
Our new adventure is WORMS. Yes, we have delved into the world of vermicomposting. It was something on my list of eventual To-do’s but a generous lady gifted me with an established worm bin, so I was able to get started now instead of later.
Why worms?
Easy to house. You can buy a fancy worm bin for $100 – $150 but really all you need is a large plastic tote costing around $20. There are a few variations to doing this but click Here for a video showing how easy it is to make an inexpensive worm bin from a plastic tote. My bin is in the back room since I don’t have a good place for it outside. That’s okay though because, done right, worms don’t smell. They don’t like it too hot or too cold and, though we live in what is considered a temperate area, it does get above and below their comfort zone. They tolerate 40- to 90- degrees F but like it best between 60- and 80-degrees F.
Easy to take care for. You feed the worms about once a week. Fluff up their environment a bit. Keep the moisture level right. Then leave them alone.
Easy to feed. You can buy worm food but there’s no need as they prefer food scraps and leftovers. They eat fruits and vegetables (even banana peels!), eggshells, cardboard, and shredded paper. Starchy foods take longer to break down so you should limit the pasta, pancakes, pizza, bread, rice, and potatoes (hmm, come to think of it, that’s the same for humans). Do not feed them spicy, salty, greasy or fatty foods, meat, dairy, eggs, citrus, or pet waste.
Best of all, worms make great fertilizer! This is a good time to have a worm bin with the price of fertilizer being nearly triple what it was a year ago. While I don’t need it on a large scale like big farmers do, being able to produce my own fertilizer is a great boon.
Today’s lunch
We opened the bin and stirred the dirt around a bit to aerate it, monitored how much they ate of last week’s food, and checked the health of the worm population.
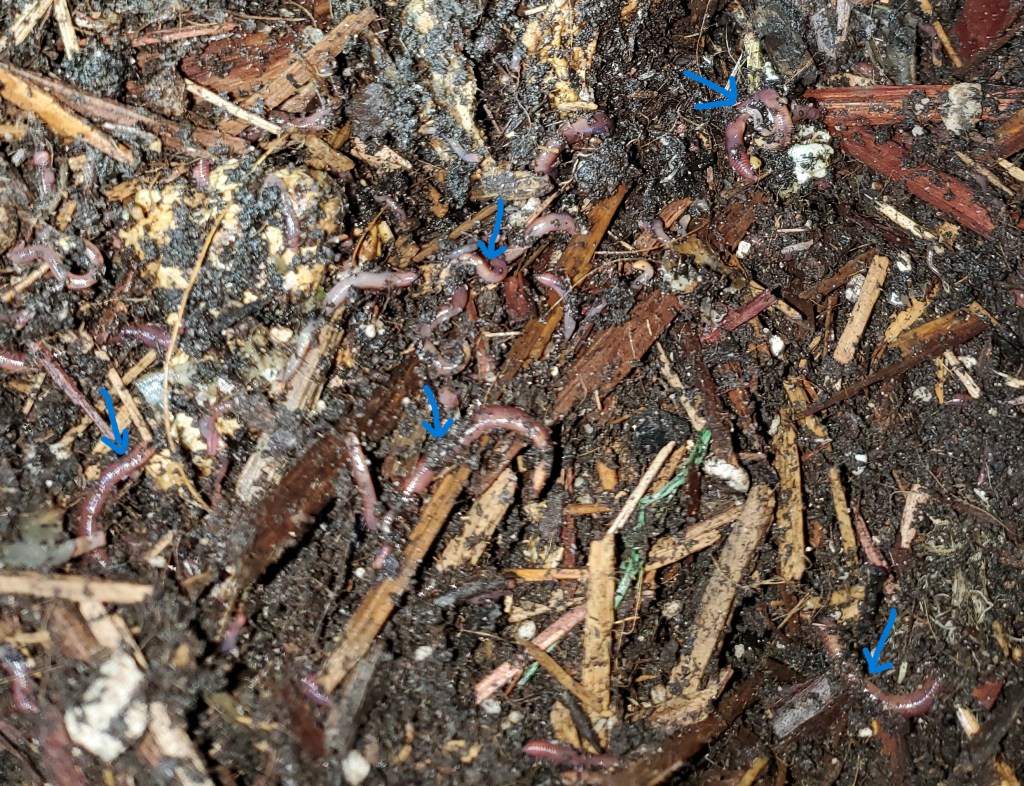
We had some climbing up the side of the bin, which is an indication that something is not right in their environment. Either it’s too wet, or too dry, or there’s not enough food. Their previous keeper had been doing this for so long she just knew what they needed. However, I am not at that stage so I’m going to buy a tool that reads the moisture, temperature, and PH levels so I can keep them happy. A happy worm is a breeding, and pooping, worm.
I dug a hole in the dirt, emptied the food I had collected for them into it, and completely covered the food with dirt. You cover the food to eliminate the smell of decomposing food which, besides being unpleasant, attracts flies and gnats. That is not good for the worms.

I added a bit of new soil and, thinking it seemed a little dry in the bin, I added some water. This is the reason why I want to invest in the gadget. Right now, it’s just a guess about how dry is too dry or how wet is too wet. You want to rotate where you put the food each week, so the worms keep moving through the dirt. So, I put a piece of cardboard over the area to mark where their food was placed.

Even after watering, that sprinkle of dirt I added looks much to dry. I think I’ll shred some paper, saturate it in water, squeeze it out, and put it on top.
While keeping worms is supposed to be an easy operation, there will definitely be a learning period. Fortunately, there are a lot of resources out there.
I DIDN’T KNOW YOU COULD DO THAT
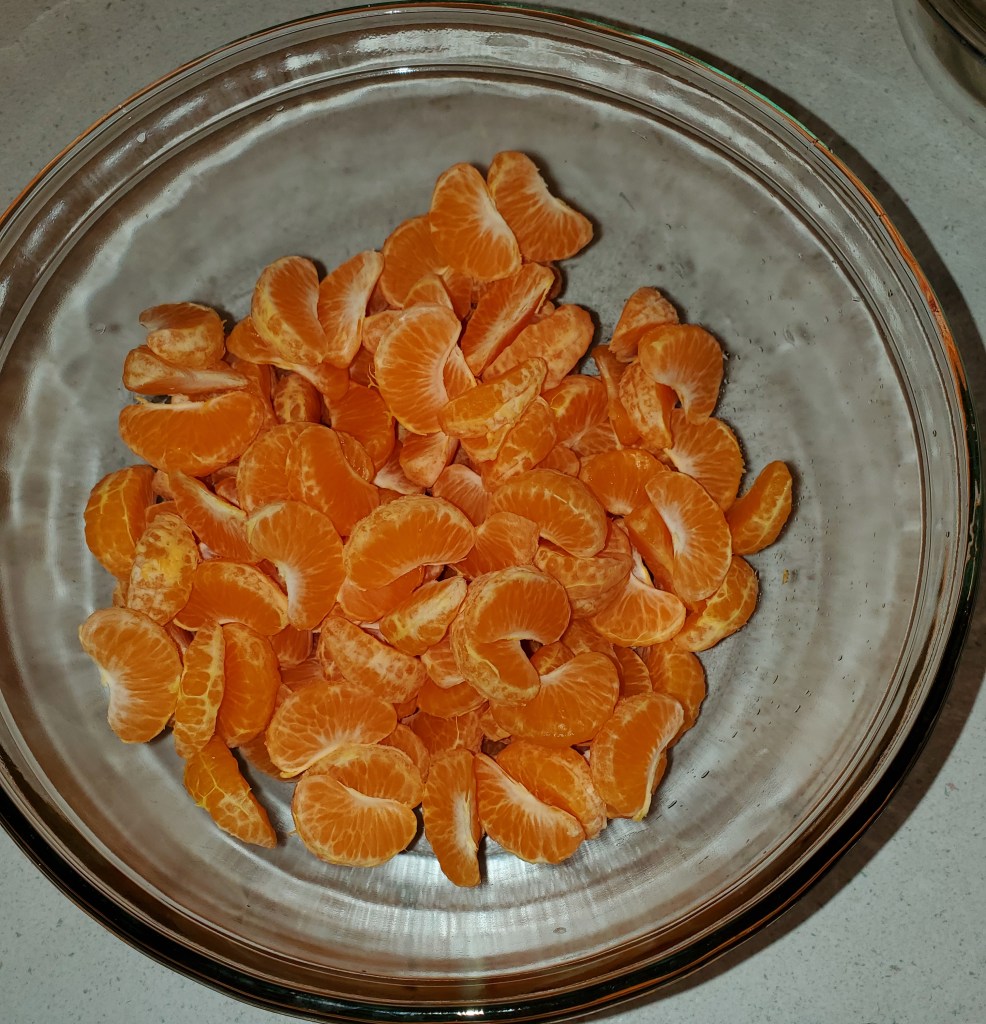
Mandarin oranges are my favorite citrus. When adding fruit to a meal, I reach for a can of mandarin oranges more often than the other canned fruit.
When I was raising my girls in Alaska, the best thing at Christmas was being able to get fresh mandarin oranges. We would plow through a whole case, in a flash!
With the empty shelves of the pandemic, one thing we had a hard time finding was store brand mandarin oranges. Occasionally there were name brand cans, but they were priced and extra dollar a can over the store brand. I was really glad I had a supply of them that carried me through much of that period. Now that I can occasionally get the store brand, the price of course has increased dramatically because of the inflation we are now experiencing.
Imagine my delight to come across several You Tube videos about home canning mandarin oranges, or Cuties! In all my years of canning, I never came across a recipe for canning citrus.
The planets aligned this weekend when I found mandarin oranges on sale. Not a great price, but still worth testing the canning waters.
I bought a three-pound bag and, with Oscar’s help, turned them into canned mandarin oranges in less than an hour.
Canned Mandarin Oranges
While Oscar peeled the mandarins, I started heating a gallon of water in my smallest canning pot, washed the jars and put them in a 200 degree F oven to keep warm, and made a light syrup of 6 cups of water to 1 1/2 cups of sugar.
You can pack them in plain water, but some commenters indicated the oranges would lose their flavor when packed in water.
As we broke them into segments (you can pack them whole, but I like segments), we picked off any strings and excess pith. If you skip this step, you apparently will end up with bitter oranges.

I’m not sure how, but we did a good job refraining from eating them as we prepared them!
I removed each jar from the oven individually and filled them with oranges and the syrup, leaving 1/2-inch headspace. I used a chopstick to remove bubbles and settle everything nicely in the jar.

Then it was just a matter of wiping the rims, putting on the lid and ring and putting them in the pan.
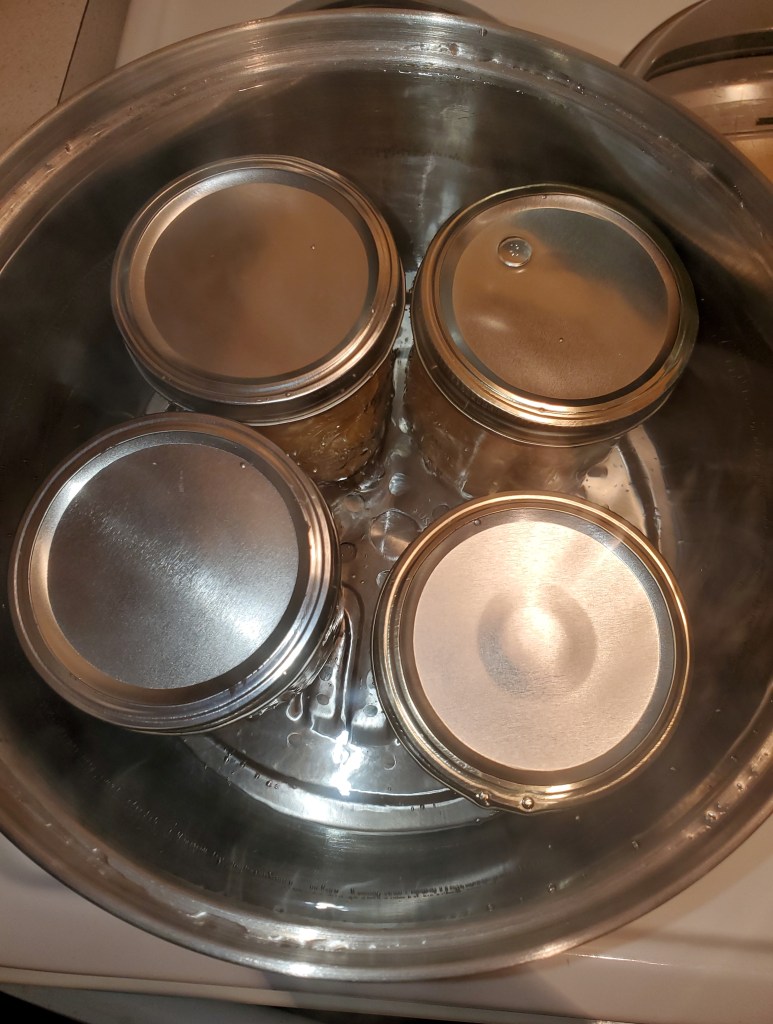
This was brought to a boil and processed for 10 minutes (at my altitude). I was able to do most of the clean up during that time.
Aren’t they beautiful?

I got three full pints and the fourth was about 2/3 full. This was a nice quick project and the cost, even though the oranges were kind of expensive, was still less than buying the store brand at the grocery store.
I look forward to next winter when they are in season and I can, hopefully, get them at a great price.
A NEW ADVENTURE
New critters are coming to the homestead this weekend!
Ooh, the mystery.

Any guesses?
OH, SISTERS
Now that I have finished adding the soil to the new garden space, I looked deeper into the particulars of how to plant my Three Sisters Garden.
Oh my, what a diversity of opinions. I even came across some folks who said, “Don’t do it!”
Apparently, according to some, the original Three Sisters Garden concept was intended for dried varieties of corn and beans, not fresh. However, the original articles I read spoke specifically about Blue Lake runner beans and zucchini.
Rather than give in to dismay and confusion, I chose ONE person to listen to and will follow those instructions. Here, for easy reference when it’s time to start planting (when our overnight temperatures stay in the 50’s later this month, is that video:
I hope it will result in a bumper crop of fresh corn, green beans, zucchini, crookneck squash, and Kabocha pumpkin (another experiment).
ONE PERCENT BETTER
About six months ago I heard a talk at church about how the British cycling team was turned around from its 110-year streak of utter failure to what it is now. In the past two decades since implementing the philosophy of “1% better,” British cyclists have won the Tour de France six times. During the past four Olympic Games, Great Britain has been the most successful country across all cycling disciplines. In the 2021 Tokyo Olympics, the UK won more gold medals in cycling than any other country.
They did this by make small 1% improvements resulting in “the aggregation of marginal gains.” Not only did they make small, continual changes to their equipment and training, but as they went along, they found unexpected areas that needed adjustment, such as nutrition and maintenance. Over time, these tiny improvements added up, providing amazing results.
Now, this talk was not about cycling, per se, but about bettering ourselves. According to James Clear, author of “Atomic Habits,” if you apply the 1% principle each day to a habit or action you are trying to improve, “by the end of a year … you will be 37 times better.”
The “1% better” principle is a mathematical version of baby steps, but I think it also is a more deliberate approach. Further, I think it applies not only to the temporal/physical but also emotional and spiritual aspects of our lives.
Just a little better each day will get us to where/what/how we want to be.
I find that this principle applies to homesteading as much as it does to everything else. I am having to embrace the concept of “1% better” in regard to my homesteading efforts. As the effects of my treatment for Lyme disease are holding me back more and more as time goes on, I find I have even less physical ability to function. The past few months has been more like a drip-drip-drip of the accomplishment faucet, instead of a gushing faucet.
So, my pep talk to myself today is: I can do 1% every week on the homestead and in the end, that will be enough to accomplish what needs to be done.
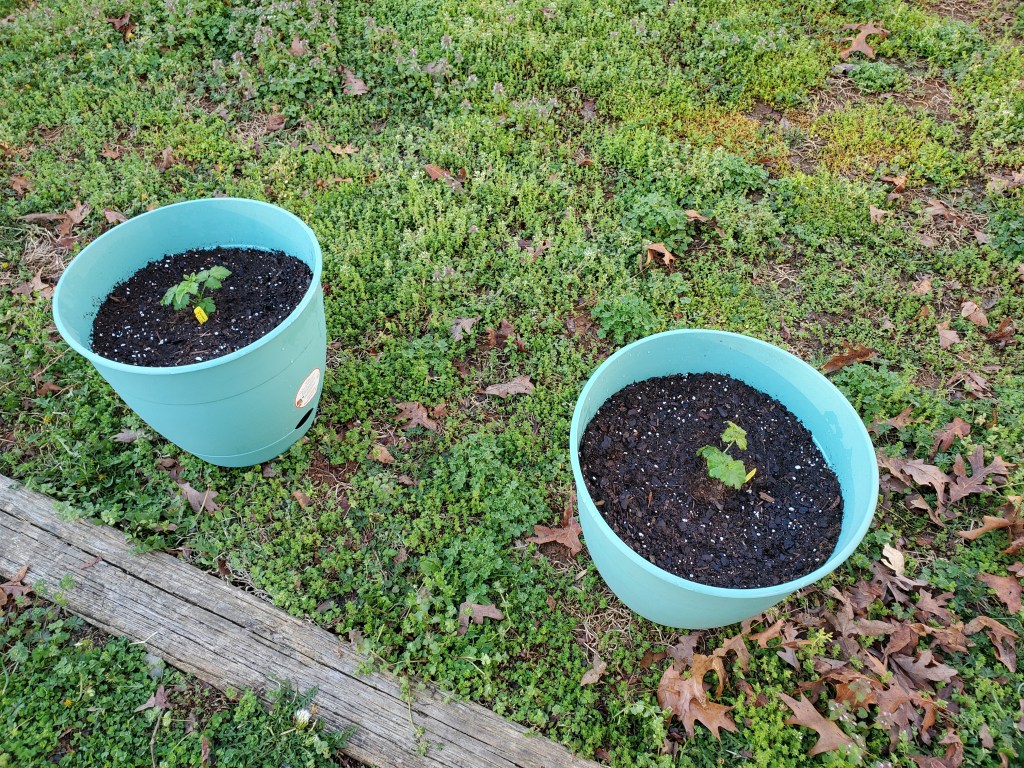
So, the fact that “all” I accomplished this week to make the homestead better was to fertilize the apple trees and boysenberry bushes, plant the new boysenberry plants in their permanent pots, clean the old litter from the chicken coop and put down fresh bedding, lay the last of the cardboard in the Three Sisters Garden area, transplant a few of the seedlings that haven’t died, and plant the Kabocha pumpkin seeds in peat pots?
It is enough.

You must be logged in to post a comment.