FEEDING TIME FOR THE CRITTERS
The new critters have been here for a week and it’s time to feed them.
Our new adventure is WORMS. Yes, we have delved into the world of vermicomposting. It was something on my list of eventual To-do’s but a generous lady gifted me with an established worm bin, so I was able to get started now instead of later.
Why worms?
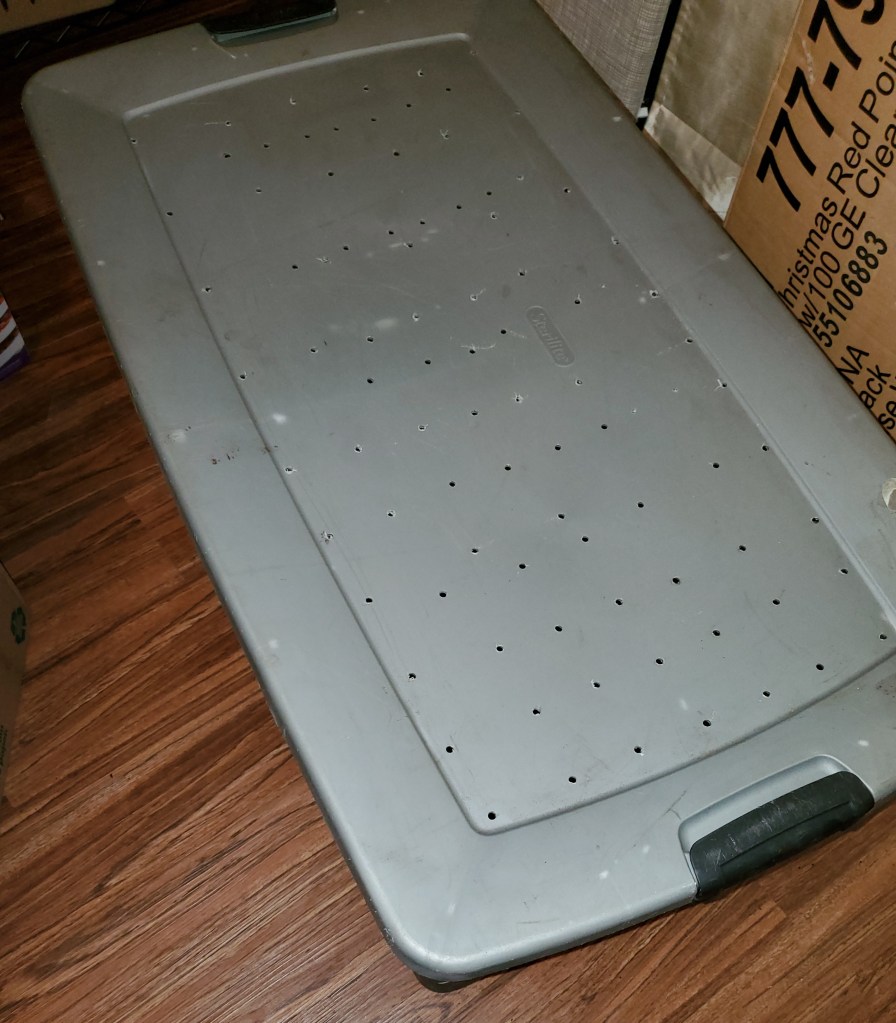
Easy to house. You can buy a fancy worm bin for $100 – $150 but really all you need is a large plastic tote costing around $20. There are a few variations to doing this but click Here for a video showing how easy it is to make an inexpensive worm bin from a plastic tote. My bin is in the back room since I don’t have a good place for it outside. That’s okay though because, done right, worms don’t smell. They don’t like it too hot or too cold and, though we live in what is considered a temperate area, it does get above and below their comfort zone. They tolerate 40- to 90- degrees F but like it best between 60- and 80-degrees F.
Easy to take care for. You feed the worms about once a week. Fluff up their environment a bit. Keep the moisture level right. Then leave them alone.
Easy to feed. You can buy worm food but there’s no need as they prefer food scraps and leftovers. They eat fruits and vegetables (even banana peels!), eggshells, cardboard, and shredded paper. Starchy foods take longer to break down so you should limit the pasta, pancakes, pizza, bread, rice, and potatoes (hmm, come to think of it, that’s the same for humans). Do not feed them spicy, salty, greasy or fatty foods, meat, dairy, eggs, citrus, or pet waste.
Best of all, worms make great fertilizer! This is a good time to have a worm bin with the price of fertilizer being nearly triple what it was a year ago. While I don’t need it on a large scale like big farmers do, being able to produce my own fertilizer is a great boon.
Today’s lunch
We opened the bin and stirred the dirt around a bit to aerate it, monitored how much they ate of last week’s food, and checked the health of the worm population.
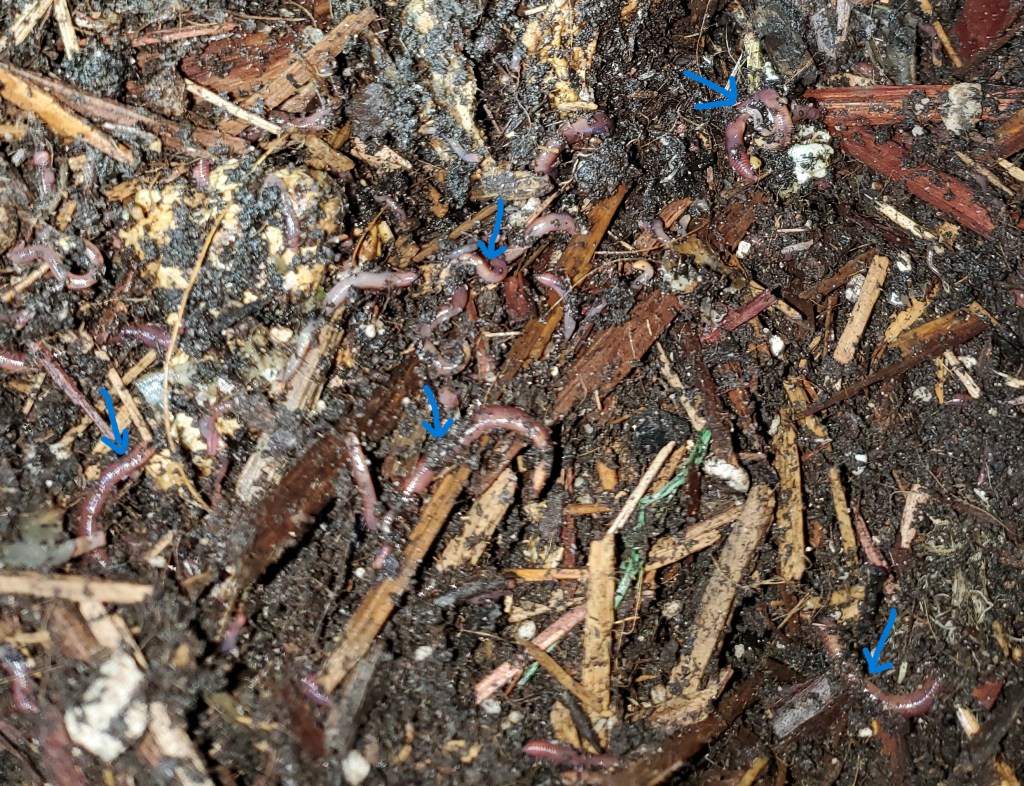
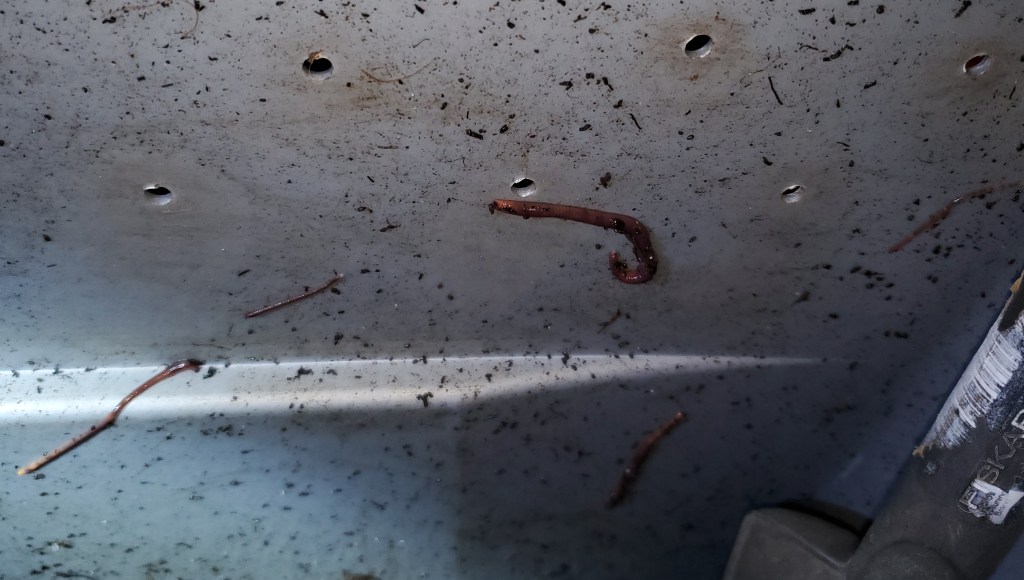
We had some climbing up the side of the bin, which is an indication that something is not right in their environment. Either it’s too wet, or too dry, or there’s not enough food. Their previous keeper had been doing this for so long she just knew what they needed. However, I am not at that stage so I’m going to buy a tool that reads the moisture, temperature, and PH levels so I can keep them happy. A happy worm is a breeding, and pooping, worm.
I dug a hole in the dirt, emptied the food I had collected for them into it, and completely covered the food with dirt. You cover the food to eliminate the smell of decomposing food which, besides being unpleasant, attracts flies and gnats. That is not good for the worms.

I added a bit of new soil and, thinking it seemed a little dry in the bin, I added some water. This is the reason why I want to invest in the gadget. Right now, it’s just a guess about how dry is too dry or how wet is too wet. You want to rotate where you put the food each week, so the worms keep moving through the dirt. So, I put a piece of cardboard over the area to mark where their food was placed.

Even after watering, that sprinkle of dirt I added looks much to dry. I think I’ll shred some paper, saturate it in water, squeeze it out, and put it on top.
While keeping worms is supposed to be an easy operation, there will definitely be a learning period. Fortunately, there are a lot of resources out there.

Intriguing! We move soon to a house with a big garden, and there is so much I’d like to try!
LikeLike
Enjoy your new garden – there are so many things to learn and try!
LikeLike
Pingback: ONE SISTER IS DONE – Two Chickens Homestead