THE DAM BROKE! MAYBE
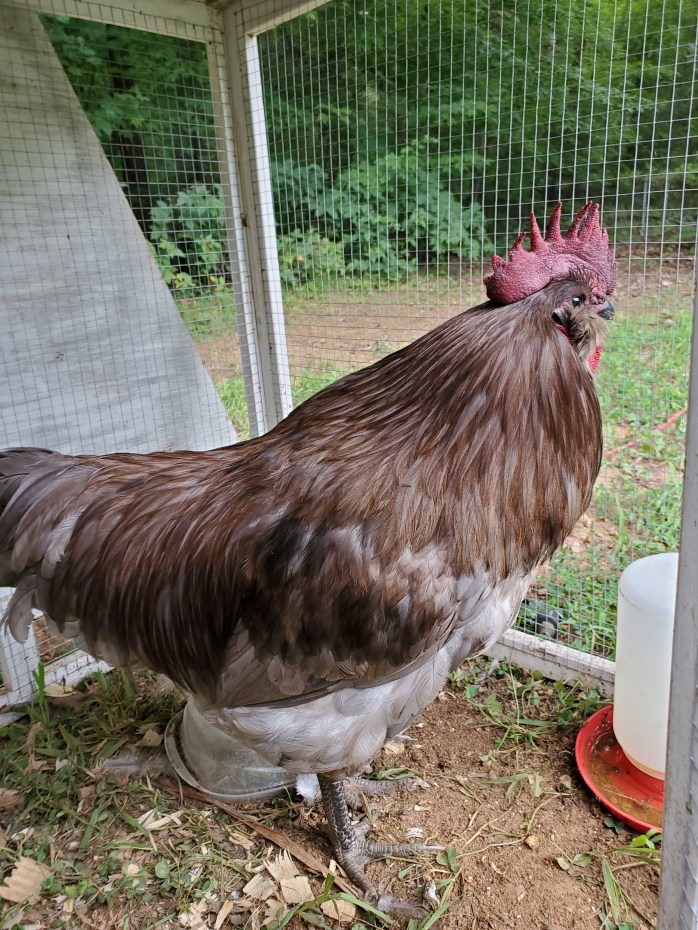
After a 3-month drought, look what we found in the coop yesterday:
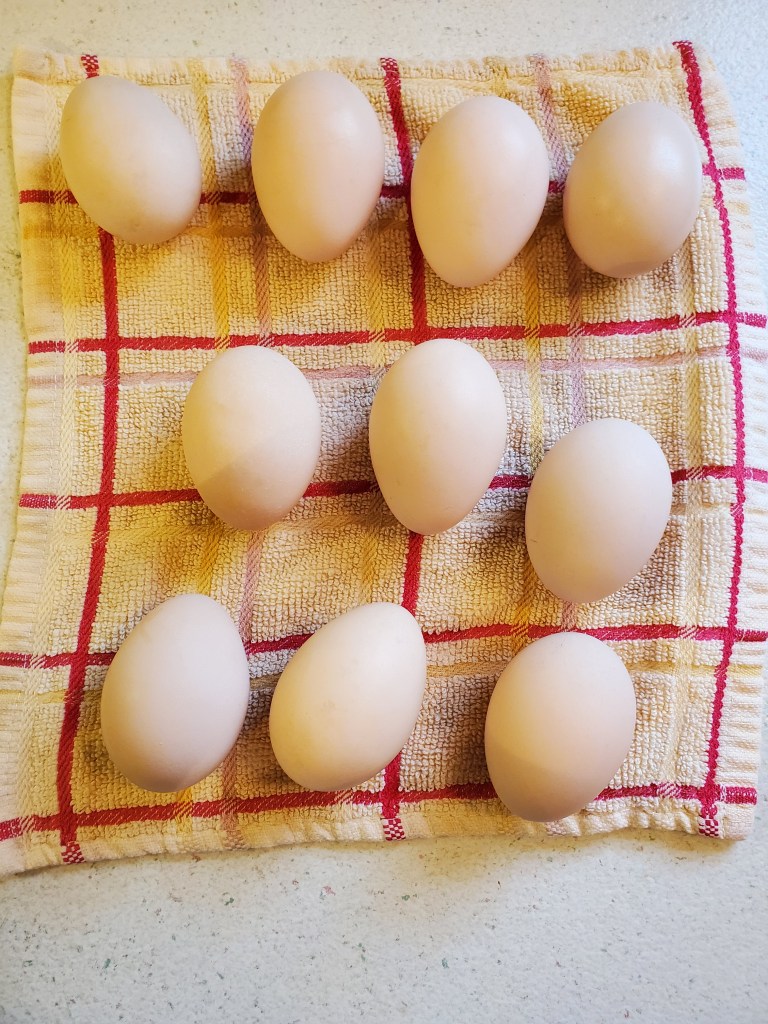
I had given up on ever seeing this flock lay again and, while it looks like only one is laying, dare I hope the others will soon be back on track?
UPDATED MAP
Remember this? This is the OLD plant hardiness map that farmers and gardeners have been using for more than 100 years.

On November 15th, the USDA released their updated plant hardiness map. Click the link to check it out:
In 2012 the USDA used 7983 weather stations to collect data for the previous map. For the 2023 map they used 13,412 weather stations, making it more precise. Because of this and the use of more sophisticated mapping methods, map developers on the project cautioned against attributing updates made to some zones as indicators of global climate change.
While planning your next garden, you will want to check out the new map as there have been significant changes. This is the perfect time to begin getting acquainted with the new map and all the features that are available on the website.
The new map is interactive and provides data down to 1/4-mile. For someone like me, whose property showed as 7b-ish on the old map but, (depending on the resolution), might be closer to 7a, being able to get down to MY STREET was very helpful.
Now, I am smack dab in the middle of zone 8a!
I found a You Tube video from Bootstrap Farmer who does an excellent job of explaining the new map. I found it very informative. Check it out HERE.

GETTING STUFF DONE
I know I’ve not posted much in the past month. I’ve had some health struggles, with increased fatigue and pain, and have only been able to do the bare minimum most days. Today, thankfully, I had enough energy to get some garden and chicken maintenance done.
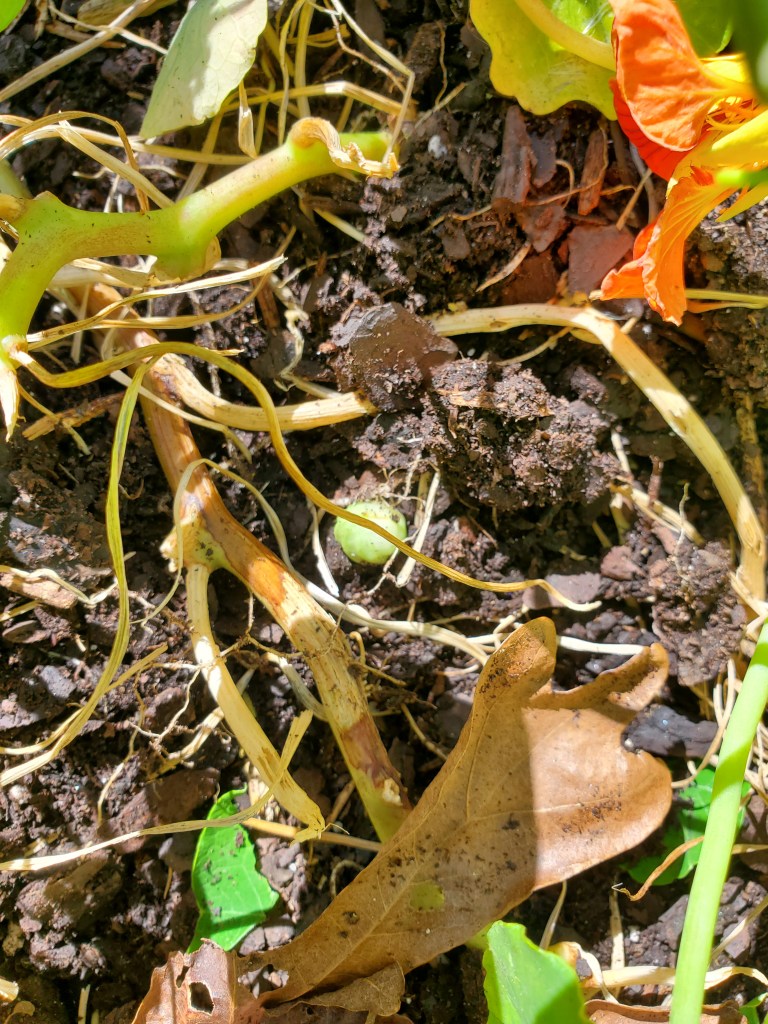
First, I found a nice surprise:
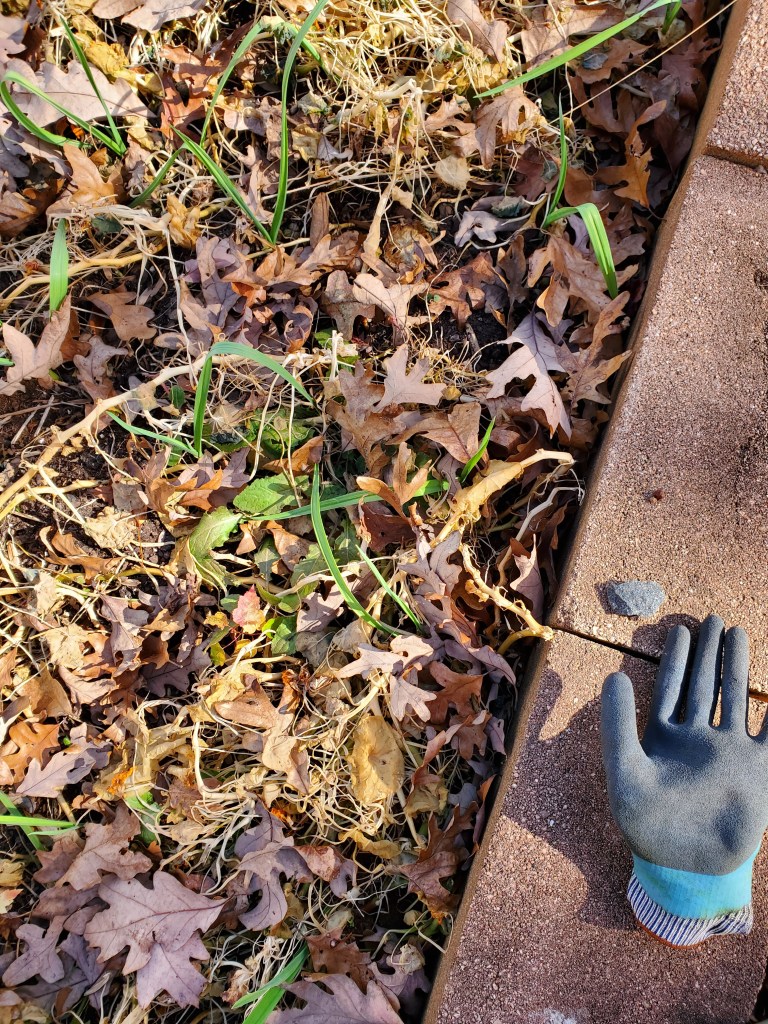
I was excited to see that my garlic is growing!
It’s been just over a month since I planted my garlic. With the weeks of dry weather we’ve had, I was concerned that it wasn’t going to sprout. Just as I planned, though, the nasturtiums created the perfect mulch, and the garlic came up just like it should.
I had four projects in mind for today: 1) transplant and prune the apple trees, 2) prune and move the boysenberry bushes to a new location, 3) clean up some of the mess, and 4) work in the chicken coop.
First, we were going to transplant the apple trees into bigger pots. When Oscar pulled the intended pots out of the greenhouse though, I discovered they were the same size as what the trees were already in. So, we didn’t need to do that job and proceeded to prune the trees.
Pruning really intimidates me and I worried that I’d ruin my three-year-old apple trees just as they are starting to produce. So, yesterday I watched this You Tube video. It gave me the confidence to proceed even though it was not something I had done before. I removed a sucker and a few branches that were crossing over and rubbing on other branches, removed a few inches of new growth so the tree would force its energy away from the tips, and ensured there would be good air flow between the branches. Finally, I top dressed the pots with worm compost.
I also cleaned out some plants that finally bit the dust after the frosts we’ve had over the past couple of weeks. I cleared out the weedy grasses that had invaded my elderberry bushes and fig tree. The fig tree received a bit of a prune also. Then I top dressed those pots with worm compost.
Next, I donned thick leather gloves and pruned the boysenberry canes all the way back to inside their individual pots. I was so happy that the gloves successfully protected me from their vicious thorns. Man, those are nasty and up to this point, nothing I had tried saved me from the painful pricks and irretrievable stickers in my fingers. I put the trimmings in the garbage can, rather than the compost pile, so they don’t take root in areas they are not wanted.
I was running out of steam at this point, so I shelved my plan to move the boysenberries for the time being and focused the remainder of my efforts on the chicken coop.
Since there was a crow in the neighborhood, I let the girls out to free-range for a bit. This is the first time they have been out of their run for many weeks, and they were very vocal in their excitement.
I put another layer of bedding in the coop, so they would have some nice clean wood shavings to sleep in. I made sure they had just the right amount of straw in the nest boxes they have ignored for weeks and weeks (no eggs!). I refilled their dust bath – which they had completely emptied – with straw, peat moss, and diatomaceous earth. I raked two or three chickens’ worth of feathers off the ground. Oscar had raked an even bigger pile three weeks ago so maybe they are nearing the end of their molt for the Fall. Finally, I mixed in some of their new food into their old food to transition them to the new stuff. I hope the new feed will help flip them back into egg-laying mode.
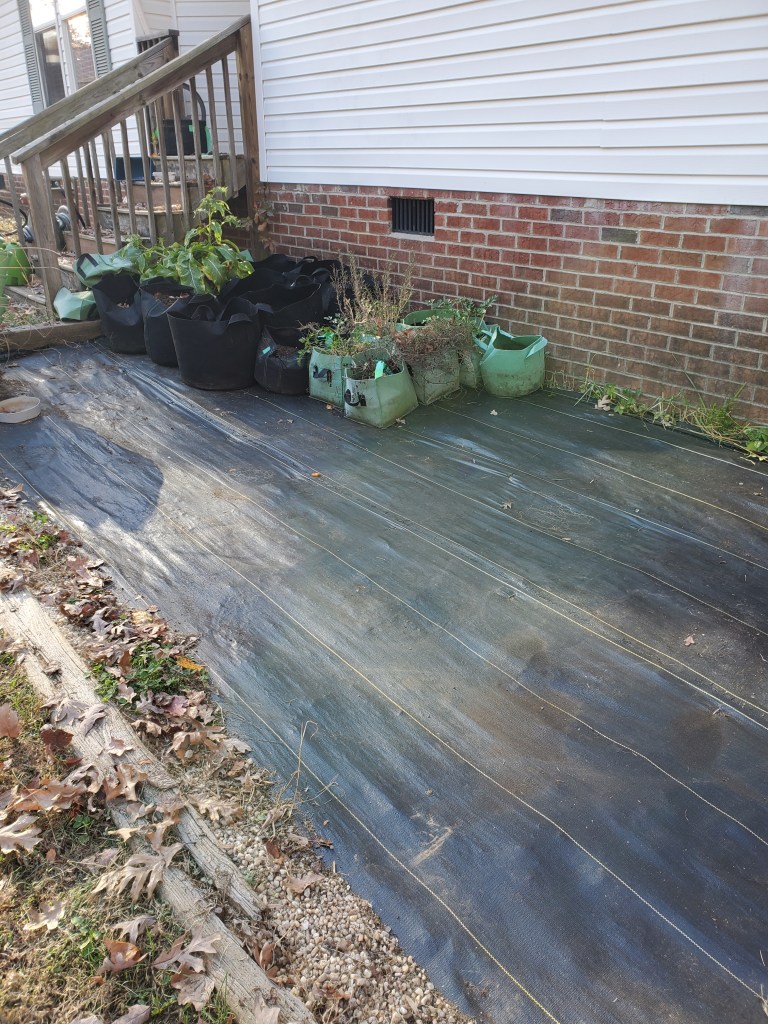
While I did these things, Oscar cleaned up some of the gardening equipment and supplies that were still strewn about the property and swept up debris. The area looks quite a bit better as evidenced by the front garden area:
By this time, we were both starving as we hadn’t eaten lunch, and it was three o’clock, so I came inside the house and made Sheet Pan Nachos. Yum! Yum!

I am really grateful we were able to get so much accomplished.
PICK A PECK OF PEPPER POWDER
One of the new things I grew in the garden this year was Time Bomb Peppers from Hoss Tools.
They are said to have a Scoville rating between green peppers and jalapeno peppers. When I first started picking them, I tested one to check that assessment. Both Oscar and I chewed a bit of the flesh and were disappointed that they seemed to not be much more than a green pepper.
It did not take me long to change my mind about that! That first batch got cleaned out and put in the freezer. That is when I learned there was heat somewhere in them. If you’ve ever removed the seeds from hot peppers, you’ll know the chaos that causes for your breathing. Well, that’s what I experienced when I de-seeded just a handful of these peppers. Then, one day I made a chicken and potato soup for a couple of people with covid. I sliced ONE Time Bomb ultra-thin for the whole pot of soup. Now remember, these things are only an inch or so in diameter. I was expecting just a little bit of flavor from them, but a taste of the broth heated not just my tongue but my whole body – for the rest of the day! (They loved the soup, by the way.)
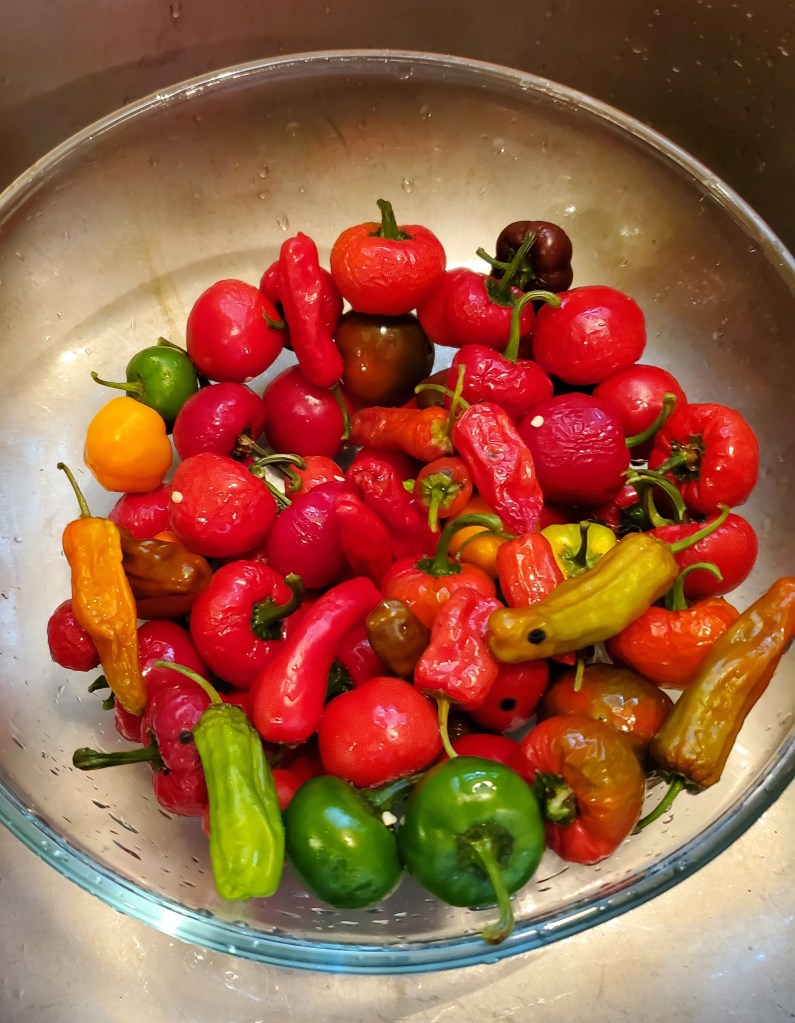
As the season progressed, I just kept collecting piles and piles of peppers in a bowl in the fridge. Then in another bowl. And another. I collected not just the Time Bombs but also some pepperoncini (which I had high hopes of pickling but gave up on that idea early on), and whatever else made it in there.
Finally, I could ignore them no longer. They were overrunning my fridge, and I was out of bowls. It was time to dehydrate them.
The day I decided to process them in the dehydrator, I suited up in what I thought would be adequate armor – gloves, mask and an exhaust fan. My goodness, even with protection, the fumes turned a one-hour project into a three-hour project. I kept having to take breaks to go outside for a few minutes of fresh air and needed several water breaks to ease the sting in my throat. Remind me to get a respirator kit for future pepper processing!

Finally, I got my pepper stash prepped and in the dehydrator.
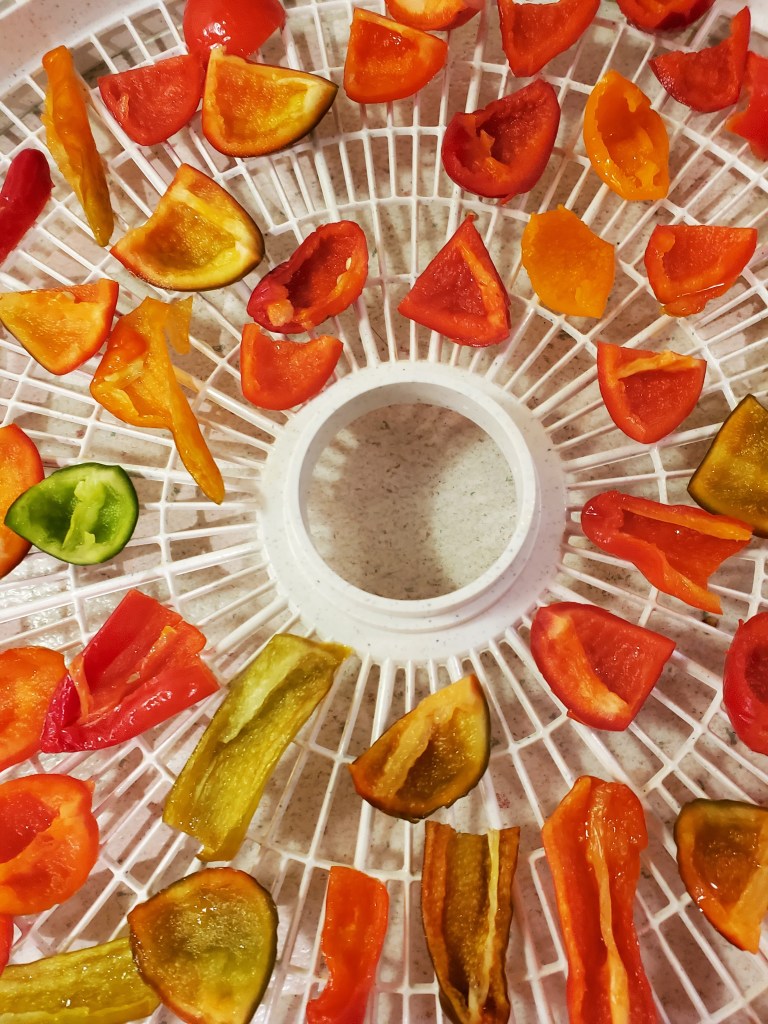
We ran a power cord from the outside outlet in back of the house to the front porch. This way the dehydrator would be protected from the weather, and we would be protected from the pepper fumes! At one point, after turning the dehydrator on, Oscar walked in from outside and said, “Do Not open that door!”
Once, dehydrated, I put the peppers in a quart jar that I vacuum sealed. They stayed there while I decided what I wanted to do with them.
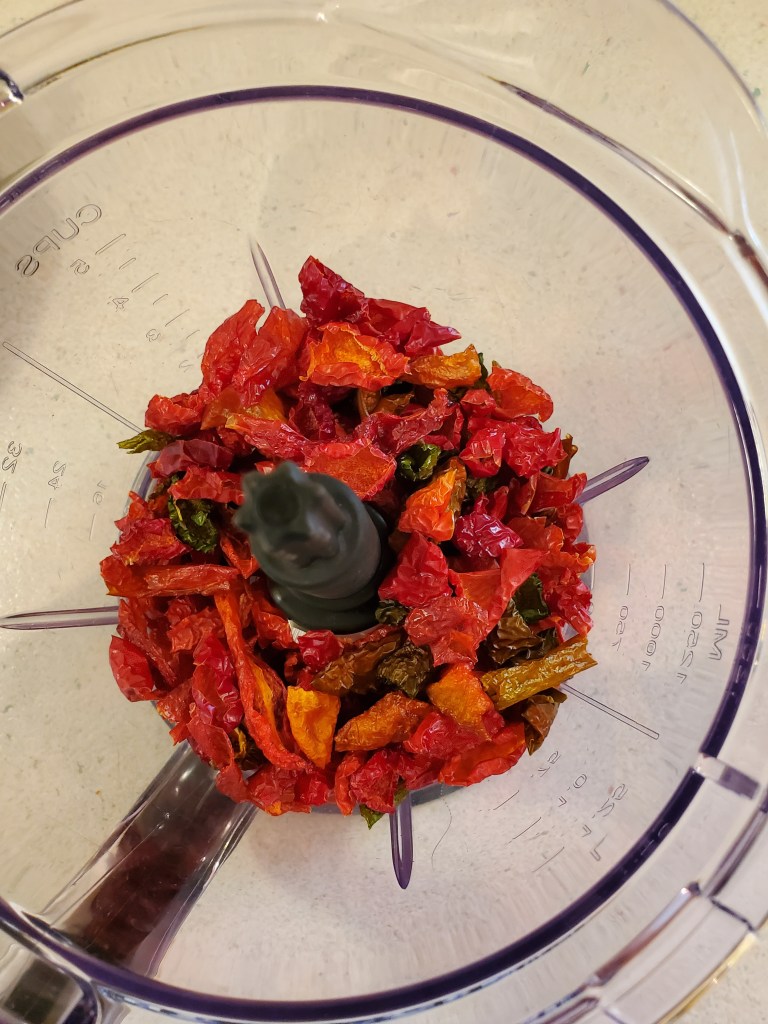
It’s been almost two months, but I got back to them today. I decided I have plenty of dehydrated and frozen pepper pieces, so this batch was destined to become pepper powder.
I emptied the jar into the blender:
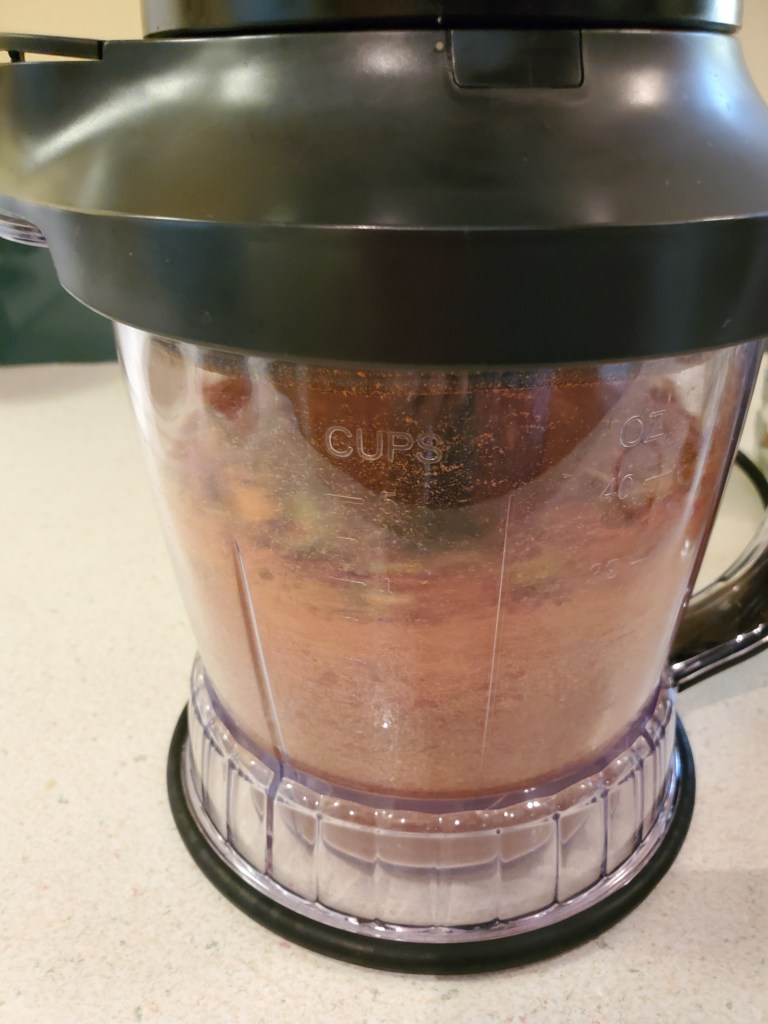
Pulsed them into a powder:
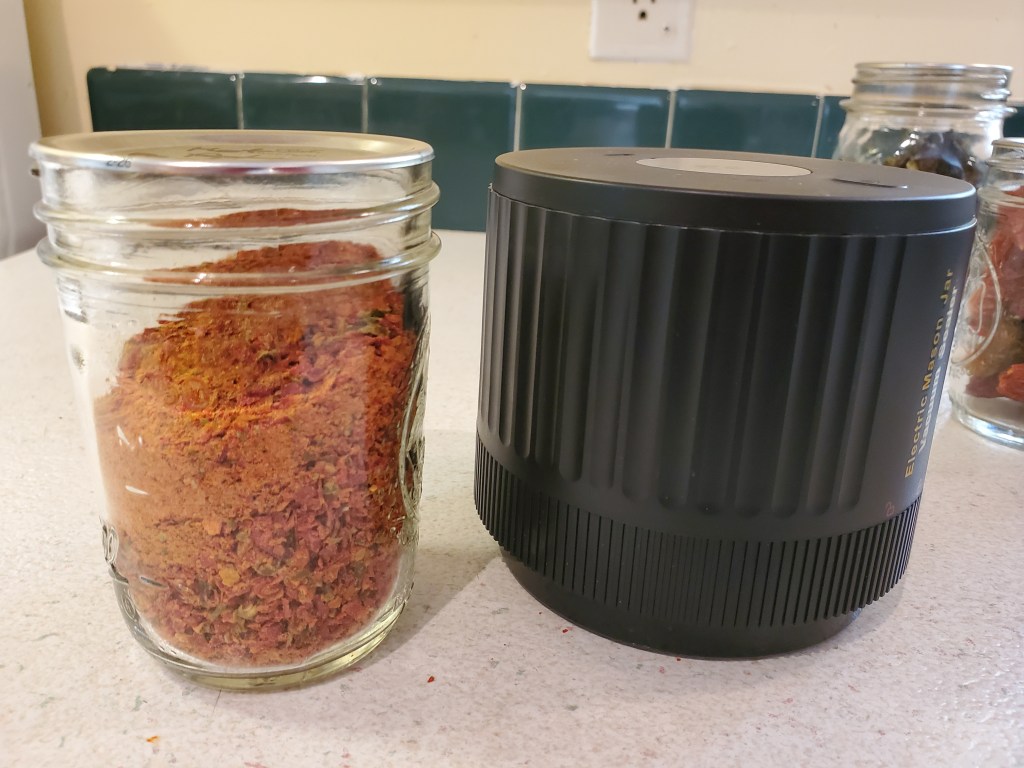
And vacuum packed the final product into a 1/2-pint jar:
Here are a couple of footnotes I want to share:
I am loving this portable, handheld vacuum sealer (the black gadget on the right) that I mentioned back when I processed plums. My Food Saver has been my go-to vacuum sealer for decades. This thing, though, works perfectly for sealing jars and it’s not a hassle to get it out like the bulkier Food Saver.
A You Tuber mentioned we could re-use canning lids to vacuum seal jars of dry goods and dehydrated products. This was the first time I tested that statement, and you know what? It works! This is a boon. Knowing how pricey they can be and, in some years, scarce, it kind of hurts my sensibilities to toss them in the garbage when I open a jar of food. I don’t have to do that anymore. I make sure I remove my lids with this mason jar opener, which does not damage the rubber gasket and does not bend the lid. It also means I can open a vacuum sealed jar, use a little of its contents, and easily seal it back to an airtight state.
WHAT DID WE LEARN? – EMERGENCY SCENARIO #4
It’s time to review what was learned by practicing, or at least thinking about, Emergency Scenario #4:
A cyber-attack has been launched on your country. The entire power grid has been taken offline.
Many preparedness efforts are focused on loss of power, probably because everyone has experienced it, at least in small doses. With most everything in our lives now being dependent on computers and electricity, even a hiccup in the power grid can create problems for us. The issues caused, though, are more far-reaching than just having no lights or heat or being able to cook a meal.
Where there is no power, fuel pumps will not work. Even if you have a generator or a place to evacuate, do you have enough fuel take care of your needs? ATMs won’t work. With most people these days relying on debit and credit cards, even if you find a grocery store open, do you have cash on hand to make purchases? For those on city water, will the wastewater plants be able to create clean water? If you’re on a well, how will you access the water without a pump? Cell towers and radio stations would not be transmitting. How will you handle communications?
Most participants of this foodstoragemadeeasy.net exercise had the ability to light their homes and alternative means to cook their food. Some had generators and/or solar panels to keep essential items like well, fridge/freezer, and medical devices going for a while. Solar radios seemed to be the standard to ensure continued communication about the situation status.
Susan shared how she recently covered the challenges of a thawing freezer, the heat of summer, and entertaining the children: “Power was out for 4½ days in June due to a storm. Cell towers lasted about 2 days. We had a big Father’s Day cookout to eat all of the food in the little freezer. Camp stove and propane smoker for the win. Kids played in a kiddie pool to cool off and decorated the sidewalk with chalk. It was a little uncomfortable, but we managed.”
Linda joked about the “forced time off” from her remote job since there was no power or internet. As more people become remote workers, this is something many may not be prepared to handle.
Mary addressed the sanitation side of the grid being down: I put a “Double Doodie” bag on each toilet so I wouldn’t have to use precious stored water to flush the toilets. I used some of my stored Bath Wipes to clean myself rather than using water to do that. I got my stash of disposable plates, bowls, cups, and utensils out of storage to use so I wouldn’t need to use water to wash dishes or eating utensils.
Amanda noted how she handles powering medical devices: “We don’t have a backup generator and we recognize this as a shortcoming ….. We just can’t justify the expense right now. We keep two big battery bank backups for some devices. There is a converter in our truck capable of running the hub’s CPAP machine (not ideal but would work in a pinch).”
Michael, though, wasn’t ready: “The bad news is my mom is on oxygen 24/7, and if no electricity, no air, therefore no mom!!! We’d have to take her to the emergency room as soon as her oxygen bottles run out. I really need to get a generator!!”
Several people pointed out that it would be necessary to take steps to protect ourselves from unwelcome visitors. If the neighborhood can see that you have lights, hear that you have a generator, smell that you can cook food, it is going to draw people in. The more a temporary situation turns into a long-term shift from “normal life,” the more danger your household will be in.
When our power goes out, the problem is generally localized and other towns, cities, or states can send support, so we don’t do without for very long. However, there have been many folks who have had the experience of being without power for long periods of time but were unable to remove themselves from the affected area.
While a cyber-attack may seem like an extreme scenario, one point of this exercise was to make us think a little deeper and consider what we would need to do in the event of an extensive grid-down problem that lasted more than a few hours or a couple of days.
What steps do you need to take to prepare for the long-reaching effects of a power outage?
TAKE STOCK – EMERGENCY SCENARIO #4
A cyber-attack has been launched on your country. The entire power grid has been taken offline.
To practice this scenario, live a full 24 hours without electricity. You must cook your meals without using electricity. There is no using the internet or cell phones, even if you have solar chargers. You can’t heat or cool your home using electricity. You can use only non-electric light sources.
Otherwise, discuss with your family all the ways your household uses electricity and what would happen if it was suddenly gone.
In North Carolina, most of us have had plenty of practice doing without electricity due to ice storms or hurricanes for a day or two (or more). The area has also experienced substation vandalism that left many households without power. In this scenario though, we can’t just leave home and stay with a friend or relative – the whole country is affected.
How much chaos would your household be in without electricity? How long would you be able to maintain basic needs (eating, drinking, bathing, toileting, etc.)? What supplies and/or skills are you missing that would make your life more livable in this kind of scenario?
This is a more complicated activity so let’s work on it for the whole week. I’ll post the follow up next Monday for you to share what you’ve discovered.
Click! Lights out!
END OF THE ROAD
Last month Road Runner developed a hoarse voice, and his crow was only half a crow. This last week he started looking really bedraggled. I knew he was failing but nothing I tried was helping him.
Tonight, Road Runner succumbed to whatever ailed him.
Road Runner was one of the chicks we hatched in 2020. My grandson Emmett named him Road Runner because, as a little chick, he would run through the brooder at top speed like a crazy chicken.
As the rooster of the flock, it took him awhile to figure out how to be a gentleman to the hens, but once he did, it was a pleasure to watch him roaming the yard, scratching a spot and calling the hens over.
His people skills, unfortunately, never improved. In that regard, he was on the naughty list most of his life. He absolutely hated Oscar and jumped him at every opportunity. When he attacked my youngest grandson once, his future (or lack of a future!) was under serious consideration. He even nailed me a couple of times. You definitely did not want to turn your back on him. He thought he was doing his job, he just never figured out that not everyone was a foe.
GARLIC PLANTED
I took today off from work and one thing I accomplished was to plant garlic.
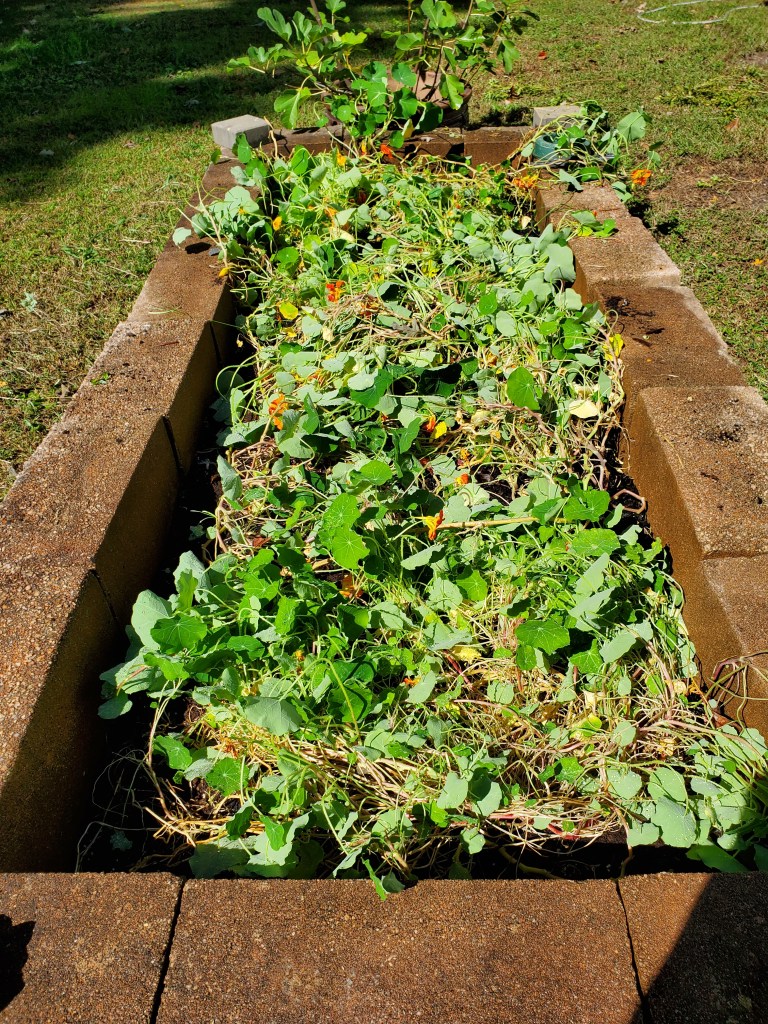
I piggy-backed the garlic in the nasturtium bed. They are good companion plants. While the nasturtiums are finishing up their season, they will provide shade and mulch for the garlic. About the time the garlic is harvested, the nasturtiums will be ready for their next season because …

The nasturtiums are busy creating and planting seed pods!
The garlic was easy, easy to plant. I just dug holes in the bed about six inches apart,
separated the cloves from the heads of garlic,
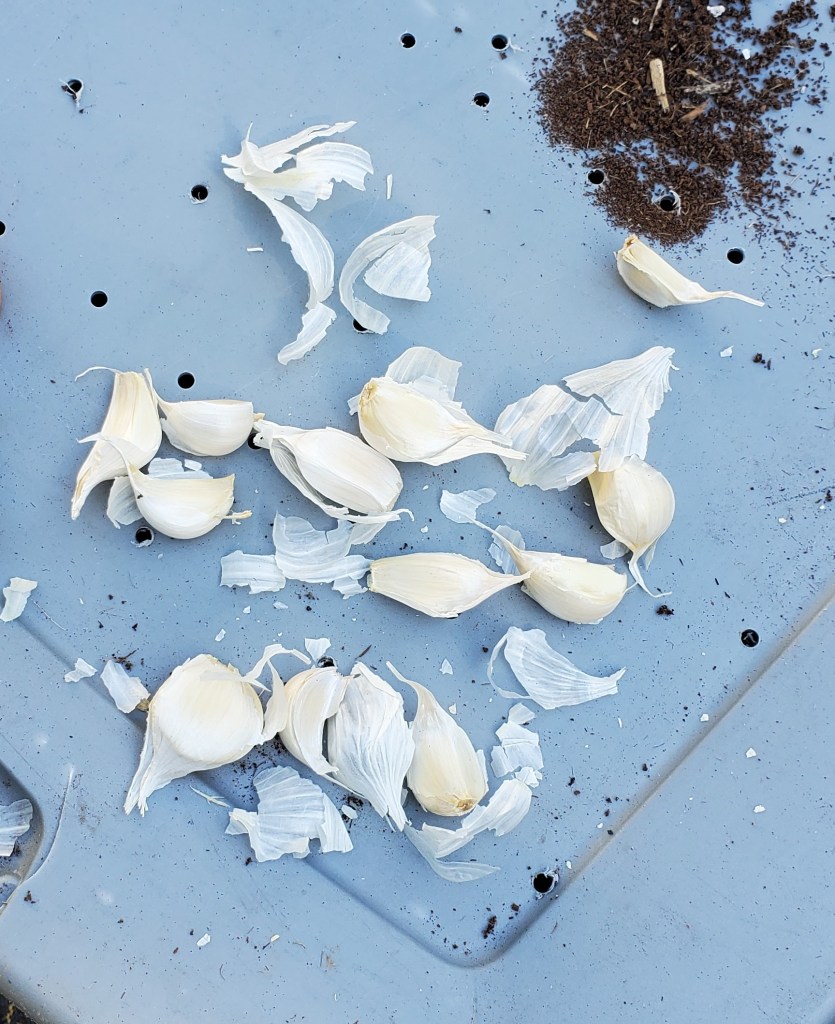
and planted one clove per hole, pointy end up. I filled each hole with worm compost (homemade!) and watered the bed. In less than half an hour, I had planted a bed of garlic!
If all goes well, I will have about 40 heads of garlic to harvest next May or June. I want to learn to can it (so I don’t have to buy ready-to-use jarred garlic at the store). I will also use a few bulbs to plant a crop next year. A self-sustaining crop!
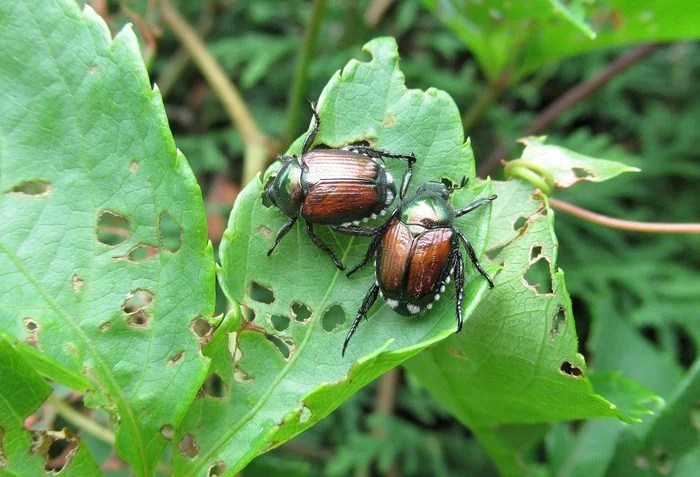
There is another benefit to planting garlic – it is a natural repellant for my archenemy: Japanese Beetles!
MILKY SPORE
As you may recall, the focus of much of my planting this year was with pest deterrence in mind. My efforts were very successful, and I was pleased with the results – – except with Japanese Beetles.
I planted white geranium between my two apple trees. White geranium was specifically listed as a deterrent for Japanese Beetles. My apple trees have been heavily damaged by these nasty pests every single year.
This supposed deterrent was a complete failure. The trees were, again, absolutely covered with Japanese Beetles!
Completely frustrated I turned again to Google, looking for another solution. That’s when I discovered Milky Spore.
Milky spore is a naturally occurring, soil-dwelling bacterium that infects and kills the grubs of Japanese beetles. When the grubs eat the spores, they get a fatal disease called milky spore disease. It does take two years to fully disrupt the life cycle of the Japanese Beetle with this treatment. On the plus side, it is not toxic to people, pets, or other insects.
Last weekend we made a Milky Spore applicator. We started with some PVC pipe, coupler and cap. The mystery item was a can of tomato paste. Well, for the curious, here’s what we did with that:

We removed the lid of the can of tomato paste (the paste went into the freezer for later use), drilled holes in it, and it fit perfectly in the coupler, resting on the lip and secured when the pipe was inserted.
The instructions were to fill the pipe with Milky Spore, cap the top end, and tamp the pipe about every four feet across the lawn and garden. This would deposit a teaspoon of Milky Spore at each tamp spot.
Unfortunately, this applicator is meant to be used for Milky Spore powder. When I went out to apply it today, I discovered I had purchased Milky Spore granules and they were too big to come through the holes, even when we made them larger. When using granules, the instructions are to use a lawn spreader. Luckily, I have one!
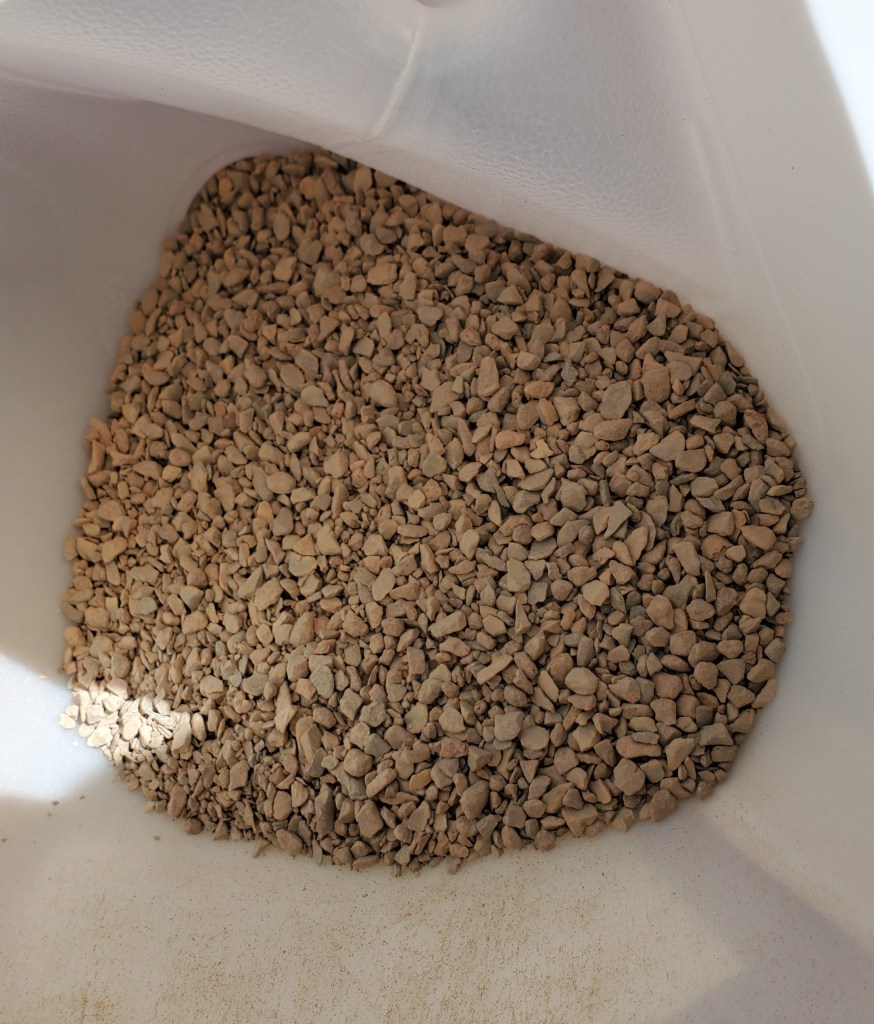
So, the first application is done. The next application is due in the Spring. Then again next Fall and the Spring after that.
I sure hope it works! It is so disheartening to see your apple saplings covered with dozens of Japanese Beetles. Ugh!

You must be logged in to post a comment.