IT’S GONE!
I have been working all week on hydrating some coconut coir, and adjusting it to just the right moisture level, to create a fresh layer of bedding in the worm tower. This was the weekend to start the new layer.
Before I could do that, I needed to dump the bottom layer of the tower into the storage container that I’ve been using to collect worm castings all winter. I was able to collect lots and lots of worm castings. But …
Lo and behold, when I opened that container, it was full of nasty, brown water … and nothing else. Somehow, even though the container was covered with plastic, the rain had infiltrated the container and dissolved my entire casting supply. All that lovely fertilizer was gone! I was so disappointed – I had plans for that poop.
Well, I certainly couldn’t leave that perfect mosquito-breeding setting there, so we used the casting-infused water — “worm tea” — to water the elderberry bushes (which have begun to leaf out), as well as the fig, the boysenberry bushes, the apple trees, and the garlic (which looks great even with the cold weather we’ve had). So, it went to good use. It just wasn’t used as I had intended. Ah well, best laid plans ….
After that detour in our day, I did still get a new layer of bedding set up in the worm tower. I really think, based on the number of worms I found, that I need a second tower. Although, I really don’t need another project. Maybe I should just cull the population and give the chickens a treat.
I had a new stove delivered yesterday! I’ve been suffering with the old, malfunctioning stove for a year and finally broke down, took advantage of the President’s Day sales, and ordered a new one. That should remove the frustration of trying to make dinner only to have the heat suddenly flare up and burn what I was cooking. It was getting to the point where I just didn’t want to try cooking something and risk burning another meal.
In addition to that, we finally got around to dragging the debris we had cut out of the woods when the goats came to visit last year.
Goats shouldn’t eat azaleas and the area they were working on was lined with azaleas that were on their last legs. So, we cut them out and tossed the debris out of the way, intending to clear it out in the winter when it wasn’t so hot. But then the weekends were cold, and rainy, and I was tired, or we had something else to do — so here it is the last week of February and we’re finally getting to it.
Azaleas are resilient so the roots have already sprouted leaves. We are going to have to get the chain saw out and cut even more vegetation out of that area. Hopefully that gets done in the next week or two. We’ll see. I’ll probably find something more interesting to do with my weekends ….
The final project of the weekend was to line the new raised beds with landscaping material:

Then I managed to fill a good portion of one bed with cardboard:
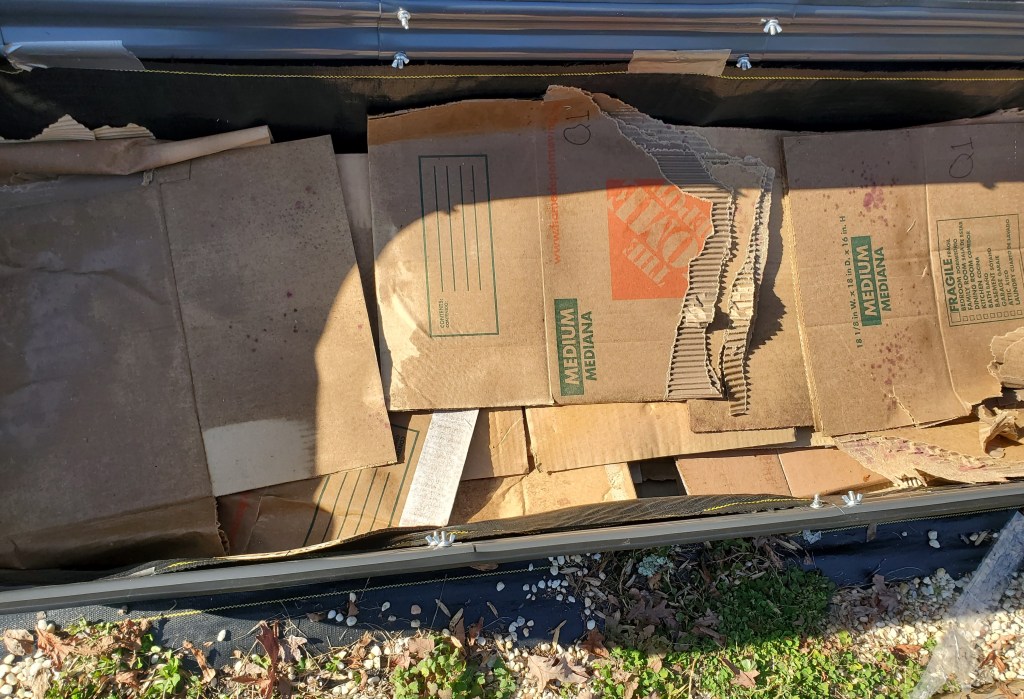
Then my back could handle no more, so, the second bed will have to be done next weekend.
Winter is stepping into Spring!
A LITTLE BIT CHEESY
I did not accomplish any “projects” this week. I just did a bit of this and that.
When I was younger, if you needed shredded cheese for a recipe, your only option was to grate it yourself. When the (more expensive) bags of shredded cheese (with anti-caking agents added) were introduced to the grocery store, I put up quite a fight to resist them. In the end, though, I lost that battle and succumbed to the lure of convenience.
I’ve tried several times over the years to cross back over from the dark side, but I don’t like using a cheese grater, I do like leaving the skin on my fingers, and, honestly, I really like just dumping shredded cheese from a bag.
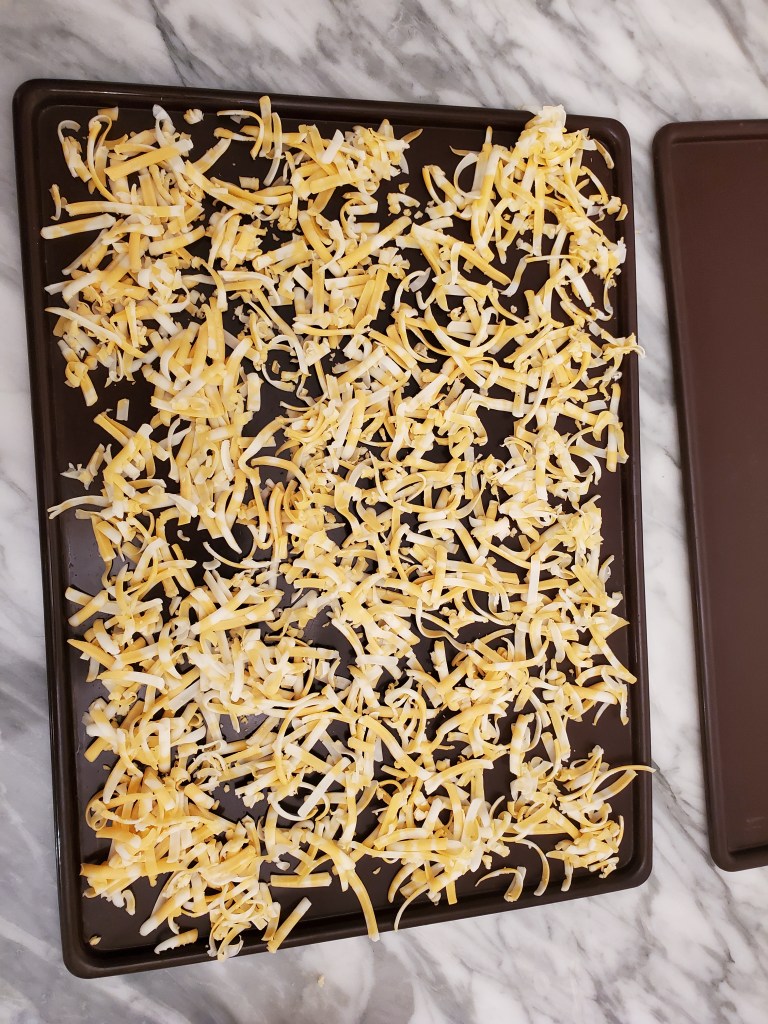
Recently though, I added a rotary grater to my stash of kitchen tools with the intent of making my own convenience foods – in the form of shredded cheese.

This thing works great! It attaches to my countertop, plows through a block of cheese in no time, and is easy to clean as the parts can be put on the top row of the dishwasher.


Other than my little cheese experiment, I started a new batch of bedding for the worms this week. It usually takes me a week or so of tinkering with the coconut coir and peat moss to get just the right moisture level before I can start a new layer in the tower for them.
I won’t do it this time but, I’m considering starting a second worm tower. Since I started feeding them Uncle Jim’s Worm Food back in October, their population has exploded to the extent that they seem to be over-crowded. It’s really amazing to flip over a scoop of dirt and find a massive wad of worms.
I started using the Uncle Jim’s because I just don’t generate enough kitchen scraps for both the worms and the chickens. (Yes, that translates into I don’t eat enough vegetables). I spent $20 for a 4-pound bag of food in October. I still have half the bag left! I sure hope my garden appreciates all the hard work the worms have been putting in to make fertilizer.
Tonight, I made pizza with the pizza sauce I made back in August. I’ve tried once before using a Boboli pizza crust from the grocery store but wasn’t very impressed. I used a pre-made crust again tonight that I like better. I still need to find an easy to make pizza crust recipe.

CHICKEN PROJECTS
This weekend’s projects were geared toward the chickens.
First, the new feed and water containers I purchased were cleaned, assembled and filled. The previous units had finally broken down after three years of constant exposure to the weather: they were held together by duct tape.

Since the new containers hold more food and water than the old ones, I won’t need to fill them as frequently. The feeder holds about a half bag of feed so I will only have to fill it about twice a month, instead of twice a week. The waterer will be fine for three or four days before needing to be refilled.
The water container came with drinking cups, which I don’t like – they tend to get dirty and slimy. So, we transferred the two chicken nipples from the old container for the time being and have a pack of new chicken nipples winging their way from Amazon.
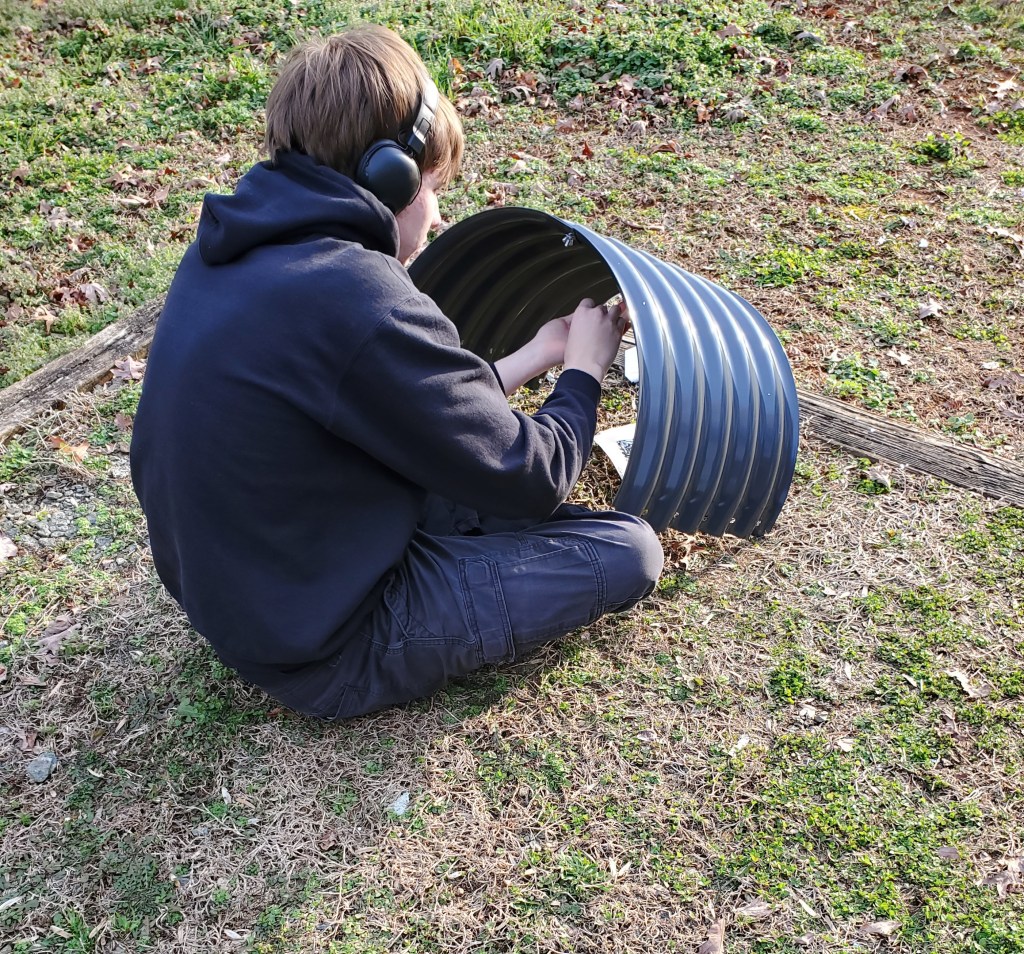
The other project was for the Chicken Tractor. (Click the link to read about that feat and to see the final product.)
It may have taken too long to build the Chicken Tractor, but it sure did serve the purpose for which it was designed. The chickens were able to have a new patch of grass every day or so (while the grass received complimentary fertilization) and they were kept safe while they “free ranged”. Bonus point: they stayed out of my garden.
The big problem with the Tractor was that it is too heavy for me to move on my own. It was a struggle to move even with both Oscar and I pulling. So, we parked it for the winter while I considered what to do.
I determined what I needed was a set of wheels at the front of the Tractor, to help carry and balance the weight of the tractor.
The solution I decided upon was to purchase a ChickLift.
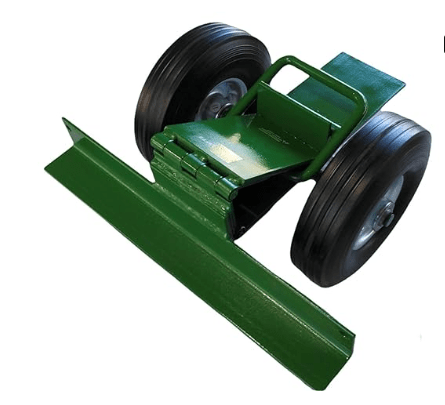
I knew about the ChickLift when I made plans to build the Chicken Tractor but was not willing to pay the price to buy one. However, when I compared what I would have to spend to re-create the original wheels (not counting the anguish involved with getting them built and installed), suddenly the price tag didn’t seem so bad.
Oscar installed it to the front of the Tractor this weekend and, just like that, Grandma can move the Chicken Tractor all by herself!

Mission accomplished.
IT BEGINS
This was another dry weekend, and the afternoon temperature was in the 50’s so the first step in this year’s garden was taken!
Oscar put together the two garden beds I purchased toward the end of last summer (when I realized I should stick with my original approach of raised beds and containers).
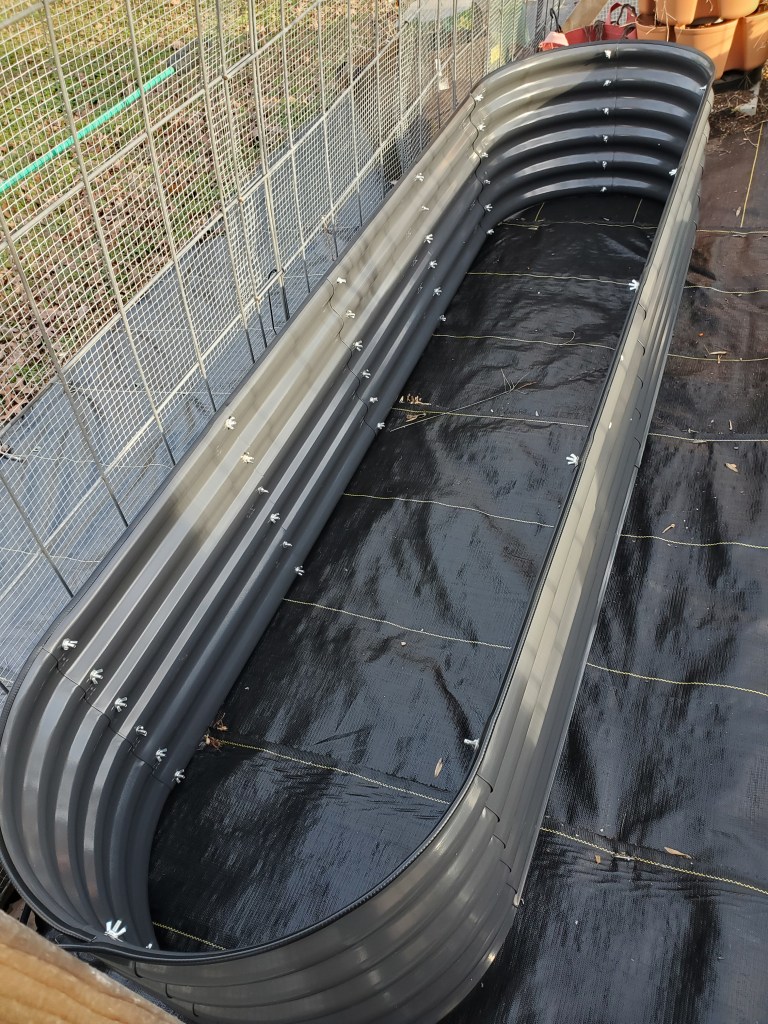
These are 8 feet long, 2 feet wide, and 17 inches tall. So, they will provide a good amount of growing space, but are not so wide that I have to climb across the bed to reach plants. Plus, they are tall enough that I won’t have to do as much bending. They are made of powder-coated steel so they are sturdy and should be long-lasting.
The rest of the month will be spent loading them up about halfway with cardboard and other biodegradable material. Then, we will fill them the rest of the way with soil.
Now seeking affordable garden soil ….
TIME FOR A WALK-ABOUT
January has been cold and rainy but yesterday we got a break from both.
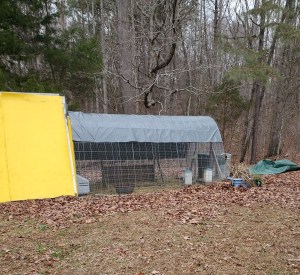
We took advantage of the break and replaced the tarp over the chicken run. The old tarp was so worn out it was doing very little to protect the area from the weather.
For the first time in months, we were able to let the chickens roam around the yard for a couple of hours. Boy, did they enjoy scratching through the leaf litter! We also added a new layer of bedding in the coop and filled their dust bath bowl with peat moss.
It was quite comical to watch them taking turns in the bowl today. It has been completely emptied again. SMH, silly chickens.
Spring will be here before we know it. In the meantime, though, homesteading work is happening in Slo-Mo.
GLAD I’M NOT A CHICKEN
As I was grumbling, yet again, about the cold weather, I glanced out the window at the chickens and thought, “Glad I’m not a chicken!”
Not that I’ve ever actually wanted to be a chicken.
With temperatures ranging between the low teens and mid-thirties this week, I have enjoyed central heat and a toasty dog in my lap. Meanwhile, the flock has been outside the whole time.
They have done marvelously though. We’ve made sure they had plenty of (unfrozen) water, food, and treats. They’ve also had plenty of clean, dry bedding on top of the winter’s worth of deep bedding (which does create some heat in the coop). There are no signs of frostbite, and they are actively scratching and sunning themselves in the run.
Actually, they seem to be handling the weather better than I!

EXPERIMENTS
This month I finally got around to using some of the Peach Pie Filling I canned this past summer.
I don’t know if there’s anything better than home-canned peaches in the middle of winter. They are so much more flavorful than commercially canned peaches. I had high hopes that would be true with pie filling, too.
I tried two new recipes. One was a failure (although nothing is really a failure, just a learning experience) and the other I am enjoying as I write this.
#1
Last month, the nurse who prepped me for a doctor appointment told me how his grandmother’s hand pies were loved by all and considered a special treat. One day, he walked into the kitchen while she was rolling out what his family called “whomp biscuits” (for the rest of us, that’s the Pillsbury biscuits you slam on the edge of the kitchen counter to open but isn’t that a great name for them?). ”Whatcha doing Grandma?” ”Making hand pies.” He said his mind was blown. He had imagined her putting a lot of work into something that tasted so good only to find out, like the best of cooks, she had a few tricks up her sleeve.
I’ve wanted to make hand pies for years. I don’t make pie crust though. If it weren’t for Pillsbury Pie Crust from the refrigerator case, I would never make anything that needed pie crust. However, I couldn’t figure out how to efficiently use the rounds of Pillsbury crust to make hand pies, without having a bunch of wasted dough. I never managed to move past that roadblock and hand pies remained on my To-Do list.
What I immediately dubbed Whomp Pies sounded like the solution to my dilemma and I picked up a couple rolls of biscuit dough the next time I went to the grocery store to give it a try.
I was disappointed. They were kind of edible but were too bready. I haven’t given up though and already have another option in mind to try. Stay tuned.
#2
This winter I’ve periodically tried new recipes in an attempt to get out of a rut in the kitchen. One recipe I came across was a peach cobbler dump cake, using a Cinnamon Coffee Cake mix. The recipe made a 9×13′ pan of cobbler though so I kept putting off trying it until there were more people around to eat it. (There’s nothing like two people eating a 9×13 pan of any dish to make it un-appealing).
Finally, it struck me that I could use half the spice package and half the cake batter mix and use a 9×9 pan. Then, if I liked it, I could make a second one another time. It also meant if I don’t like it (I’m not usually a fan of dump cake), the chickens wouldn’t end up with a big pan of what is supposed to be MY treat.
Of course, by the time I had this epiphany, I couldn’t find the recipe. So, I checked the internet for basic dump cake instructions and decided to wing it. If I find the actual recipe, I’ll try to post it later.
Let’s just say the chickens will NOT be getting any of this cobbler. Yum!

LOOKING BACK
While not as full of homesteading activity as the previous year, 2023 had plenty of progress and learning opportunities. Here are some of the highlights.
We managed to get the Chicken Tractor built and the chickens enjoyed using it for a few weeks. It was wonderful to keep them on fresh grass without having to worry about winged and four-footed predators. While the chickens were being tractor-ed around the yard, we were able to do some much-needed repairs and upgrades to the chicken coop and run, including painting it yellow!
Despite two predator deaths in the flock (Chipmunk and Road Runner), the remaining hens are doing well enough. That is, if eating and lazing about count. Only one hen is laying and that just started in December. Since not enough eggs are being produced for me to sell, the dog and chickens get scrambled eggs when I have too many sitting in the refrigerator.
The goats did an amazing job cleaning up the woods around the house and they were fun to have around while they were here. It was also nice to be able to send them home – just like with grandkids!
We covered a section in front of the house (where the azalea bushes used to be) with landscaping material and used that area to house my fabric pot garden. The experiment using fabric pots was successful. They are a more affordable alternative to the hard-sided pots and worked just as well. We harvested and preserved so many tomatoes and peppers that I don’t need to grow them this year at all… unless I change my mind course and just want to try a new variety.
The garlic I planted in the nasturtium bed has been thriving throughout the fall and winter with absolutely no attention from me. I have to admit that is a nice way to grow a garden – ignore it. I’ll have to see if I can apply that principle in future gardens.
We expanded the in-ground garden but growing anything there was an utter failure and we ended up letting it go back to nature. I shouldn’t say “utter failure” as it did prove to me that my instinct to grow in containers is the way for me to garden.
My emphasis on growing bug repelling plants this year was an outstanding success. I had only four mosquito bites the whole year and there were almost no flies in the chicken coop. There was one exception to this accomplishment: planting white geranium to repel the Japanese Beetles did absolutely no good. If white geranium truly does work, it must require a massive number of plants. I did discover Milky Spore as an organic method to kill the grubs and we laid down the first application this fall. Though it will take a couple years to see the effect, I am looking forward to the end of those nasty, destructive, beasties.
While I didn’t do quite as much food preservation as the previous year, we are still enjoying the rewards of that effort. My shelves have plenty of food on them from which to “shop” and I really like not having to go to the grocery store very often.
The worms are thriving in their worm tower. Switching them to a tower set-up worked out very nicely for easier harvesting of their castings. Every couple of months, I give them a new layer of coconut coir and peat moss and wait while they move up to the new layer where the food is. After a month or so, all I have to do is dump the previous layer into a storage container. I’ve been collecting fertilizer all winter to use in the next gardening season – which is coming soon!
I’m grateful for the progress made this past year and I have my list of projects ready for 2024!


You must be logged in to post a comment.