THEY WON’T STOP
Last weekend I told you I was done with watering, and I was leaving it to Mother Nature.
Mother Nature didn’t water either.
Nevertheless, when I went to clear more plants this weekend, lo and behold I picked another two gallons of tomatoes, peppers, and cucumbers. Afterfter a week and a half of no water
SMH, I need to find some friends to gift this stuff.
I did manage to clear plants out of two large containers and a raised bed in the greenhouse before my back was done. The tomatoes had grown through the hardware cloth that covers the greenhouse, and I snipped those branches and left them hanging there. I bet the tomatoes on them will ripen.
Remind me in the spring to hold my horses when I plant seeds, so I don’t have this “problem” next year. Remind me also to plant no tomatoes – I have enough dehydrated tomatoes and tomato powder now to last at least two years!

RAMBLINGS
I know it’s been a while since I posted, but I promise I’ve been busy.
This past week or so, I have been clearing out spent plants, and harvesting and watering the plants that are still producing. I’m done with watering though. I am so cucumbered and peppered and tomatoed out that if Mother Nature doesn’t water the remaining plants and keep them alive, so be it.
I harvested the last of the potatoes – two pots of French Fingerling and one pot of Red Nordling. I didn’t realize how much better home-grown potatoes taste than the ones from the grocery store.

Last weekend and this weekend we disassembled the in-ground garden. I have given it a chance for two years now and am not satisfied with the results. I’ve decided to stick with my pots and containers and raised beds and will not continue with the in-ground garden.
As you may remember, I tried to grow a block of corn this year (after last year’s dissatisfaction with the Three Sisters Garden) but most of the corn did not germinate (or, maybe something ate the seeds?) and the weeds utterly took over. I did get to enjoy a few peas from the space in the spring (though not as many as I planted), a few sunflowers made a valiant effort, and the cosmos did splendidly until the last month when the weeds even overtook those. So, we took down the fence and the trellises, pulled up the cardboard (that did little to hold back the weeds), and mowed the whole thing down.

I’m considering planting a cover crop so there is not so much loose dirt to attract ants, etc., but we’ll see if that happens.
It was also time to change the bedding in the Chicken Tractor. You can’t really use the deep-litter method in this set-up though I was able to add fresh bedding on top of the old every few days which allowed it to last for a few weeks. So today I cleared it all out and replaced it with fresh bedding. The chickens will be sleeping in clean sheets tonight!
Now that the chickens are in the Chicken Tractor, we are taking the opportunity to update and do some maintenance on the main chicken coop. The coop was originally built three years ago, the run was added two years ago. Since that time, the two have been connected by a piece of unpainted plywood shoved between the two. We were able to remove those connecting boards and cut them to size, paint them, and reattach them. We also painted the coop. It’s original coat of Kilz paint was definitely looking shabby. There are still a few things to work on, but this is what we’ve accomplished so far.
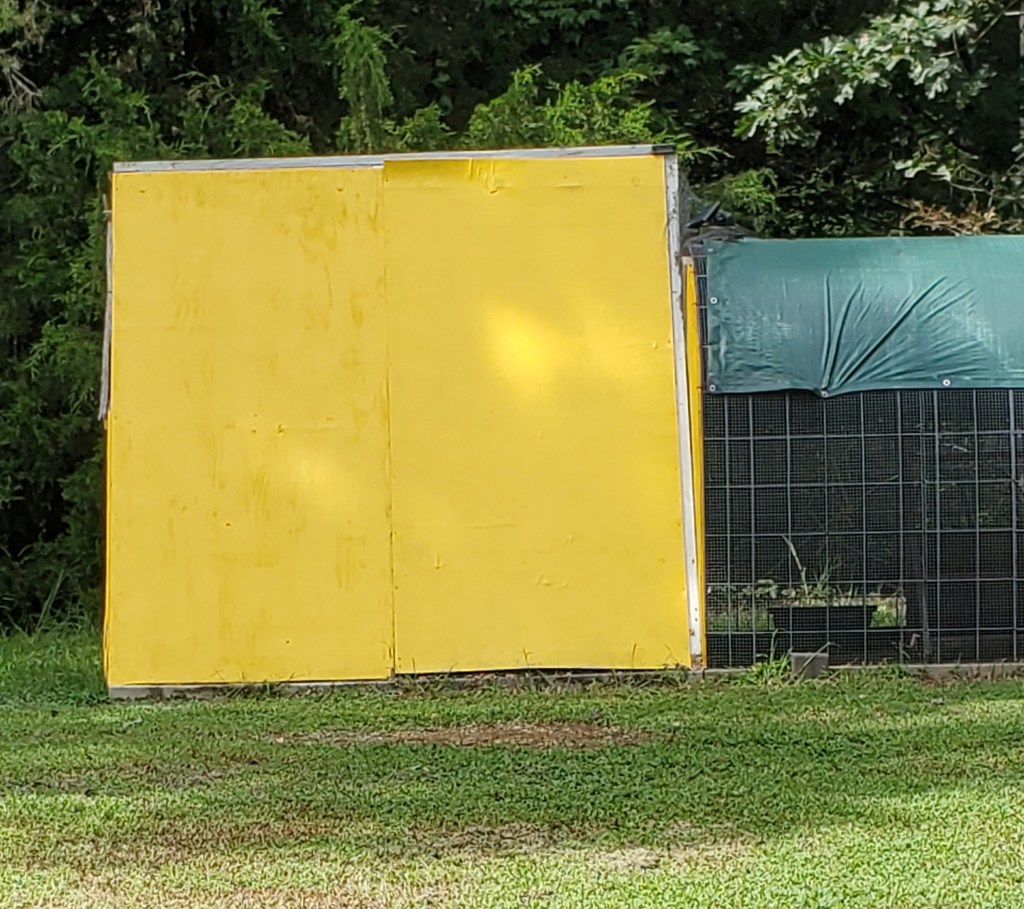
I admit, looking at this in the North Carolina sunshine is painful. You end up with spots in your eyes. I bet it will be cheerful to see in winter though. I had a neighbor in Cheyenne who unintentionally painted her whole house this color, not realizing how bright it would be. When she saw it, she apologized to all the neighbors. I thought it was funny, but she was horrified.
The goats left this weekend. They were put in the first section Saturday, August 26th, for a week. They were finished with it by Thursday. You haven’t lived until you’ve experienced a bunch of goats yelling at you that they are hungry. Thankfully, the farm brought some hay out to hold them until Saturday.
When they came out Saturday (the 2nd), to move the goats to the next section, they took Bonnie home and left just Clyde, Pepper, and Oreo. You’d think being down a goat and a whole new section of undergrowth would help. No. They had everything cleared out by Monday and were – you guessed it – yelling at me again.
Smarter this time, Oscar and I took to cutting down leafy branches and trees from other areas of the property to toss into their pen. This satisfied them … until it didn’t. Tuesday evening, we gave them a bigger-than-ever pile of leafy branches thinking it would last until the next evening. When I let Timmy out the next morning and everything was gone though, I knew we were in trouble. They had eaten everything, and we wouldn’t be able to give them more until we returned from work in the evening. I called in reinforcements and the farm brought a whole bushel of hay to help out. The rest of the week was quiet.
I must say I had mixed feelings when they left this Saturday. On the one hand, they were personable (especially Clyde), did a good job, and I enjoyed visiting with them. Keeping them happily fed though was a trick I did not quite master!
The compost pile is climbing high as I add the end of season garden waste. Since I have no free source of aged manure, this year’s additions will not be usable for two or three years.
I have looked into getting sheep or rabbits on the property for manure production, but in truth, feeding an animal simply for its poop does not make economic sense. Yes, rabbits can be used for meat production, and I do enjoy the occasional rabbit stew, but after Oscar’s scalped bunny incident a couple years ago, I don’t think I could do my own butchering.
I even looked into angora rabbits. With these you, rather than use them for meat, you harvest the hair (imagine combing a bunch of rabbits), spin it into a luxurious yarn, and then sell it at a hefty (specialty product) price. I managed to pull myself out of that rabbit hole (yes, a pun) when I saw the price of a spinning wheel and my sister reminded me that I’m probably allergic to the rabbits.
Sorry, that was all to say: I cold-compost my yard waste which takes a long time to break down.
I need to focus for a while on food preservation as there is a lot of backlog in my fridge and I don’t want to waste any of it.
CROP ROTATION MADE EASY
As I waffle about how much of a fall/winter garden I want to deal with this year, I knew crop rotation is important. My method to figure out what to plant where, though, has been rather haphazard. I’d google to see if a specific fall plant could be planted with the plants I had in a particular spot over the summer and, if not, I wouldn’t plant it in that bed.
It turns out there’s so much more to know about crop rotation, but, I found this chart that simplifies the process.

The easy answer is to plant below ground crops after above ground crops.
I had been considering planting kale or kohlrabi in the bed that had tomatoes this summer. As it turns out, that wouldn’t be a good idea since they are both cruciferous vegetables. Maybe I’ll try rutabagas again…
TAKE STOCK – WEEK # I DON’T KNOW
Heads Up! September is around the corner, and we have a challenge!
National Preparedness Month is observed each September to raise awareness about the importance of preparing for disasters and emergencies that could happen at any time.
So, let’s test our Preps.
Jodi at Food Storage Made Easy does a mock emergency challenge each September where she provides different emergency scenarios every day for a week. The goal is to “live” as if you are experiencing each scenario for the whole day it is posted and see how you do. For example, the scenario might be “the city water system is contaminated, and you are unable to use your water.” What will you do? How will this affect your family’s daily routines? How will you manage to function as normally as possible? What do you need to manage that scenario better next time?
If you want to participate in the challenge in it’s original format, sign up in advance on her blog.
I’d rather not throw the household into the chaos of experiencing a new “emergency” every day, so I will post one scenario each Monday.
If you’re up to the spirit of the original challenge, take the opportunity to live the scenario over the next 24 hours.
If that seems too overwhelming, gather your family and thoroughly discuss the scenario and determine the best way to handle that kind of event in your household. Even though you may not have gone through the motions, you will still have improved your family’s readiness through awareness and planning.
Whichever option you choose to execute, use the rest of the week to arrange, organize, and obtain the things you need in order to make that kind of emergency less stressful and scary.
Are you ready?

I DIDN’T THINK THE DAY WOULD COME
Many months ago – many, many months – we began a project. In February, we started building a Chicken Tractor. I started posting our progress at first (you can review those posts HERE, HERE, and HERE. I figured normal people could finish the project in a month of weekends, so surely, We could finish it in two months of weekends.
After we got the wheels on though, forward motion ceased. Oscar did not want to do it and there was no convincing him that life is infinitely more pleasant with a happy grandma than a frustrated grandma, so the project was fraught with more stalls than progress.
Nevertheless, this grandma doesn’t give up very easily so, after 7 looooong months may I present ….
THE CHICKEN TRACTOR
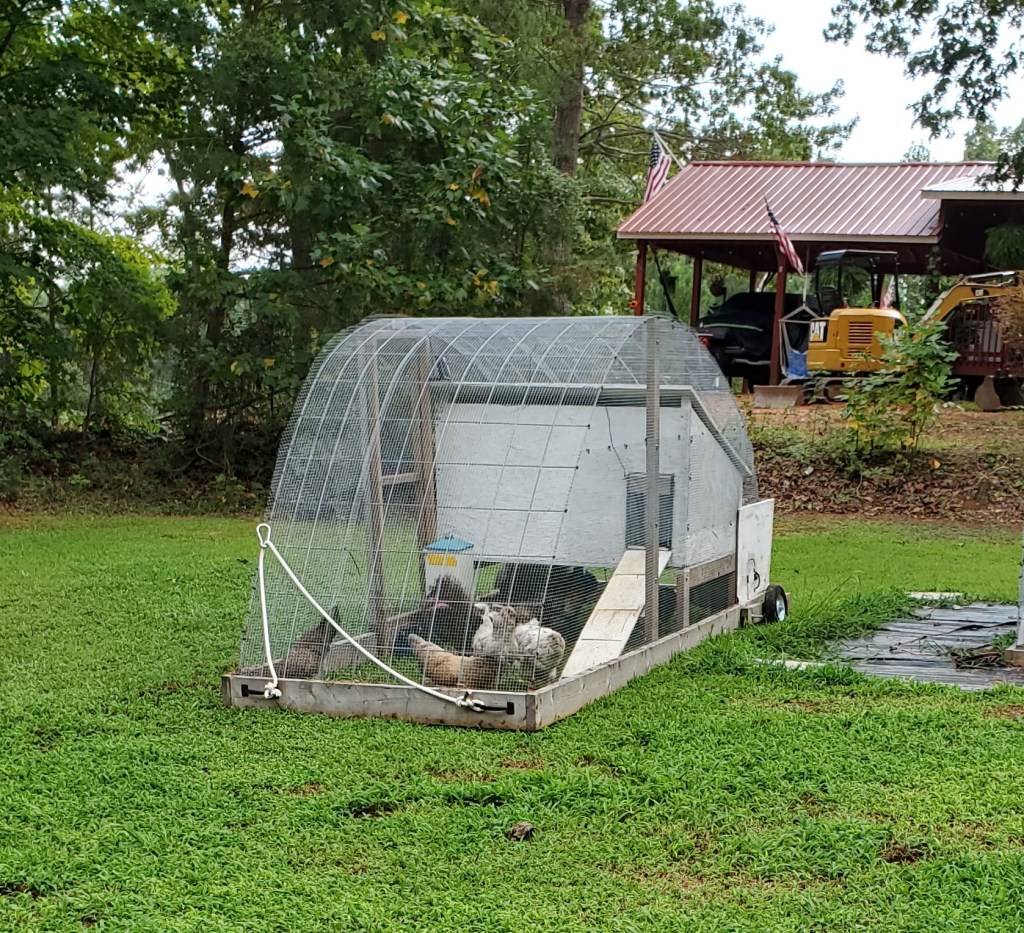
Here are some side views:
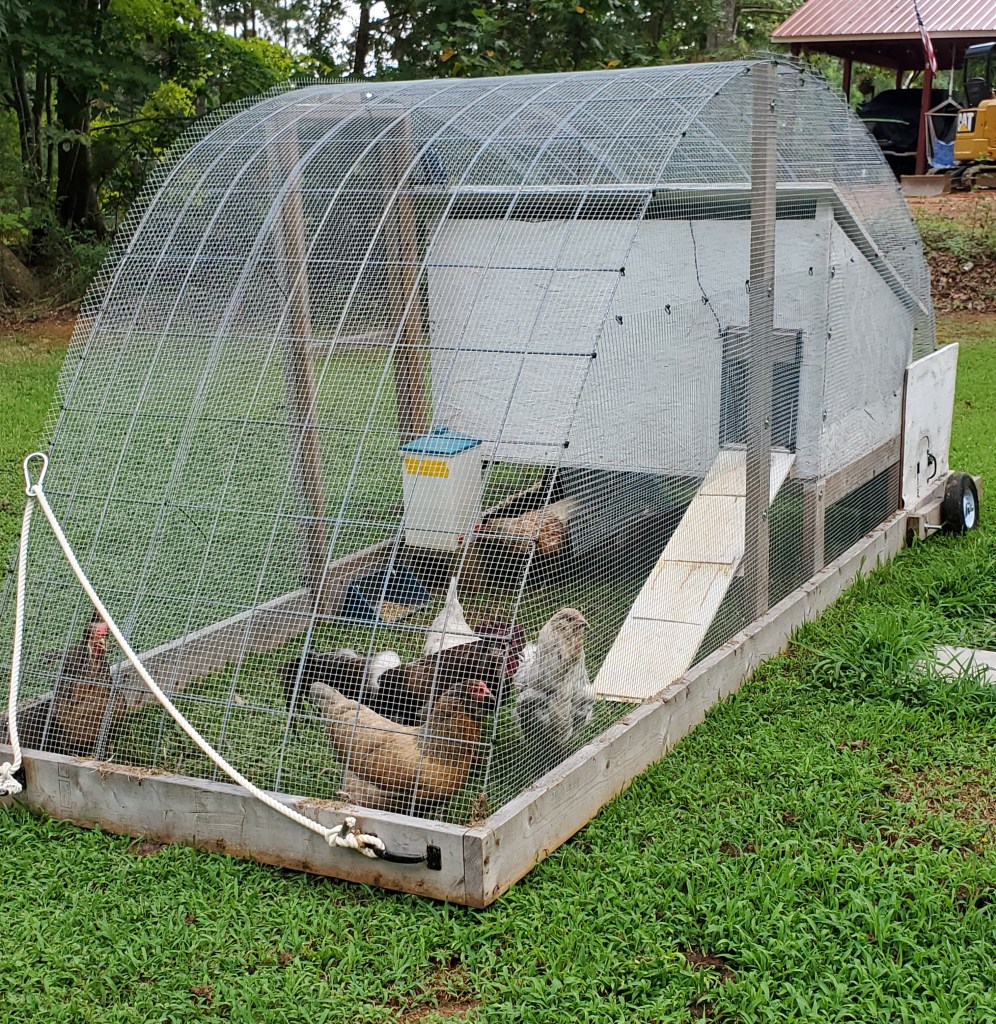
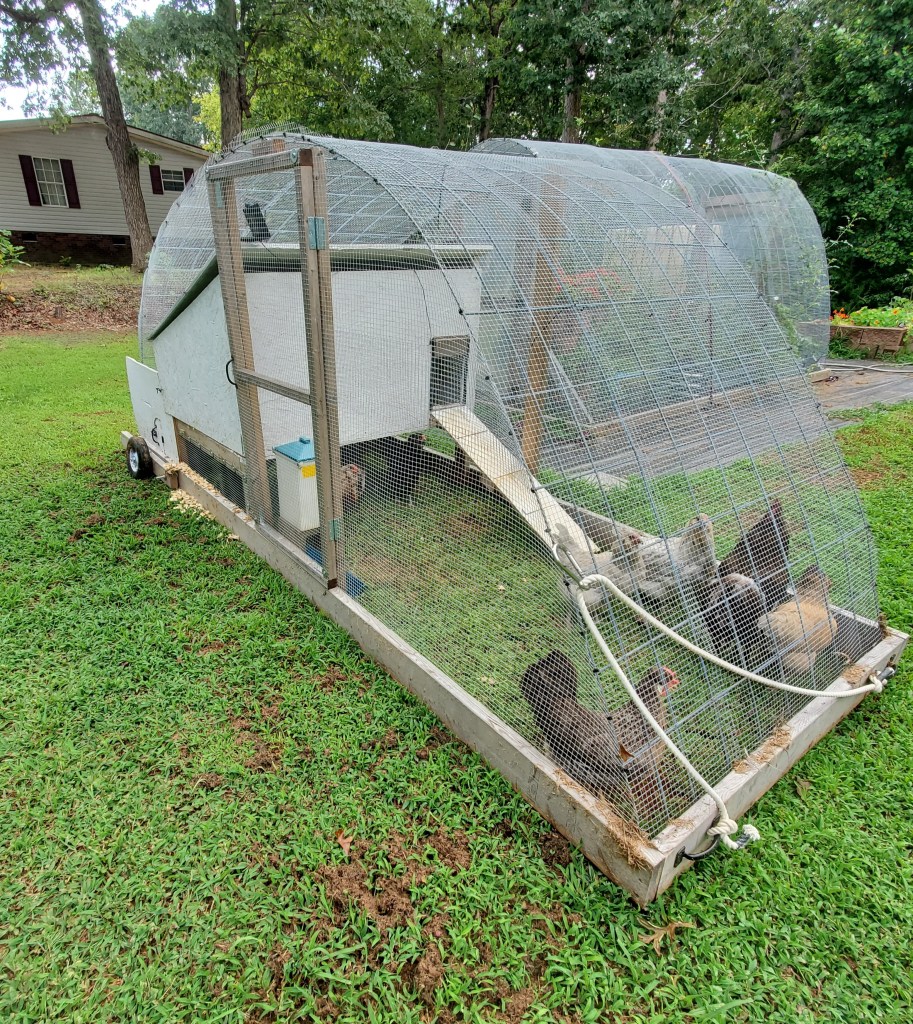
The chickens are happy to be on fresh grass every day.
THE GOATS ARE BACK
The goats from Chronicle Farm are back. This time they are cleaning out the back of my property. They will work on the area behind the house this week and then move to an adjacent area behind and around the barn.
Meet our visitors:

Bonnie is the biggest of the bunch and tried out a bit of bossiness, but the others just ignored her. Bonnie enjoys exploring new areas, walks in the woods, and munching.

Clyde is new to the herd. He came from a barren corral so is a bit bewildered by all this green stuff. He is a sweet boy.

Pepper came without her sister and BFF because, together, they get into mischief like finding escape routes. We’ll see if she or her sister is the instigator.

Back for a second time, Oreo wasted no time chowing down on the bounty dropped at her very feet. Invasive plants will get no mercy from this eating machine.
Welcome Goat Friends! Thank you, Chronicle Farm!
WATER & PICK
This has been another hot week with no rain. Every night after work, the only thing I could accomplish was to water the garden and pick tomatoes and peppers and cucumbers.
Water & pick, water & pick, water & pick.
The only problem with that is that my fridge is over-flowing with produce. That’s not a bad thing, of course, but I ran out of room for anything else in the refrigerator. I had to take care of at least some of the accumulation.
So, for tonight’s project, I filled the dehydrator with tomatoes to dry and make into more tomato powder.
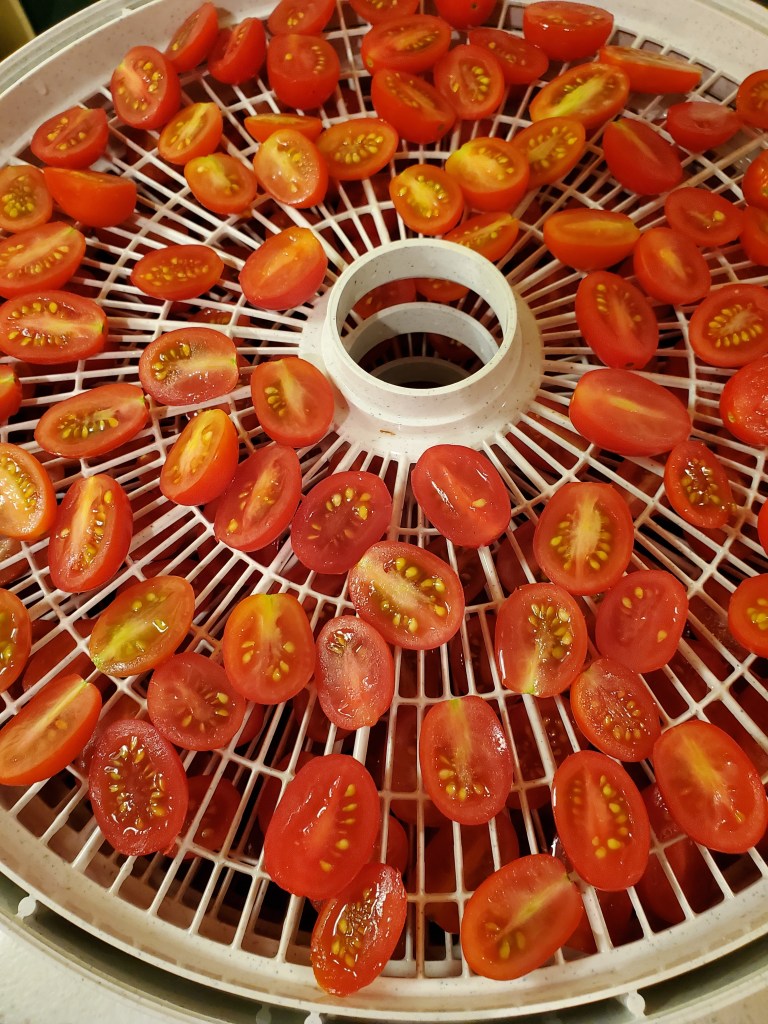
That is all. Not much, but something – every bit counts you know.
The last time I talked about making tomato powder, I didn’t really explain why it is so useful so let’s discuss that for a minute.
The main way I’ve used tomato powder is to make tomato sauce or tomato paste when I didn’t need enough to open a whole can. Actually, I don’t usually keep canned tomato sauce or tomato paste in my pantry. I also like to add tomato powder to soups, casseroles, and other dishes for extra flavor and nutrition. If I have a tomato-based sauce that’s too thin or watery, I thicken it up with my tomato powder.
Do you have picky eaters? They can’t turn their noses up at a dish with tomato if they can’t see the tomato, right? Tomato powder, actually any vegetable powder, is a great and easy way to “hide” vegetables in your cooking.
Check out this post by Darcy Baldwin that I found on The Purposeful Pantry. She has some good ideas and interesting recipes for using tomato powder. Her suggestions can be found by clicking HERE.
I’m thinking, the Garlicky Tomato & Herb Sandwich Spread needs to be on the table the next time we grill hamburgers.
ON TO THE PEACHES
In addition to the plums I got at the Farmers Market, I got a small quantity of peaches.
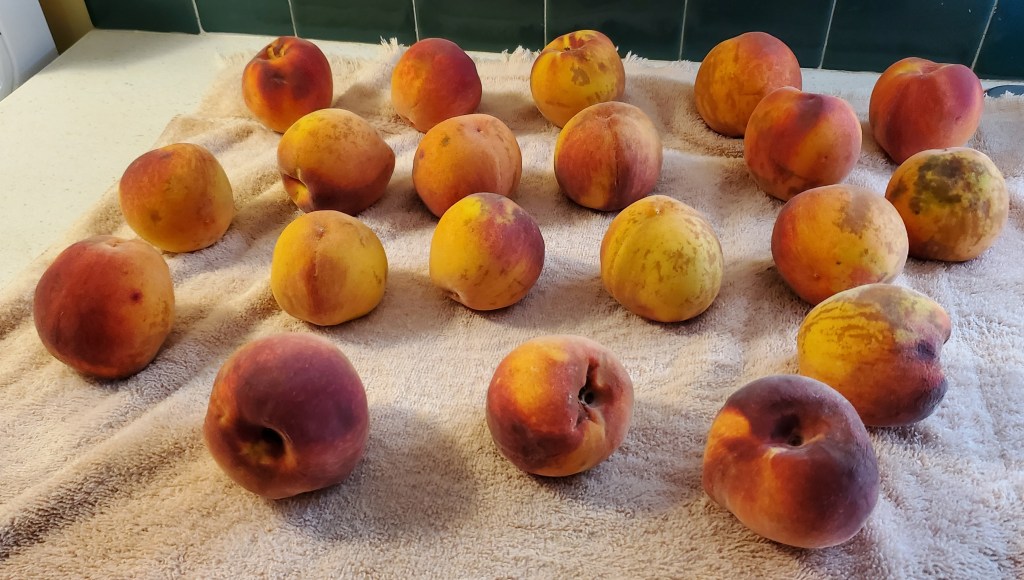
I didn’t need any peaches for canning this year as I still have some on the shelf from last year’s processing. I’ve been wanting to learn how to can pie filling though and there’s not much that’s better than peach pie. So, that was Saturday’s adventure.
First, I had to get these peeled, pitted, and cut up. My fingers had been swollen and painful for several days and I knew I would not be able to peel them using my usual method. This opened the way for two things.
First, I’ve been seeing a video on social media about using needle nose pliers to pull the pit from a peach and wanted to see for myself if it lived up to the hype. Second, now that the Sidewindr™ filtration system I had installed in May has improved water quality so much, I don’t have to wash things in bottled water, so I decided to use the dip method for peeling the peaches.
PITTING
The videos looked plausible, theoretically, so I bought a new pair of needle nose pliers and washed them. See Oscar demonstrating here:
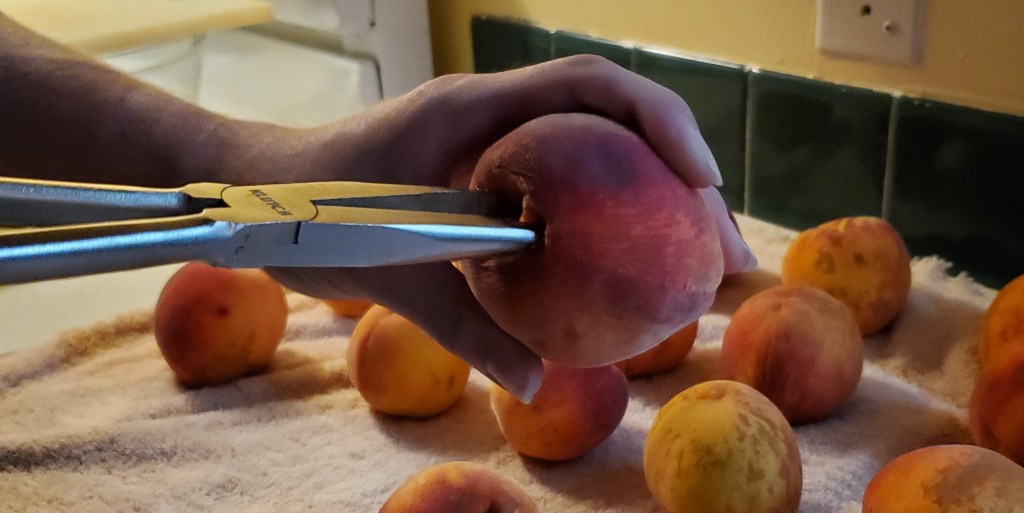


Oh, my goodness – IT WORKS! This is the slickest trick I’ve seen on the Internet since, well, since the last slick trick. These needle nose pliers will not be going into the toolbox, they are going with my canning supplies!
SKINNING
If you’ve known me for any length of time you will have heard me express my loathing about peeling peaches using the dip method. This is where you put the peaches in boiling water for a minute or two and then into cold water, after which the skin pretty much slips off. This is also used for peeling tomatoes for canning.
I despised doing it this way because 1) you use a lot of extra pans and burners on the stove when you are already short of space because of your canner, etc. and, 2) after peeling them this way, the peach is too slippery to remove the pit without absolutely squishing the darn thing.
Since removing the pit was no longer a problem and the water was no longer a problem and I now use an electric canner instead of a stove top canner I decided to try again.
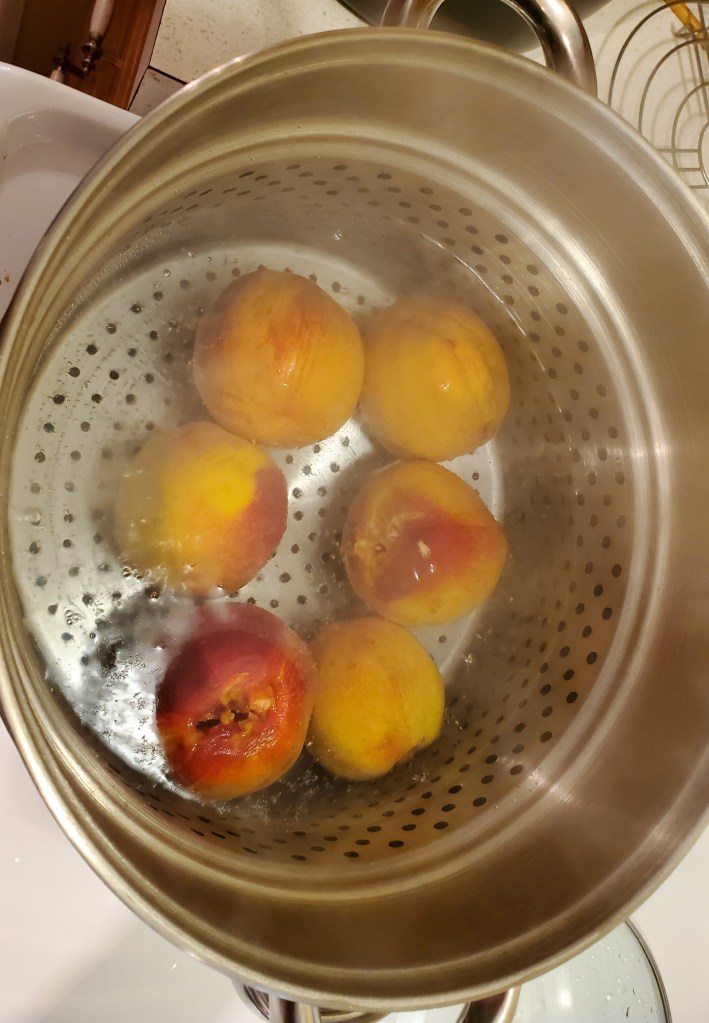
Using my pasta cooker to dip the peaches in hot water meant I could then just transfer the insert to the pan of cold water to cool them down. It made it a nice, straight-forward process.

The peaches were still pretty messy to work with but, since I didn’t have to deal with the pit after these slimy things came out of the cold-water bath, this was do-able.
PIE FILLING
I used the Peach Pie Filling recipe from my USDA The Complete Guide to Home Canning book (2020 printing). The recipe only gives you the measurements for 1 quart or 7 quarts. So, I had to math. Sigh. This often does not work well for me. Nevertheless, 1 quart is 2 pints, and my canner holds 4 wide-mouth pints, so I just had to double the recipe for one quart.
For four pints I needed
- 7 cups peaches
- 2 cups sugar
- 1/2 cup + 2 tablespoons Clear Jel
- 1-1/2 cups cold water
- 1/2 cup lemon juice
Well, the next bit required Oscar’s help stirring while I was preparing jars and lids and running back and forth reviewing and re-reviewing the recipe, so there are no pictures until, after 30 minutes in the water bath canner:

At this point I’ was feeling a bit frazzled, and more than a little tired, so I admit I wavered for a moment and thought, “Just put the rest of the peaches in the dehydrator. It’ll be quick and you’ll be done.” I held steady though and used the remainder of the peaches to make a double batch of Peach Jam.
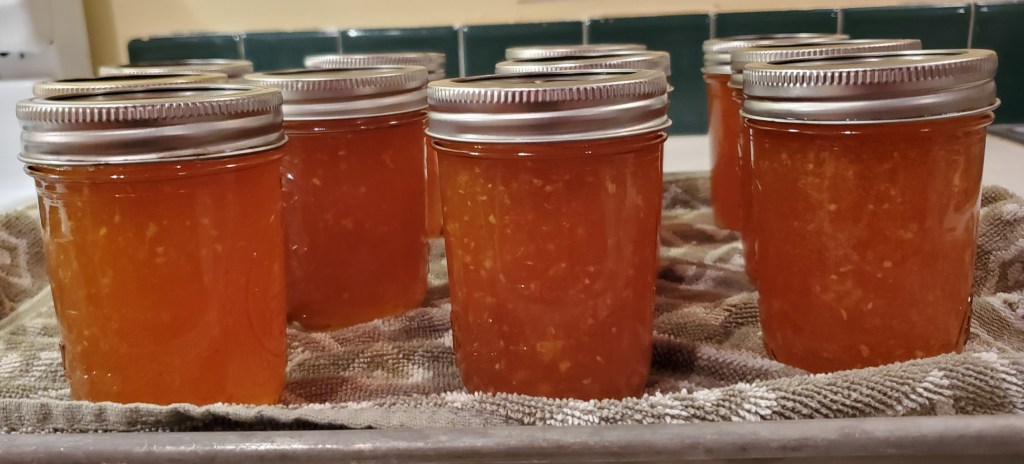
PEACH JAM
I am a whiz at making freezer jam, but I want this batch to be shelf-stable so cooked jam it is. I rarely make cooked jam. This is because 75% of the times I’ve tried it, I missed an instruction or added ingredients in the wrong order and ruined the batch.
This time, I managed to follow the directions in the Sure Jell box correctly. The jam got made but not without a bit of angst and, I’m sorry to say, some sweary words when I couldn’t find my immersion blender, then found it but it didn’t work as expected so I had to run the jam through my blender. Sigh. Eventually though:

A lot more 1/2-pint jars fit in the electric canner than you’d think. I had too many jars to process in one go so I had to do a second processing. There were not enough jars in the second batch though, so the canner was filled mostly with jars of water to keep the few jars of jam stable.
Then it was time to make dinner.
The ending was nice though – Oscar got to do the dishes!
PLUMMY GOODNESS
I went to the Farmer’s Market last weekend and picked up about six pounds of plums.
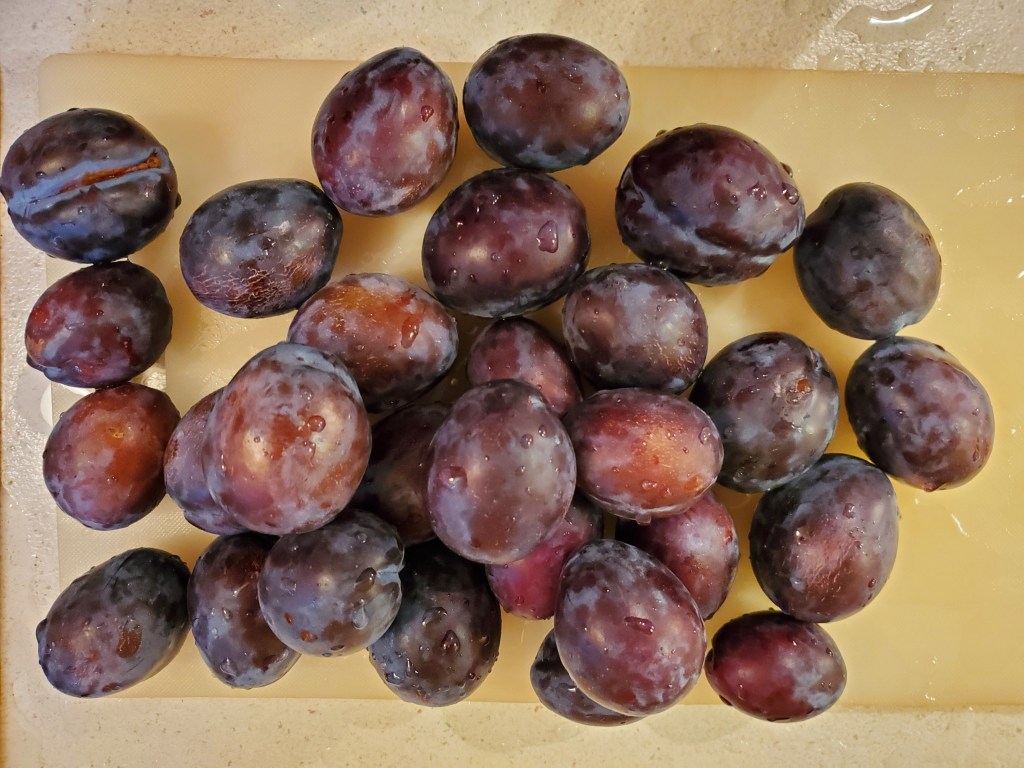
I washed them, cut them in 8ths and put them in the dehydrator.
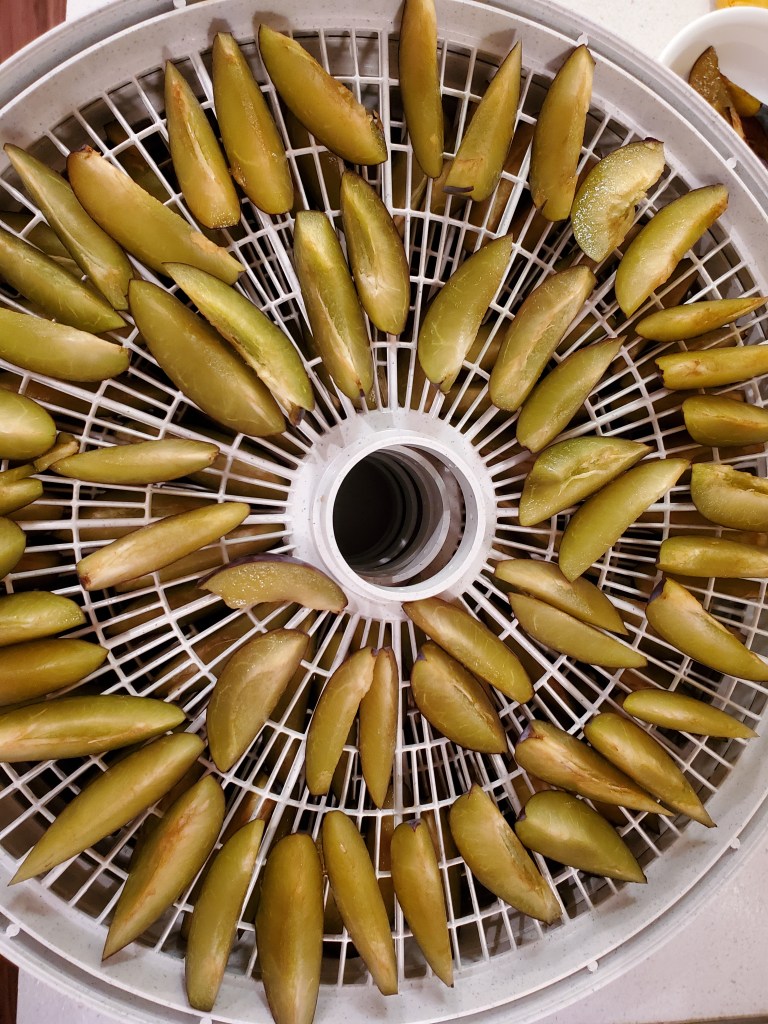
Twenty-four hours later I have nearly two quarts of dried plums ready to eat and enjoy!

Dried plums, can be used whole, in pieces, or pureed for baked goods, and cooked or soaked to make a sauce or marinade. They are a simple add-in that adds natural sweetness and nutrition to a recipe. Or, you can just eat some straight from the jar as a snack.
I used a new tool to vacuum seal these in the jars.
If you’ve known me long, you know I love my Food Saver! Well, I saw a portable, hand-held vacuum sealer for jars on a You Tube video and purchased one. It is a great tool. It’s small enough to fit in a drawer so I don’t have to haul out my big Food Saver and it’s jar attachments. Just pop this thing on top of a jar and lid, push the button, and your jars are vacuum sealed, extending the shelf life of your dehydrated and dry goods.
My Food Saver still has it’s place in my repertoire of freezer preservation techniques but this gadget has won my heart for use with stuff I vacuum pack in jars.
UNEXPECTED 8 BALL
I cleaned out the garden debris in containers that have finished their life cycle. These are the containers I will use to plant fall crops.
One of them contained the plant for a new to me variety of squash that I was disappointed had produced no fruit.
It did though! I was surprised to find one squash on the plant!

What a cute little squash this is. It’s called an 8 Ball Squash. It is about 3″ round and is a nice glossy green. They are supposed to taste similar to a zucchini.
What a nice surprise.

You must be logged in to post a comment.