NEW DIGS
I have enjoyed my time with the worms since I inherited my worm bin from the Sussman family when they left South Carolina. Worms are easy to care for and the worm castings are one of the best fertilizers around.
My bin is very basic – a large, plastic storage container with air holes – and it performs perfectly. Stir the bedding every time you put more food in the bin, dig a hole put in the food, cover the food with bedding, and put the top back on the bin. Can’t get much simpler than that.
Or can it?
Periodically I’ve seen variations that have intrigued me. No, I’m not interested in the pay-lots-of-money-unnecessarily systems you can find on-line nor the ones that utilize “worm tea.” I know, I’m leaving fertilizer on the table, so to speak, by not harvesting the “tea,” but I’m just not interested in that aspect of it – I’m interested solely in harvesting worm castings (poop). The problem is that, since I typically lean toward being lazy, I tend to not get around to harvesting as often as I could.
So, I decided to try a worm tower. A tower lets you lure your worms to a higher level in the tower, leaving the castings they’ve deposited in the bottom layer of the bin. This makes it much easier to harvest the castings.
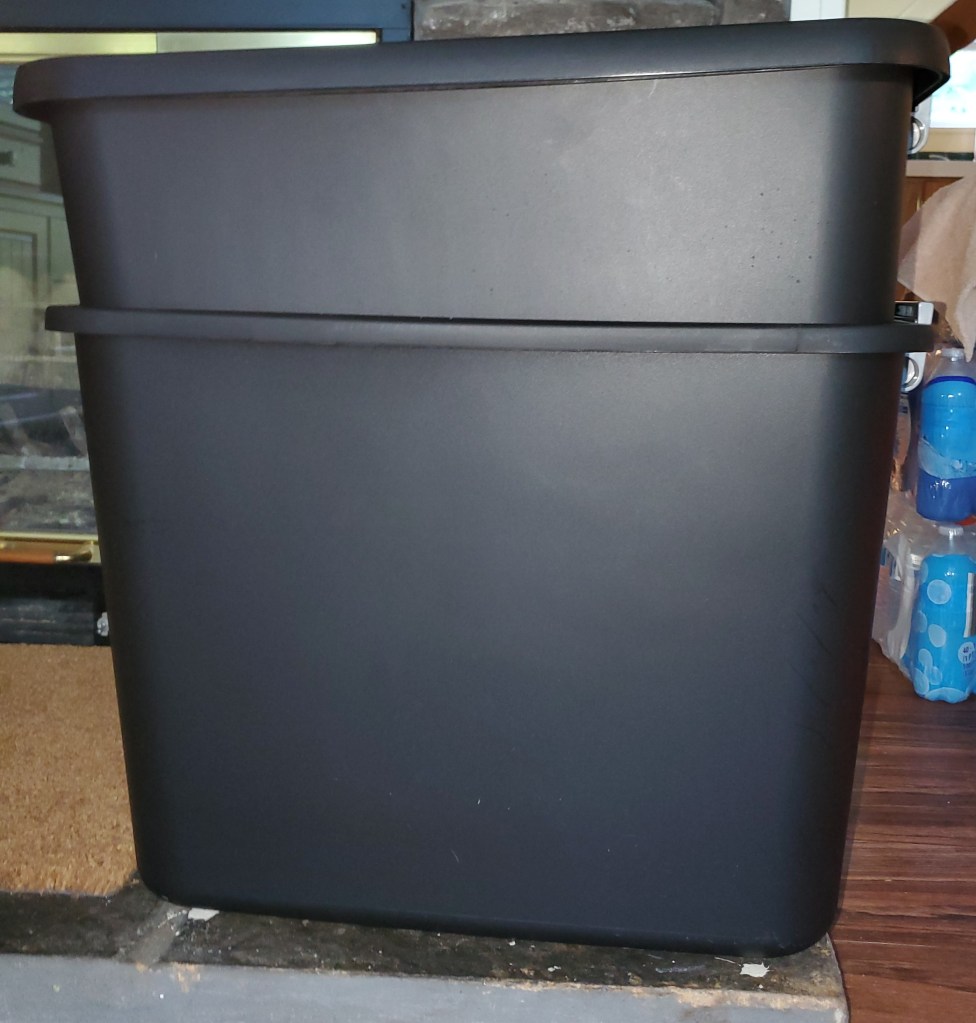
Most DIY worm towers I’ve seen use 5-gallon buckets which, I felt, were too small. I decided to make my worm tower with 20-gallon storage containers (similar to what I have but a bit smaller).
I acquired the storage containers when I was off work last week and have been preparing them by scrubbing them out and airing them for a few days (to reduce the plastic smell). I also prepared new bedding for them by loading up a five-gallon bucket with re-hydrated coconut coir, shredded paper, small pieces of sticks, etc.
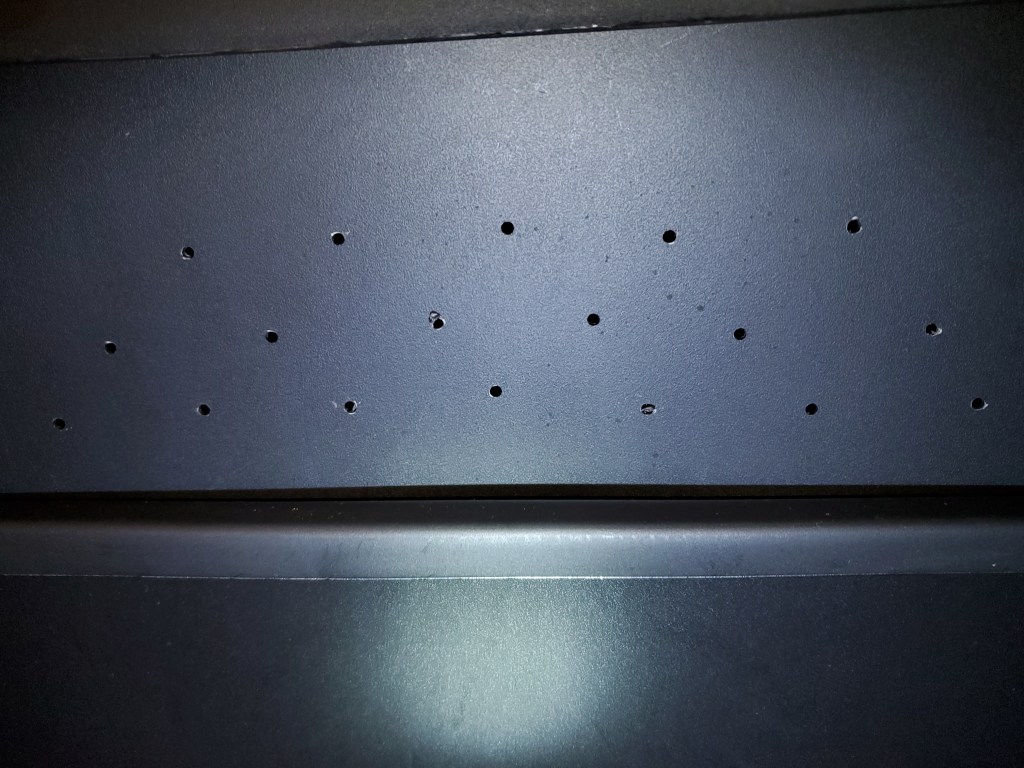
Next, I had Oscar (I have to keep him involved in learning and doing new things after all) drill holes in the bottom of the upper bin and smooth off the rough edges, so they don’t irritate the worms’ delicate skin as they move through the holes.
Finally, it was moving day!
I made sure to remove any leftover food from the bedding in the old bin. Let me tell you, there wasn’t much left – worms really like to eat! I also pulled out some of the old bedding with worm eggs to get a head start on the next generation and put that it in the bucket of new bedding.
Then I carefully dumped the contents of the old bin into the bottom container of the new bin. Generally, you should avoid just dumping worms and their bedding from one bin to another, but it was necessary, so we tried to be delicate with the process.
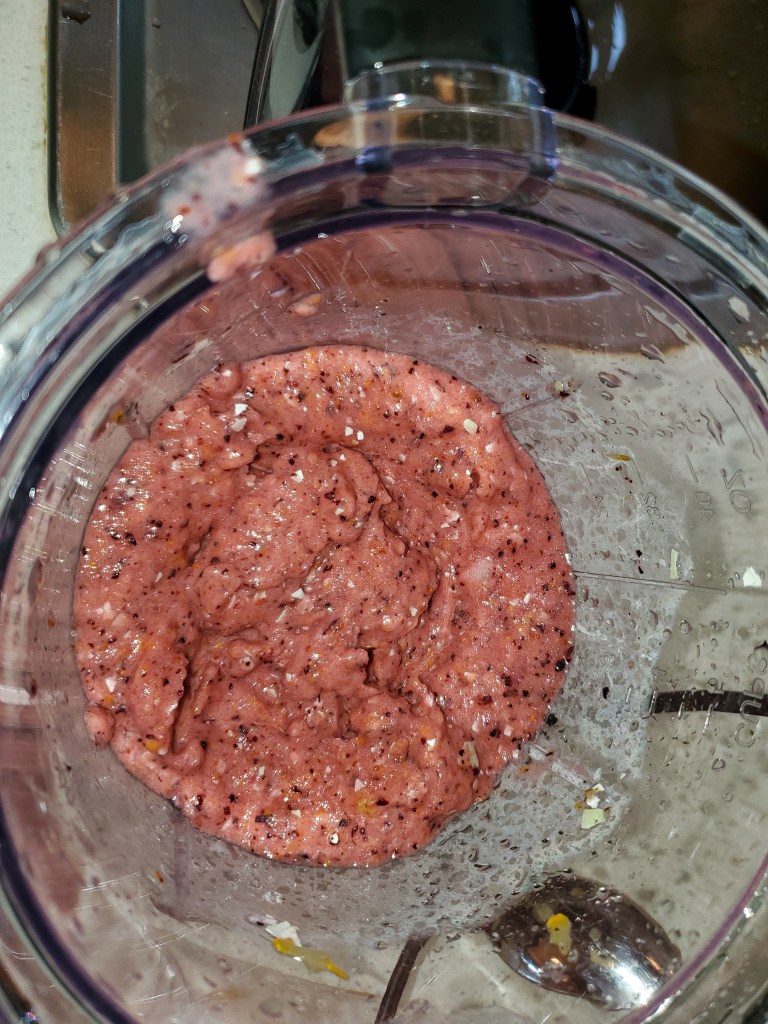
I ran some blueberries, peaches, eggshells and other goodies through the blender. I don’t usually pulverize their food – I just tear or chop it into small bits – but doing so makes the food in the top bin more tempting to the worms and is more readily digestible so it will encourage them to move. There I go, acting like I understand worm psychology.
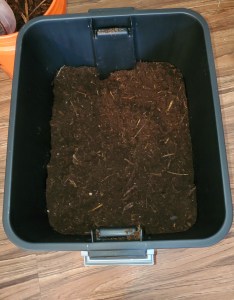
After placing the top bin (with the holes) inside of the bottom bin (with the worms) I filled it with the new bedding (I had already checked that the Ph and moisture levels were correct). I made a trough down the middle, poured the lovely mess of food in the trough, and covered the food with bedding material.

Ta-Da! The finished product, my new worm tower:
The articles I read indicated it would take about two weeks for the worms to move from the bottom bin to the top bin …
wait a minute…
While finishing up this post, I noticed: there is something wrong with this picture.
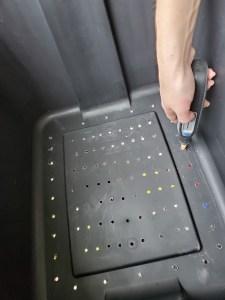
Can you see what the problem is with this new bin?
Look closer at the top bin – it’s missing something:

I forgot to drill the air holes in the side!!!
Poor wormies!
I ran (ok, so at my age “ran” is a relative term) to the bin and sure enough, the walls on the inside were dripping with condensation (it’s been a few days). There were even a couple of worms trying to escape. (Worms will leave an environment that is not welcoming.)
I checked the moisture level of the bedding with my meter, and it wasn’t too terribly bad. I mixed in a couple handfuls of dry paper shreds and gave it a good stir.
That’s when I noticed there are already a lot of worms in the top bin! Most of the food is gone, too.
Don’t you just love when something works like it’s supposed to?
I drilled the air holes (being careful to not get any of the plastic shavings inside the bin).
I will leave the lid off with a light on over the bin tonight (the worms don’t like light so will stay in their bedding) to help dry it out a bit. Then, tomorrow, I’ll give them some more food and put the lid on.
After all the worms have migrated to the top bin, I will use the castings and bedding in the bottom bin as side dressing for plants in my garden.
I will leave the worms in the new layer for about three months. This will give the eggs I transferred time to hatch, the adults that are currently reproducing to lay more eggs, and those eggs to hatch into juvenile worms.
Then, I will create a new top bin with fresh bedding, lure them up a level, and harvest the remains from this bin. This will give me two top bins (with holes for the worms to travel up) and one bottom bin (no holes). I will repeat the process by alternating between the two “top” bins, leaving the bottom bin (with no holes) empty. This tower will take up less floor space while make harvesting much easier.
Did you know, the average life span of a red wiggler worm can be as long as 4 or 5 years? That’s assuming you do your part to take care of them, of course.

I can’t seem to get it right to “comment” directly on blog…so I’ll do it here….
I am so impressed w/your knowledge of gardening in so many aspects…if I had a little plot I’d be using your expertise! Love your blog! Love you!
Sent from my iPhone
LikeLike
Aww, thank you Sue. I appreciate you encouraging me!
LikeLike